UK Tarp Shelters: 3 Setups That Survive British Rain
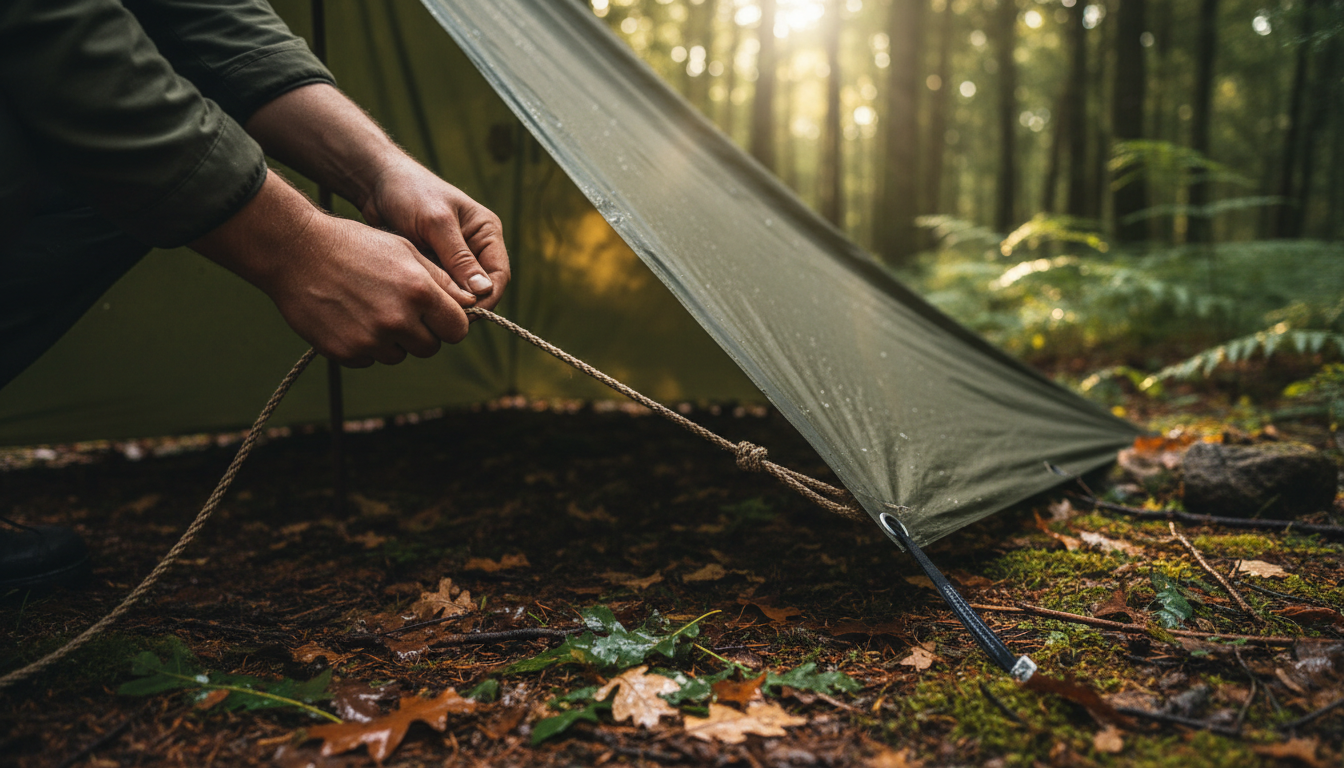
Getting a tarp up quickly matters most when the weather turns and the ground is already wet. For UK beginners, the goal is not a clever pitch with ten moving parts. It is a simple shelter you can put up fast, tension properly, and trust in wind and rain. This guide covers two straightforward setups, the kit that actually matters, and the common mistakes that make a shelter flap, sag, or leak.
This guide is a key part of our essential UK bushcraft kit list, and it is built around the kind of damp, breezy conditions that catch people out in British woods and hills.
Why a Tarp is Your Best Friend for UK Bushcraft
A good quality tarp is one of the most versatile and valuable pieces of kit you can carry for UK bushcraft, offering a flexible shelter solution that often outperforms a traditional tent for beginners. For us in the UK, where the weather can change on a sixpence, a tarp’s adaptability is its superpower. Think about it: a tent is a fixed shape, but a tarp can be a lean-to, an A-frame, a plough point, or even just a quick overhead cover. This means you can tailor your shelter precisely to the wind, rain, and terrain you find yourself in.
Honestly, when you first get into bushcraft, it is easy to think a tent is the only way to go. But a tarp is usually far more affordable and significantly lighter to pack than a decent tent, making it perfect for those on a budget or looking to keep their pack weight down for a day out or a short wild camp. Plus, using a tarp often feels more connected to the environment, leaving a much lighter footprint than a tent. The Leave No Trace Centre for Outdoor Ethics provides brilliant guidance on minimising your impact, which is something we are really keen on.
Learning to pitch a tarp effectively is a core bushcraft skill that builds confidence and connection with the environment. It teaches you to read the landscape, understand wind direction, and use natural features – skills that are useful no matter what kind of outdoor trip you’re on. Plus, there’s something satisfying about transforming a flat sheet of fabric into a secure, protective space with just a few ropes and stakes. Being able to throw up a simple tarp setup quickly can save you from a good soaking when an unexpected downpour hits on a day hike. It makes a noticeable difference to comfort when the British weather turns. If you’re looking to build up your essential bushcraft kit, a tarp should be high on your list. If you’re curious about other aspects of getting started, pop over to the Bushcraft Base blog for more tips.
Comparing Beginner Tarp Setups
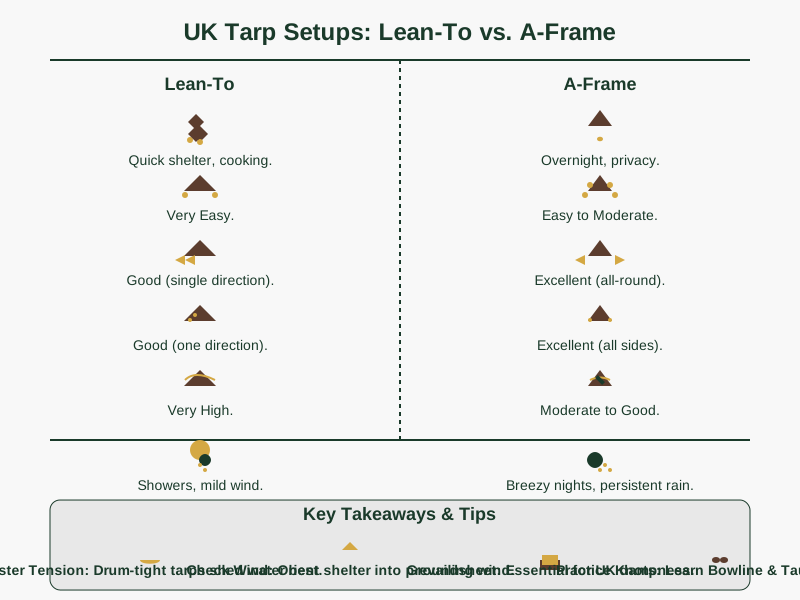
| Feature | Lean-To Tarp Shelter | Classic A-Frame Tarp Shelter |
|---|---|---|
| Primary Use | Quick rain/wind protection, cooking shelter, day use | Overnight protection, better privacy, more enclosed |
| Ease of Setup | Very easy, often just 2-3 anchor points | Easy to moderate, requires more guylines and precision |
| Wind Resistance | Good for single-direction wind, can be exposed at front | Excellent all-round wind resistance when pitched low and tight |
| Rain Protection | Good from one direction, open front can be vulnerable | Excellent, sheds rain beautifully from all sides |
| Ventilation | Very high (open front) | Moderate to good (can be adjusted by raising sides) |
| Space | Open, but sleeping area is exposed | More enclosed, tent-like internal space for sleeping |
| Ideal UK Weather | Sudden showers, mild wind, sunny days | Breezy nights, persistent rain, overnight wild camps |
Essential Gear for Your UK Tarp Setup (Beyond the Tarp!)
Beyond the tarp itself, a few crucial pieces of gear are absolutely essential for a successful and secure UK tarp setup, and getting these right can make all the difference in our often-damp conditions. You might think it’s just about the tarp, but honestly, the accessories are what turn a flapping sheet into a proper shelter.
First off, the tarp itself. For UK beginners, We generally recommend a 3m x 3m (roughly 10ft x 10ft) tarp. It’s a brilliant all-rounder, offering enough space for one or two people and plenty of versatility for different pitches. When you’re choosing one, prioritise waterproofness – look for a hydrostatic head (HH) rating of at least 3000mm. This number, often found in a tarp’s specifications, tells you how much water pressure the fabric can withstand before it starts to leak. The UK Met Office warns that heavy rain in the UK can quickly overwhelm lower-rated kit, so anything less and you might find yourself getting a bit damp in a proper British downpour. Reinforced attachment points (grommets or webbing loops) are also key, as these are where all the tension will be. Give the tarp a quick once-over before each trip as well, because a tiny pinhole or a worn grommet is far easier to patch at home than in the rain. You can pick up decent ones from UK retailers like Go Outdoors, Alpinetrek UK, or even some local army surplus stores without breaking the bank.
Next, cordage is king. You’ll need plenty of strong, non-stretching cord for your ridgeline and guylines. Paracord (550lb breaking strain) is a popular choice, and for good reason – it’s strong, light, and durable. However, don’t feel you have to splash out on fancy paracord straight away. A good quality, strong nylon cord will do the job just fine for starting out. We’d suggest having at least 20-30 metres of cordage in your pack – a 10-metre ridgeline and several 2-3 metre lengths for guylines. Many beginners make the mistake of using some cheap, stretchy clothesline for their guylines on a particularly damp weekend. The constant moisture causes the cord to stretch and sag, meaning the tarp keeps losing tension and pooling water. Not ideal, and a definite learned-it-the-hard-way moment! Knowing how to choose the right cordage for bushcraft is a skill in itself.
Pegs or stakes are your anchor points to the ground. While you can improvise with sticks or rocks, a set of sturdy metal pegs (the ones that come with tents are usually fine, or you can buy stronger ones) will make your life much easier, especially in varied UK soil types. Aim for around 6-8 pegs for most basic setups. If you’re trying to keep things super light or minimalist, learning to make wooden stakes from fallen branches is a great DIY bushcraft gear project and a brilliant skill to have, but it takes practice.
Finally, poles or trekking poles are optional but incredibly useful. If you’re pitching in an open area with no suitable trees, a couple of trekking poles can become your main support for an A-frame or a simple lean-to. They add versatility and ensure you’re not reliant on finding the perfect trees. So, before you head out, make sure you’ve got these bits sorted – they’re the unsung heroes of a comfortable tarp shelter. And if you’re wondering who we are and why we are so passionate about this, you can always read more about us.
The Super Simple Lean-To: Your First UK Tarp Build
The Lean-To is arguably the quickest and easiest tarp shelter to erect, making it the perfect first build for any UK bushcraft beginner. This setup is brilliant when you need immediate protection from rain or wind coming from one primary direction, or if you just want a simple windbreak to cook behind. It’s not designed for an all-out gale, but for a sudden shower or a breezy afternoon, it’s spot on.
Here’s how to get your first Lean-To sorted:
- Find your supports: You’ll ideally want two sturdy trees roughly 3-4 metres apart. If you can’t find trees, two trekking poles (or strong, straight sticks you’ve found) will work just as well, but you’ll need to secure their bases into the ground. When choosing your spot, always look above you for ‘widowmakers’ – dead branches that could fall. We want to be safe, not sorry!
- Tie your ridgeline: Take a length of cordage (about 5-6 metres should do it) and tie one end to a tree at chest height using a Bowline knot. This knot creates a secure loop that won’t slip. Run the cord across to your second tree and tension it tightly, tying it off with another Bowline. This is your ridgeline – the backbone of your shelter. Make sure it’s taut; a saggy ridgeline means a saggy shelter!
- Drape the tarp: Now, simply drape your tarp over the ridgeline. Position it so the ridgeline runs along the long edge of the tarp, or slightly off-centre depending on how much overhead cover you want. One side of the tarp will hang down towards the ground, creating your back wall, and the other will form your roof.
- Stake out the corners: Take the two corners of the tarp that are closest to the ground (these are your ‘back’ corners). Use your guylines and pegs to stake them firmly into the ground. Angle your pegs away from the tarp for maximum holding power.
- Tension the front: Finally, take the two front corners of your tarp (the ones forming the ‘roof’). Attach a short length of cordage to each, and then stake these out to the ground, pulling the tarp taut. This is where the Taut-line hitch comes into its own – it allows you to adjust the tension easily, so you can get that roof nice and drum-tight to shed water effectively.
When it’s done, you’ll have a simple, open-fronted shelter that looks a bit like a half-tent or an angled roof. The lower, back edge will provide protection from the elements, while the open front allows you to observe your surroundings, enjoy a fire (safely, of course!), or simply take in the view. A sudden, torrential downpour can hit while you are on a woodland walk in the New Forest. Within minutes, a lean-to can be up, and you can be sitting smugly dry under your tarp while everyone else is running for cover. That is when you really appreciate simple, effective tarp shelters. Learning essential bushcraft knots for beginners, like the Bowline and Taut-line hitch, will make this process incredibly smooth. Ray Mears’ website has some fantastic visual guides if you need a bit of a refresher.
The Classic A-Frame: A Step Up for Better Protection
The Classic A-Frame offers a significantly more enclosed and stable shelter than the Lean-To, making it a brilliant step up for beginners looking for better all-round protection in the often-unpredictable UK weather. This setup provides more privacy and a greater sense of security, much like a traditional tent, but with all the versatility of a tarp. It is our go-to for overnight stays when you want to feel properly snug.
Here’s how to build your trusty A-Frame:
- Establish your ridgeline: Just like the Lean-To, you’ll start by setting up a ridgeline. This can be a length of cordage strung tightly between two trees, or you can use a single sturdy pole (or two trekking poles joined) as a central support. If using trees, aim for a height that gives you enough headroom – around waist to chest height is usually good. Again, a secure Bowline at each end will keep your ridgeline solid.
- Drape and centre the tarp: Drape your tarp over the ridgeline, ensuring it’s centred. You want roughly equal amounts of tarp hanging down on both sides, like a pitched roof. This creates the ‘A’ shape.
- Stake out the corners: Now, take the four corners of your tarp. Attach a short guyline to each corner loop. Pull the corners outwards and stake them firmly into the ground. These four corner stakes will define the footprint of your shelter. For the best stability and water shedding, try to make sure the angles are fairly symmetrical.
- Tension the sides: Once the corners are staked, you’ll have a basic A-shape. To really batten down the hatches and prevent flapping, you’ll want to stake out the long edges of the tarp. There are a couple of ways to do this:
- Low pitch: For maximum wind and rain protection, pull the long edges down close to the ground and stake them out, creating a low, tight shelter. This is brilliant for those breezy, rainy nights.
- High pitch: For more headroom and ventilation, you can stake out the sides further away from the tarp, creating a wider base. This is good for milder weather or if you need more space inside.
- Use your Taut-line hitches on your guylines to get everything drum-tight. Proper tension is key to shedding water and preventing wind from getting under your tarp.
When pitched correctly, the A-Frame sheds rain beautifully and offers excellent wind resistance, especially if you orient the lowest, tightest side into the prevailing wind. A simple groundsheet inside makes a real difference too and helps stop ground moisture creeping up. Many beginners remember one particularly breezy night spent on the North Downs. They had pitched their A-frame low and tight, facing the wind, and despite the bluster, they felt secure and slept soundly. It just goes to show how effective a simple tarp can be when you know how to pitch it. Remember, when you’re out wild camping, always be mindful of UK wild camping etiquette and leave no trace. If you’re struggling to get the hang of it, or have specific questions about your setup, don’t hesitate to get in touch – We’re always happy to help.
Common UK Tarp Setup Mistakes (And How to Avoid Them)
We’ve all been there, haven’t we? Standing in a drizzly woodland, looking at a half-finished tarp shelter, wondering why it’s not quite working. Most newcomers have made every mistake in the book – and probably invented a few new ones – while learning to pitch tarps in the notoriously fickle British weather. Recognising these common pitfalls is half the battle, so let’s get them sorted.
Pitching directly on damp ground: This is a classic, and one many beginners fall victim to early on. If your tarp’s edges are touching damp ground, capillary action will draw moisture right up and into your sleeping area. You’ll wake up feeling clammy and miserable.
- Solution: Always try to pitch on slightly raised ground if possible. More importantly, ensure your tarp edges are either staked out slightly above the ground or are angled sharply enough that water runs off without touching your sleeping space. A simple groundsheet (even a cheap plastic sheet) underneath your sleeping bag really helps keep you dry from below. Of course, wearing the right bushcraft clothing and understanding layering is your next line of defence against the damp.
Not tensioning properly: A saggy tarp is a useless tarp. It’ll collect water, flap noisily in the wind, and eventually, it might just collapse. This is a common issue with beginners who haven’t quite mastered their knots.
- Solution: Learn and use tensioning knots like the Taut-line hitch. Every single guyline should be pulled taut, almost like a drum skin. Check your tension periodically, especially as temperatures change or if it rains (cordage can stretch when wet). A good, tight pitch is your best defence against the elements, and it’s surprisingly satisfying to achieve!
Ignoring wind direction: The UK often brings us strong, gusty winds, and pitching your shelter incorrectly can lead to a very uncomfortable night. If your open lean-to is facing the wind, you’re in for a chilly, exposed time.
- Solution: Before you even unroll your tarp, take a moment to observe the wind direction. You can do this by watching leaves, grass, or simply feeling it on your face. The Mountain Weather Information Service (MWIS) is a brilliant resource for understanding mountain weather, which often gives clues about general wind patterns. Always try to pitch the lowest, most secure, or most enclosed part of your shelter into the prevailing wind. This deflects the wind over your shelter, rather than allowing it to batter or penetrate it.
Using weak or stretchy cordage: Remember the Lake District tale? Cheap cordage that stretches when wet or simply isn’t strong enough will lead to a constantly sagging shelter.
- Solution: Invest in decent cordage like 550 paracord or a strong, non-stretch nylon line. It’s worth the extra few quid for peace of mind. Check your cordage for wear and tear before each trip. A frayed line is a disaster waiting to happen.
Over-reliance on trees: What if you find the perfect spot, but there are no suitable trees for your ridgeline? If your only plan involves two perfectly spaced oak trees, you’re going to be stuck.
- Solution: Always carry a couple of trekking poles, or be prepared to improvise with sturdy fallen branches. Knowing how to use these as central supports or prop poles gives you far more flexibility in your pitch locations. It opens up so many more possibilities for where you can set up camp!
Incorrect stake angle: If your pegs are hammered straight down or angled towards your tarp, they’re much more likely to pull out, especially in soft ground or strong winds.
- Solution: Always angle your pegs away from the tarp, so they are resisting the pull of the guyline. Imagine a ‘V’ shape with the peg forming one side and the guyline the other. Hammer them in firmly, leaving just enough exposed to tie off your lines. This creates maximum purchase in the ground and will keep your shelter secure, even when the wind really picks up.
Many beginners once spend an hour trying to pitch a tarp in the Peak District, only for the wind to rip it down because they hadn’t secured the guylines properly and their pegs were poorly angled. Lesson learned – and it is a cold, damp lesson at that! Paying attention to these simple details will save you a lot of grief and ensure your bushcraft safety tips for beginners are truly put into practice. For more general advice on staying safe and comfortable, check out other articles on the Bushcraft Base blog.
Related Reading
Essential UK Bushcraft Fire Lighting Kit for Beginners A good shelter is vital, but so is a warm fire. Learn what you need to build a reliable fire lighting kit for UK conditions.
Bushcraft Clothing UK: Layering Systems for All Seasons & Weather Staying dry under your tarp is one thing, but wearing the right clothing is the other half of the battle against the British weather.
Sources & Further Reading
- Leave No Trace Centre for Outdoor Ethics: Guidance on minimising environmental impact.
- UK Met Office: Information on heavy rain warnings and weather patterns.
- Mountain Weather Information Service (MWIS): Forecasts and insights into wind patterns in UK mountains.
- Ray Mears’ Website: Visual guides and tutorials for essential bushcraft knots.
- Bushcraft Base Blog: Additional articles and tips for beginners.
Note: This article covers general principles and tips, so always adapt advice to your own experience and conditions. For advice specific to your situation, get in touch.
Frequently Asked Questions
What’s the best size tarp for UK beginners?
For most beginners, we would start with a 3m x 3m tarp. It gives you enough coverage for simple lean-tos and A-frames without turning into a bulky mess to manage. Smaller can feel cramped fast, and bigger is often just more fabric to control when you’re still learning.
Do I really need special pegs for my tarp setup in the UK?
You can improvise, but proper pegs are worth carrying. UK ground changes constantly from soft woodland soil to hard, stony pitches, and weak pegs are often the first thing to fail when the tarp is under tension. We would rather carry a few solid metal pegs than spend half an hour fighting loose corners.
Which knots are most important for setting up a tarp?
You do not need a big knot list. Learn the Taut-line hitch for tension, the Bowline for fixed loops, and a Clove Hitch for quick attachments to poles or trees. If those three are reliable, you can build most beginner tarp setups without fuss.
How can I avoid getting damp inside my tarp shelter, especially in the UK?
Ventilation and ground protection matter just as much as the tarp itself. If you pitch too low with no airflow, condensation builds up fast; if you skip a groundsheet, the damp comes up from below instead. We usually leave enough gap for airflow and always put something between ourselves and the ground.
Can you use a standard camping tarp, or do you need a specific ‘bushcraft’ tarp?
No, a standard waterproof camping tarp is fine. We would focus on decent attachment points, enough size to pitch comfortably, and a fabric rating that can handle wet UK conditions rather than paying extra for “bushcraft” branding. A simple, durable tarp is usually the better buy when you’re starting out.
Taking the Next Step
The main thing is to practise these pitches before you need them. A lean-to or A-frame that feels awkward on the first attempt becomes much quicker once you’ve run through it a few times in the garden or on a legal campsite.
Getting your first shelter up feels good, but having the right kit ready before you leave the house makes the whole trip easier. If you’re keen to get started but want a bit more personalised guidance, or perhaps need help choosing the right gear for your first trip, don’t hesitate to get in touch.
Download the Free Bushcraft Starter Checklist If you’re feeling inspired to get out there but aren’t sure where to start with your kit list, We have put together a Free Bushcraft Starter Checklist that covers the absolute essentials for your first few trips. It’ll make sure you’re prepared for anything our glorious UK countryside throws at you!