DIY Bushcraft Kit: Make Your Own UK Gear
As an Amazon Associate we earn from qualifying purchases. This page contains affiliate links — if you buy through them, we earn a small commission at no extra cost to you.
Making your own bushcraft kit is one of the simplest ways to keep costs down while learning how your gear actually works. This is a core part of building your essential UK bushcraft kit without spending a fortune. If you can make a pouch, twist cordage, or carve a basic utensil, you are already building useful field skills alongside the gear itself.
Why Craft Your Own Bushcraft Gear? The UK Beginner’s Advantage
Making your own bushcraft gear isn’t just a quirky hobby; it’s a fundamental aspect of bushcraft itself, offering a wealth of advantages, especially for us here in the UK. DIY bushcraft projects not only save money but deepen your understanding of the natural world and the tools you rely on. When you’re standing on a soggy Welsh hillside, knowing how your handmade tinder box was constructed and how to fix it if it gets bashed about is a huge confidence booster.
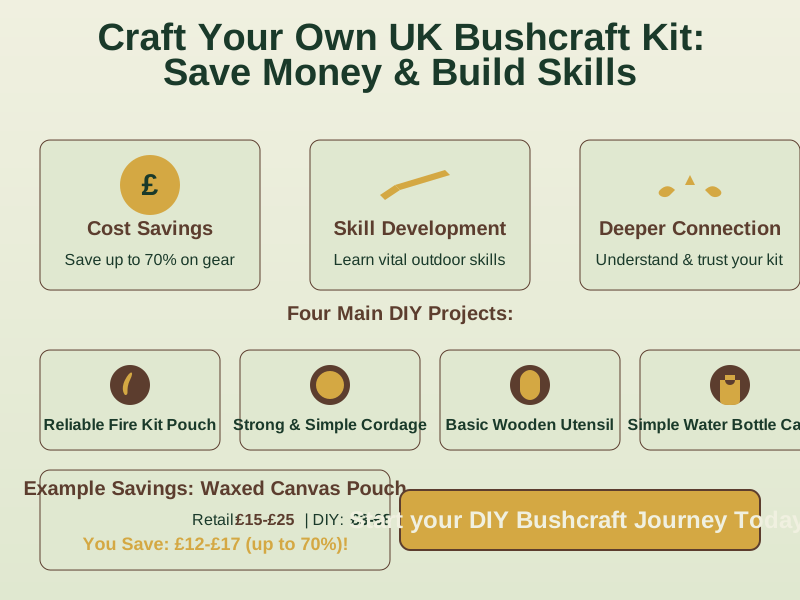
First off, let’s talk about the obvious one: cost savings. Bushcraft gear, especially the good quality stuff, can be pricey. A decent Light My Fire Firesteel (paid link), a reliable tinder pouch, a sturdy water bottle carrier – it all adds up. By crafting your own, you’re often using readily available, cheaper materials, or even upcycling things you already have. Look, let’s take a simple tinder box as an example:
| Item | Retail Price (Approx.) | DIY Cost (Approx.) | Savings |
|---|---|---|---|
| Waxed Canvas Pouch | £15-£25 | £3-£8 | £12-£17 |
Prices are illustrative and can vary based on quality and where you buy materials or ready-made items.
You see? Those savings quickly add up, leaving more money for other essentials like a good knife or some decent waterproofs. Speaking of materials, the UK countryside and our local shops offer a fantastic array of resources. From fallen hazel branches perfect for carving to offcuts of waxed canvas from a local fabric shop, you’ll find plenty to work with. We have found some brilliant bits of leather at reclamation yards that were destined for the bin, perfect for a knife sheath or a fire steel striker. Charity shops can also be useful for old belts, canvas bags, and other sturdy materials that can be cut down for smaller projects.
Then there’s the skill development. Every single project you undertake, no matter how simple, teaches you something. You’ll learn about material properties, how to use tools safely and effectively, basic sewing, carving techniques, and problem-solving. Making a first tinder box, for instance, teaches you so much more about different wood types and their moisture resistance than just buying one ever could. You really get to grips with the why behind the design.
This leads directly to understanding your kit. When you’ve built something, you know every stitch, every joint, every material choice. This means you know its strengths and weaknesses, how to maintain it, and, crucially, how to repair it if it gets damaged out in the field. That’s true resourcefulness, isn’t it? It builds a deeper connection to your gear and, by extension, to the natural world around you. You’re not just a consumer; you’re a creator. Plus, there’s an immense satisfaction in using something you’ve made yourself. Honestly, that feeling of pride when you start a fire with a kit you crafted is just unbeatable. It’s a proper British bushcraft advantage, that. If you’re keen to learn more about our approach and what drives Bushcraft Base, you can always check out our story on the /about/ page.
Essential Tools for Your DIY Bushcraft Workshop
You might be thinking you need a fully kitted-out workshop with all sorts of fancy gadgets to start making your own bushcraft gear, but that’s simply not the case. You don’t need a workshop full of fancy tools to start making quality bushcraft gear; a few key items are all it takes. Our first “workshop” was literally just a sturdy old tree stump in the garden, and we still use it sometimes! The trick is to start with the essentials, focus on quality over quantity, and always prioritise safety.
Here are the must-haves we’d recommend for any UK beginner looking to get stuck into DIY bushcraft projects:
- A Good Bushcraft Knife: This is your most versatile tool. Look for a fixed-blade knife with a sturdy, full-tang construction and a comfortable handle. For beginners, a Scandi grind is often recommended as it’s excellent for carving and easy to sharpen in the field. Brands like Mora (paid link) (Swedish, but widely available and respected in the UK) offer fantastic value and performance. You’ll want to ensure it’s always razor-sharp – a blunt knife is a dangerous knife, trust me. We’ve got a whole guide on tool recommendations if you’re looking for the best budget bushcraft knives in the UK.
- Small Saw: A folding saw or a bow saw is incredibly useful for cutting larger pieces of wood for carving or shelter building. They’re much more efficient and safer for cross-cutting than trying to hack at things with a knife. Silky saws (paid link) are popular choices, but there are plenty of good, affordable options available from UK camping and outdoor retailers like Go Outdoors or Blacks. The Bushcraft UK forum often has great discussions and recommendations on reliable, affordable saws for beginners.
- Axe/Hatchet (Optional, but Useful): While not strictly essential for every project, a small hatchet can be invaluable for splitting wood, roughing out larger carving blanks, and even some basic felling (with permission, of course!). Again, safety is crucial. Learn proper striking techniques and always use a chopping block. The Woodland Trust, a brilliant UK conservation charity, offers excellent resources on safe woodland practices.
- Basic Carving Tools: A small whittling knife or even a dedicated hook knife (for hollowing out spoons) can really elevate your carving projects. You can often find sets of these relatively cheaply online or in craft shops.
- Sandpaper: A selection of different grits (coarse to fine) will help you smooth out your finished projects, making them more comfortable to use and giving them a professional look.
- Sturdy Needle and Thread: For any fabric or leather projects, a good strong hand-sewing needle and robust thread (waxed linen thread is brilliant) are essential. You can pick these up at any haberdashery or online.
Remember, the key is to keep it minimal and focus on learning to use these tools safely and effectively. Always cut away from your body, wear gloves when appropriate, and keep a first aid kit handy. Honestly, a bit of practice and patience will get you further than a shed full of expensive kit. A first “proper” carving knife can be a cheap one from a market, and you can learn loads from it before investing in something a bit fancier.
Project 1: The Reliable Fire Kit Pouch
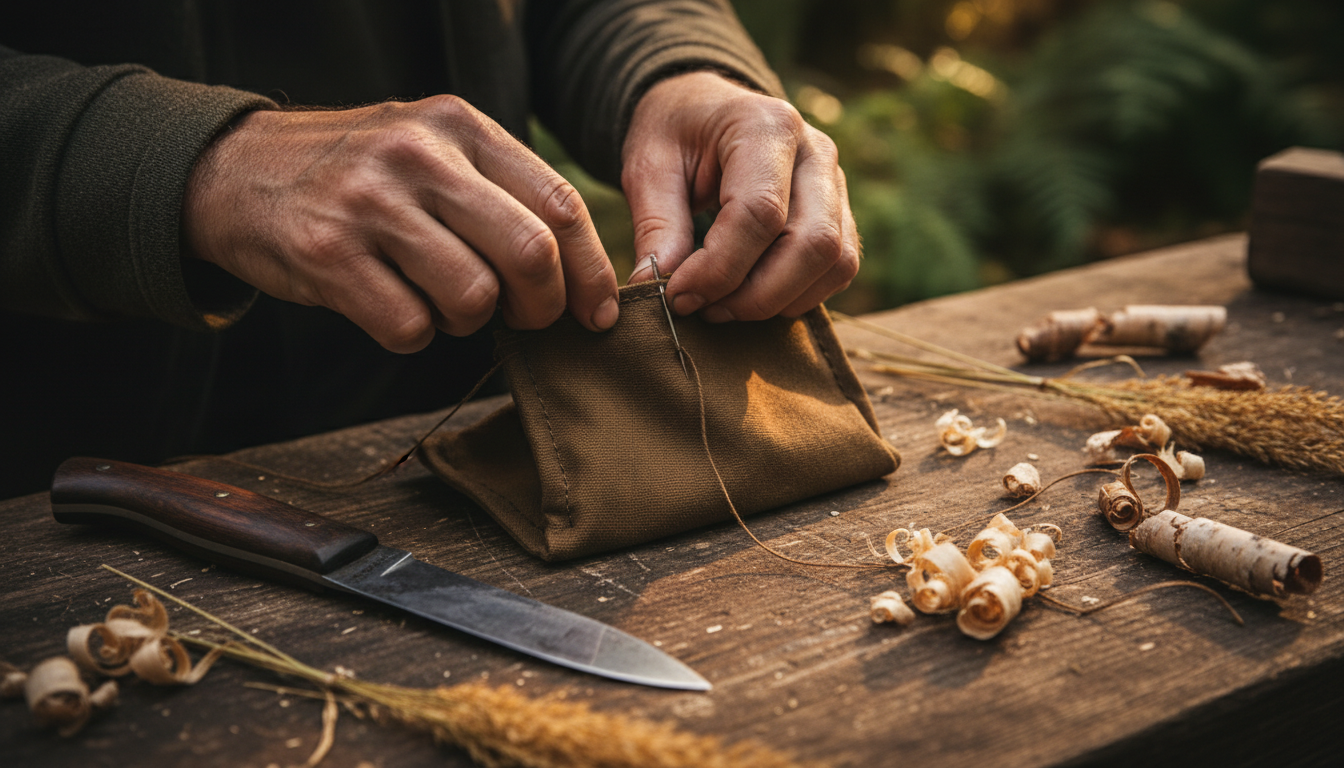
Having a reliable fire kit is absolutely non-negotiable for bushcraft in the UK. Those damp, drizzly days mean your tinder and ignition sources need proper protection. A well-made fire kit pouch protects your ignition sources and keeps them organised, essential for reliable fire-starting in damp UK conditions. This project is a fantastic starting point because it’s practical, teaches you basic sewing, and gives you something genuinely useful.
Materials You’ll Need:
- Waxed Canvas: This is your best friend for waterproofing. Look for a sturdy weight (around 10-12oz). You can often find offcuts or rolls at UK fabric shops, online retailers, or even repurpose an old waxed canvas bag.
- Strong Thread: Waxed linen thread or heavy-duty polyester thread is ideal.
- Hand-sewing Needle: A sturdy one that can handle thick fabric.
- Optional: A small leather strip for a toggle loop, a wooden toggle, or a snap fastener for closure.
Tools:
- Scissors
- Ruler or measuring tape
- Marker pen or chalk
- Pins or fabric clips
Steps to Craft Your Fire Kit Pouch:
Measure and Cut Your Fabric:
- First, decide what you want to put in your pouch (ferro rod, cotton wool, char cloth, matches, small knife).
- Lay out your items and measure the length and width needed, allowing for seam allowances and a generous flap.
- As a general guide, for a ferro rod, some cotton wool, and a small knife, you might cut a rectangle of waxed canvas roughly 25cm long by 18cm wide. This allows for folding.
- Cut your fabric neatly.
Fold and Stitch the Sides:
- Lay your fabric flat, waxed side up.
- Fold the bottom edge up by about 10cm (or whatever height you need for your tallest item), creating the main pocket.
- Pin the sides of this fold down securely.
- Using your needle and thread, stitch a strong seam down each side. A simple running stitch or backstitch is fine, just make sure it’s tight and secure. You’re aiming for a strong, weather-resistant seam.
Create a Flap/Closure Mechanism:
- The remaining fabric above your pocket forms the flap.
- You can trim the corners of the flap to give it a nice rounded or angled look if you like.
- For a simple toggle closure: Stitch a small loop of leather or a piece of cord onto the front of your pouch, just below the flap. Then, on the underside of your flap, stitch a wooden toggle (a small piece of carved branch works perfectly) so it can loop through the cord.
- For a snap fastener: Attach one half of the snap to the front of the pouch and the other half to the underside of the flap.
Add a Loop for Hanging or Attaching (Optional):
- If you want to be able to clip your pouch to your belt or pack, cut a small strip of waxed canvas (e.g., 8cm x 2cm).
- Fold it in half lengthwise and stitch it securely to the back of your pouch, near the top, forming a loop.
Customisation and What to Store Inside:
- Waterproofing: Waxed canvas is naturally water-resistant, but you can enhance this by running a beeswax bar along the seams and gently heating it with a hairdryer to melt it in.
- Compartments: For more organisation, you could stitch small internal dividers within the main pocket.
- What to store: Tinder (char cloth, cotton wool, fatwood), a ferro rod, stormproof matches, a small folding knife, a small piece of inner tube for a rubber band.
One particularly miserable campout in the Peak District illustrates this well. A fire kit pouch had been made, but the stitching on the flap was rushed. Of course, it rained all night, and by morning, the tinder was damp. It teaches the hard way that a little extra time on the seams makes all the difference! From that day on, we always double-stitch and pay proper attention to the closure.
Project 2: Strong & Simple Bushcraft Cordage
Learning to make your own cordage is a fundamental bushcraft skill that opens up a world of possibilities for shelter construction and gear improvisation. It’s an ancient skill, and incredibly satisfying to master. Whether you’re lashing together a quick emergency shelter or needing a strong line for a drying rack, having the ability to create cordage from what’s around you is invaluable.
Materials You’ll Need:
You’ve got a couple of main routes here:
Natural Materials:
- Nettle: This is one of our favourites. Collect mature nettle stalks (wear gloves!). Strip the leaves, then split the stalks lengthwise to get at the fibres. You’ll need to process them – soaking, scraping, and drying – to get usable strands. It’s a bit of a faff for beginners, but incredibly rewarding.
- Tree Bark: Inner bark from certain trees like lime (linden) or willow can be processed into cordage. Again, it requires careful harvesting and preparation.
- A note on natural materials: Always forage responsibly and legally. Only take fallen wood or small amounts from abundant plants, and be mindful of seasonality. The Forestry Commission (GOV.UK) provides excellent guidance on responsible foraging.
Synthetic Materials (Easier for Beginners):
- Paracord (Type III 550): This is a fantastic modern alternative. It’s strong, lightweight, and you can even strip out the inner strands for finer cordage. You can buy it cheaply in most UK outdoor shops or online.
- Strong Fabric Strips: Old jeans, canvas bags, or even thick cotton t-shirts can be cut into strips and braided.
Basic Techniques: The Reverse Wrap (Twisting)
This is the most fundamental and effective way to make strong cordage.
- Gather Your Fibres: Take two bundles of your chosen material (e.g., nettle fibres, paracord strands). Make sure each bundle is roughly the same thickness and length.
- Twist One Strand: Hold the two bundles together at one end. Take the bundle on the right and twist it tightly away from you.
- Fold Over: Bring that twisted strand over the left strand, towards you.
- Twist the Next: Now, take the new right-hand strand (which was previously the left) and twist it tightly away from you.
- Fold Over Again: Bring this newly twisted strand over the left one, towards you.
- Repeat: Continue this process – twist away, fold over – adding more fibres as your strands get thinner or shorter to maintain consistent thickness. The key is to keep the tension even and the twists tight.
Strength Testing:
Once you’ve made a decent length, give it a good tug! Wrap it around something sturdy (like a tree branch) and pull. If it holds, you’ve got yourself some reliable cordage. For critical applications like shelter building, always make it thicker than you think you need.
Uses:
- Shelter Building: Lashing poles together for a tarp lean-to or a simple A-frame. We’ve got loads more on that in our guide to bushcraft shelter building UK.
- Gear Repair: Fixing a broken strap on your pack, securing a loose piece of kit.
- General Utility: Clothesline, snare lines (only if legal and for survival, mind you), traps (again, legality and ethics first!), securing items.
We remember a time when a team member was building a quick emergency shelter in a Scottish pine forest. They’d forgotten to pack enough cordage, but they had some old paracord. By stripping out the inner strands and reverse-wrapping them, they managed to create enough strong line to lash the ridge pole and secure the tarp. It wasn’t pretty, but it held up perfectly in the blustery conditions. It was a proper moment of self-reliance, that. For more detailed information on cordage making and the science behind fibre strength, you can always check out resources like the Wikipedia entry on “Cordage”.
Project 3: A Basic Wooden Utensil (Spoon/Spork)
There’s something incredibly satisfying about eating your campfire stew with a spoon you’ve carved yourself. Carving your own wooden spoon connects you directly to the material and provides a satisfyingly functional piece of bushcraft kit. It’s a fantastic project for developing your knife skills and patience. And once you’ve made it, you’ll want to use it, so check out our guide to the essential campfire cooking kit.
Materials You’ll Need:
- Seasoned Hardwood: This is crucial. Green wood (freshly cut) will warp and crack as it dries. Look for fallen branches of birch, hazel, apple, cherry, or sycamore. These are readily available in UK hedgerows and woodlands (always ensure you have permission to collect wood, and only take fallen branches). Aim for a piece roughly 25-30cm long and about 5-7cm in diameter.
Tools:
- Bushcraft Knife: Sharp, as always.
- Small Saw: For cutting your blank to length.
- Hook Knife (Optional but Recommended): For hollowing out the bowl of the spoon. If you don’t have one, you can use your bushcraft knife, but it’s trickier.
- Sandpaper: Various grits (e.g., 80, 120, 240, 400).
Safety First:
- Always cut away from your body.
- Use a carving glove on your non-dominant hand.
- Keep your knife sharp – a blunt knife is more likely to slip.
- Work slowly and deliberately.
Steps to Carve Your Wooden Spoon:
Select a Suitable Piece of Wood:
- Find a piece of fallen hardwood that’s free of major knots or cracks.
- Look for a slight bend in the branch – this can sometimes be incorporated into the spoon handle for ergonomics.
- Cut your blank to your desired length using your saw.
Rough Out the Basic Shape:
- Start by defining the handle and the bowl. Use your knife to remove large chunks of wood, working from the ends towards the middle.
- Think about the “profile” first – how thick the spoon will be. Then start to shape the sides.
- Beginner Spoon Dimensions (Rough Guide): Total length 15-20cm, bowl length 5-7cm, bowl width 4-5cm, handle thickness 1.5-2cm.
Carve the Bowl/Scoop:
- This is where a hook knife shines. Use controlled, scooping motions to hollow out the bowl.
- If using a regular knife, you’ll need to be very careful, using small, controlled cuts to chip away at the wood. Always brace the wood against something (like your thigh, protected by a carving glove) and cut away from your body.
- Aim for an even thickness in the bowl – too thin and it’ll break, too thick and it’ll feel clunky.
Refine the Handle and Edges:
- Once the bowl is roughed out, focus on the handle. Shape it to be comfortable in your hand. You might want to taper it or add a slight curve.
- Smooth all the edges of the spoon – no sharp corners.
Finishing Touches:
- Sanding: Start with a coarser grit sandpaper (e.g., 80 or 120) to remove knife marks, then move to finer grits (240, 400) for a silky-smooth finish.
- Oiling: Once sanded, apply a food-safe oil. Mineral oil, walnut oil, or linseed oil are good choices. This protects the wood, brings out its grain, and makes it food-safe. Apply liberally, let it soak in for an hour, then wipe off the excess. Repeat this a few times over several days.
Many beginners have got a whole collection of carved utensils, from a first wobbly attempt that looks more like a shovel, to some more refined pieces they use all the time. Each one tells a story. And honestly, finding safe, fallen wood is part of the fun – you can learn loads about different tree species and their properties. If you’re keen on learning more about identifying useful trees, check out our guide on foraging UK for beginners.
Project 4: Simple Water Bottle Carrier/Sleeve
A good water bottle is a bushcraft essential, but it can get bashed about in your pack, or feel a bit cold in your hand in winter. A simple fabric sleeve can significantly improve the usability and durability of your water bottle in the outdoors. This project is straightforward, practical, and adds a nice personal touch to your hydration setup.
Materials You’ll Need:
- Fabric:
- Felt or Thick Wool Fabric: Great for insulation and easy to work with (doesn’t fray).
- Waxed Canvas: Excellent for durability and water resistance.
- Leather: A more advanced option, but very durable and looks fantastic. Small offcuts can often be found cheaply.
- Strong Thread: Waxed linen or heavy-duty polyester.
- Needle: Sturdy enough for your chosen fabric.
- Optional: Rivets or eyelets for strap attachment, cord for a drawstring closure.
Tools:
- Scissors
- Ruler or measuring tape
- Marker pen or chalk
- Pins or fabric clips
- Hole punch (if using rivets/eyelets)
Steps to Craft Your Water Bottle Carrier:
Measure Your Bottle:
- Measure the circumference of your water bottle (wrap a tape measure around it).
- Measure the height of your bottle from the base to just below the neck/cap.
- Add 2-3cm to the circumference for seam allowance.
- Add 5-10cm to the height for the base and any top closure mechanism.
Cut Your Fabric:
- Cut a rectangle of your chosen fabric using your measurements. For example, for a standard Nalgene bottle, you might cut a piece roughly 35cm wide x 25cm high.
- If you’re adding a separate base (recommended for durability), cut a circle of fabric that matches the diameter of your bottle’s base, adding 1.5cm for seam allowance.
Stitch the Sides to Form a Cylinder:
- Fold your fabric rectangle in half lengthwise, right sides together (if your fabric has a “right” side).
- Pin the raw edges together.
- Stitch a strong seam down this edge, creating a fabric tube. A backstitch is ideal here.
Add a Base (Optional, but Recommended):
- Turn your fabric tube inside out.
- Align your circular base piece with the bottom of the tube, pinning it all the way around.
- Carefully stitch the base to the cylinder. This can be a bit fiddly, but go slow and aim for strong, even stitches. If you’re using felt or a very thick wool, you might get away with just gathering the bottom of the tube and stitching it closed, but a separate base is usually sturdier.
Create a Top Closure (Optional):
- Drawstring: Fold the top edge of your carrier down by about 2-3cm and stitch it to create a channel. Use a hole punch or carefully cut two small slits on opposite sides of the channel. Thread a piece of cord through this channel to create a drawstring.
- Simple Flap: You could extend one side of your fabric rectangle into a small flap that folds over the top, securing it with a button or a snap.
Add a Loop or Strap Attachment Point:
- Cut a sturdy strip of fabric or leather (e.g., 10cm x 2.5cm).
- Fold it into a loop and stitch it securely to the side of your carrier, near the top. This allows you to clip it to your belt, pack, or use a shoulder strap. If using rivets or eyelets, punch holes through the fabric/leather loop and the carrier, then secure the rivets.
Benefits:
- Insulation: Keeps your water cooler in summer and prevents it from freezing as quickly in winter. We remember a particularly cold morning walk where a simple wool sleeve stopped a water bottle from turning into an ice block!
- Protection: Guards your bottle against bumps, scratches, and drops.
- Easier Carrying: The loop or strap attachment makes it much easier to carry on its own.
This project is great for customisation. You could add pockets for a small filter or purification tablets, or embroider it with your bushcraft logo. Staying hydrated is key in the outdoors, and having a reliable, protected water bottle is part of that. If you’d like more tips on keeping your fluids up, check out our guide on staying hydrated bushcraft style.
Sourcing Your Materials in the UK
One of the great joys of DIY bushcraft is the hunt for materials. You don’t need to order everything from abroad; the UK countryside and our local shops offer a fantastic bounty. The UK countryside and local markets offer a wealth of materials for the resourceful bushcrafter, often overlooked by those focused solely on buying new.
Natural Materials:
- Fallen Wood: This is your primary source for carving. Always seek permission before collecting wood, especially on private land. The Forestry Commission (GOV.UK) provides guidance on responsible woodland access and foraging, so always check local rules. Focus on fallen branches, not live trees. Responsible foraging is growing in popularity, so it’s worth checking local bylaws before you head out.
- Plant Fibres: Nettle, bramble, lime bark – these can all be processed for cordage. Again, be mindful of responsible harvesting and seasonality. Don’t strip bark from live trees unless it’s an emergency.
- Tinder: Birch bark, dead grass, fatwood (often found in old pine stumps), fungi – the woods are full of it!
Fabric & Thread:
- Local Fabric Shops: Many towns still have independent fabric shops or haberdasheries where you can find waxed canvas, sturdy cottons, and heavy-duty threads. Support local businesses!
- Online Retailers: For specific materials like high-quality waxed canvas or specialist threads, UK-based online fabric stores are an excellent resource.
- Upcycling: Don’t underestimate the power of old clothes! Old denim jeans can be cut into strong strips for cordage or small pouches. Old canvas bags (like army surplus bags) can be repurposed for larger projects.
Leather:
- Local Leatherworkers: If you have a local saddle maker, shoemaker, or leather crafter, they often have small offcuts that are perfect for knife sheaths, fire steel strikers, or small pouches, and they might sell them for a very reasonable price.
- Online Suppliers: There are several UK-based online leather suppliers that sell smaller pieces perfect for craft projects.
Tools:
- UK Camping/Outdoor Retailers: Shops like Go Outdoors, Blacks, Millets, and independent outdoor stores stock a good range of bushcraft knives, saws, and axes.
- Tool Shops/Hardware Stores: For sandpaper, general-purpose saws, and other basic tools, your local hardware store is a solid bet.
- Online Marketplaces: eBay and Amazon UK can be good for finding specific tools or materials at competitive prices, but always check seller reviews.
The key is to be resourceful and keep an eye out. You can often find perfect bits of seasoned wood during a casual walk in the local woods, or stumble upon a bargain roll of canvas at a market stall. It’s all part of the bushcraft mindset, isn’t it?
Common Mistakes & How to Avoid Them
Even the most experienced bushcrafters make mistakes – we have made our fair share! The trick is to learn from them. Patience and careful planning are as crucial in DIY bushcraft as the tools themselves; rushing often leads to rework or failure. Here are some common pitfalls beginners often encounter and how to steer clear of them:
- Using the Wrong (or Blunt) Tools: Trying to carve wood with a blunt knife is not only inefficient but incredibly dangerous. A blunt edge requires more force, increasing the risk of slips and injury.
- Avoid: Always ensure your knife is razor-sharp before starting any carving project. Invest in a good sharpening stone and learn how to use it. A blunt tool requires more force and is far more likely to slip — proper maintenance is non-negotiable.
- Incorrect Material Choices: Using green wood for carving, for example, is a common mistake. It might be easier to carve, but it will almost certainly warp and crack as it dries, ruining your project. Similarly, using weak thread for a load-bearing pouch will lead to failure.
- Avoid: Research your materials! Understand their properties and suitability for the task. For wood, always use seasoned (dried) hardwood where possible. The Wood Database is a great online resource for understanding wood properties.
- Rushing the Process: It’s tempting to want to finish a project quickly, but hurrying often leads to sloppy work, weak construction, and an unsatisfying end product.
- Avoid: Take your time. Enjoy the process. Each cut, each stitch, each knot is a chance to learn and refine your skills. If you’re feeling frustrated, take a break.
- Not Testing Finished Gear Adequately: You wouldn’t want your handmade cordage to snap when you’re relying on it for a shelter, would you?
- Avoid: Always test your creations. Tug on your cordage, put weight in your pouch, check the stability of your carving. If it’s something critical, test it more rigorously than you think you need to.
- Forgetting Safety Precautions: This is essential. Bushcraft involves sharp tools and potential hazards.
- Avoid: Always wear appropriate safety gear (like a carving glove). Know how to use your tools safely (e.g., cutting away from your body). Keep a well-stocked first aid kit handy. Never work tired or distracted. The Royal Society for the Prevention of Accidents (RoSPA) provides general safety advice that’s always worth reviewing.
We’ll admit, one of our team once tried to carve a spoon from a piece of green sycamore he’d just chopped down. It was lovely and soft to work with, but as soon as it dried, it twisted into an unusable pretzel! It was a good lesson in patience and understanding wood dynamics. If you’re ever unsure about a technique or a material, or just want to ask us directly about a specific challenge you’re facing, don’t hesitate to reach out on our /contact/ page. There’s no such thing as a silly question when you’re learning! And for more insights into common beginner challenges, a quick search on reputable UK bushcraft forums often reveals similar experiences and solutions.
Related Reading
Essential UK Bushcraft Kit List: Your Ultimate Gear Guide for Beginners Making your own gear is a great way to build your kit. See what other essential items you’ll need with our comprehensive guide.
Essential UK Bushcraft Cooking Kit for Beginners Once you’ve carved your own spoon, you’ll need something to cook with it! Check out our guide to the essential campfire cooking kit.
Sources & Further Reading
- Forestry Commission (GOV.UK) - Guidance on responsible woodland access and foraging.
- Natural England - Survey data on foraging popularity.
- British Medical Journal - Study on outdoor activity injuries involving blunt tools.
- The Wood Database - Resource for understanding wood properties.
- Royal Society for the Prevention of Accidents (RoSPA) - General safety advice.
- Wikipedia - Entry on “Cordage” for detailed information on fibre strength.
Note: This article covers general principles and tips. For advice specific to your situation, get in touch.
Frequently Asked Questions
Do I really need special tools to make bushcraft gear?
No. A sharp knife, a small saw, and basic sewing materials are enough to begin with. Add more specialised tools only once you know which projects you genuinely enjoy and repeat.
Is it safe to use natural materials I find in the woods?
Yes, but only if you are collecting them legally, responsibly, and with enough identification skill to know what you are handling. Fallen wood is usually the safest place to start, and you should only take what you need. If you are unsure about the material or the rules on collecting it, leave it where it is.
How long does it take to make these projects?
It depends on the project and your experience. A pouch might take an afternoon, while a spoon can easily take a weekend once you include shaping, sanding, and oiling. We would plan for longer than you think you need so you are not tempted to rush the final steps.
What if my first attempt doesn’t turn out perfectly?
That is normal. Early projects are where you learn what your tools, materials, and patience level actually allow. If something turns out badly, keep the lesson, adjust the process, and make the next version better.
Is DIY bushcraft gear as reliable as store-bought?
If you build it well and test it properly, yes. In some cases it can be more useful than a bought item because you understand exactly how it was put together and how to repair it. We would still test anything important before relying on it outdoors.
The sensible way to start is to pick one small project and finish it properly. A pouch, a length of cordage, or a basic spoon will teach you far more than collecting materials for five projects and completing none of them.
If you are unsure which project to begin with or how to test something you have made, the /contact/ page is there for that. The practical value in DIY kit comes from making, testing, and improving, not from getting the first version perfect.
Want a quick project list and materials checklist? Download the free DIY Bushcraft Projects Card.