UK Bushcraft Fire Kit: What You Actually Need (And What You Don't)
As an Amazon Associate we earn from qualifying purchases. This page contains affiliate links — if you buy through them, we earn a small commission at no extra cost to you.
A reliable fire is the heartbeat of bushcraft, providing warmth, cooking, and morale. But for beginners, the array of fire lighting gear can be bewildering. This guide cuts through the noise and focuses on the essential, dependable tools you need to build a reliable fire lighting kit for UK conditions. As a key part of our essential UK bushcraft kit list, it will help you make a confident choice and get started.
Why Fire is the Heartbeat of Bushcraft (And Why Your Kit Matters)
Fire is more than just a source of heat; it’s a cornerstone of almost every outdoor skill. It provides warmth, purifies water, cooks food, and even lifts morale on a chilly evening. Reliable fire-starting is fundamental to safe and enjoyable bushcraft — and it directly depends on the quality and suitability of your chosen tools.
Think about it: a roaring fire can transform a miserable, damp afternoon into a cosy, memorable experience. It’s not just about survival (though it certainly plays a crucial role there); it’s about comfort, capability, and connection to the wild.
Spending countless nights under canvas or a tarp shows how knowing you can get a fire going — whatever the weather throws at you — gives you a massive confidence boost out in the woods. It’s not just about warmth; it’s about feeling capable, self-reliant, and truly at home in nature. Imagine being able to boil water for a brew after a long hike, cook a simple meal over the flames, or simply sit and watch the embers glow, feeling completely present. That’s the power of fire — and that’s why your kit really matters.
For a bit more about our approach and why we started Bushcraft Base, you can always check out our story.
But with great fire comes great responsibility, as they say. Part of being a capable bushcrafter is understanding fire safety. As GOV.UK guidance on countryside safety often reminds us, always ensure your fire is in a safe, clear area, well away from anything flammable, and properly extinguished before you leave. Your kit helps you make fire, but your knowledge and respect for the environment ensure you do it safely.
A reliable kit means you can get a fire going with less fuss — which in turn means you can spend more time on site preparation and safety checks. It’s all connected, you see? Having the right tools isn’t just about making sparks; it’s about being a responsible and confident outdoorsman.
So your kit is an investment in more than just warmth.
The “Must-Have” UK Beginner’s Fire Lighting Kit: No Fluff Allowed
When it comes to assembling your essential fire lighting kit for UK bushcraft, the focus should be on reliability, simplicity, and effectiveness in damp conditions. A quality ferrocerium rod, paired with reliable waterproof matches or a lighter and a dedicated dry tinder container, forms the solid core of any UK beginner’s fire lighting kit.
This isn’t about having a huge collection of gadgets; it’s about having a few, dependable items that you can trust when it counts. Our British weather — as the Met Office frequently highlights — is often characterised by dampness and unpredictable showers, meaning your kit needs to be resilient.
Here’s what we consider absolutely essential:
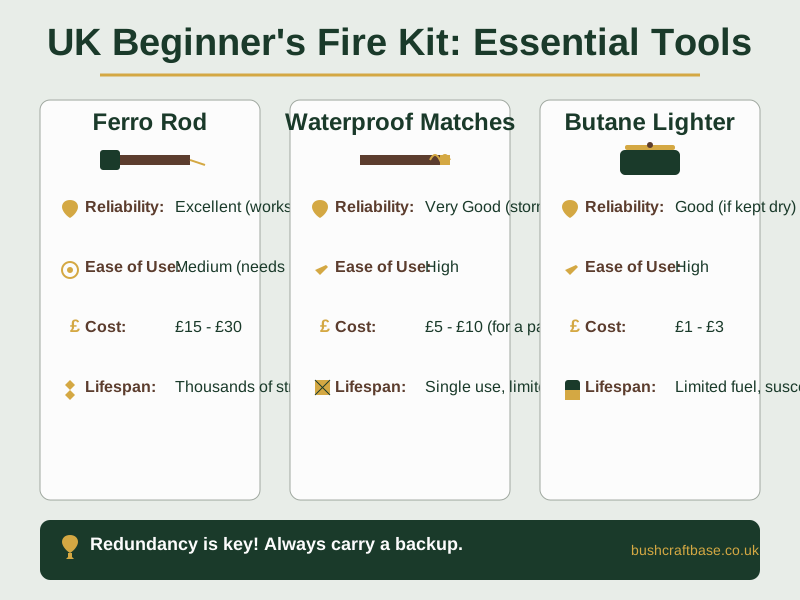
Comparing Essential UK Fire Starters for Beginners
| Item | Reliability in Damp UK Conditions | Ease of Use (Beginner) | Approx. Cost Range (GBP) | Lifespan/Capacity |
|---|---|---|---|---|
| Ferro Rod (Fire Steel) | Excellent (works when wet) | Medium (needs practice) | £15 - £30 | Thousands of strikes |
| Waterproof Matches | Very Good (stormproof options) | High | £5 - £10 (for a pack) | Single use, limited per pack |
| Butane Lighter (Bic) | Good (if kept dry) | High | £1 - £3 | Limited fuel, susceptible to cold |
Primary Ignition Source: The Ferro Rod (or Fire Steel)
This, in my humble opinion, is your absolute best friend for fire lighting in the UK. Why? Because it works when wet, it lasts for thousands of strikes, and it throws a shower of incredibly hot sparks (around 3,000°C!) that can ignite even slightly damp tinder.
What to look for: Don’t skimp here. We always recommend a decent-sized ferro rod — none of those tiny ones that are a nightmare to hold. Look for one that’s at least 10–12mm thick and has a good, chunky handle. This gives you something substantial to grip, especially when your hands are cold or wet. A good length (around 10–15cm) also helps you get a better strike. Brands like Light My Fire Swedish FireSteel 2.0 Army or even some of the unbranded ones from reputable bushcraft suppliers in the UK (like Woodlore or The Bushcraft Store) are spot on. OutdoorGearLab often praises larger ferro rods for their ease of use and consistent performance — a sentiment we wholeheartedly agree with.
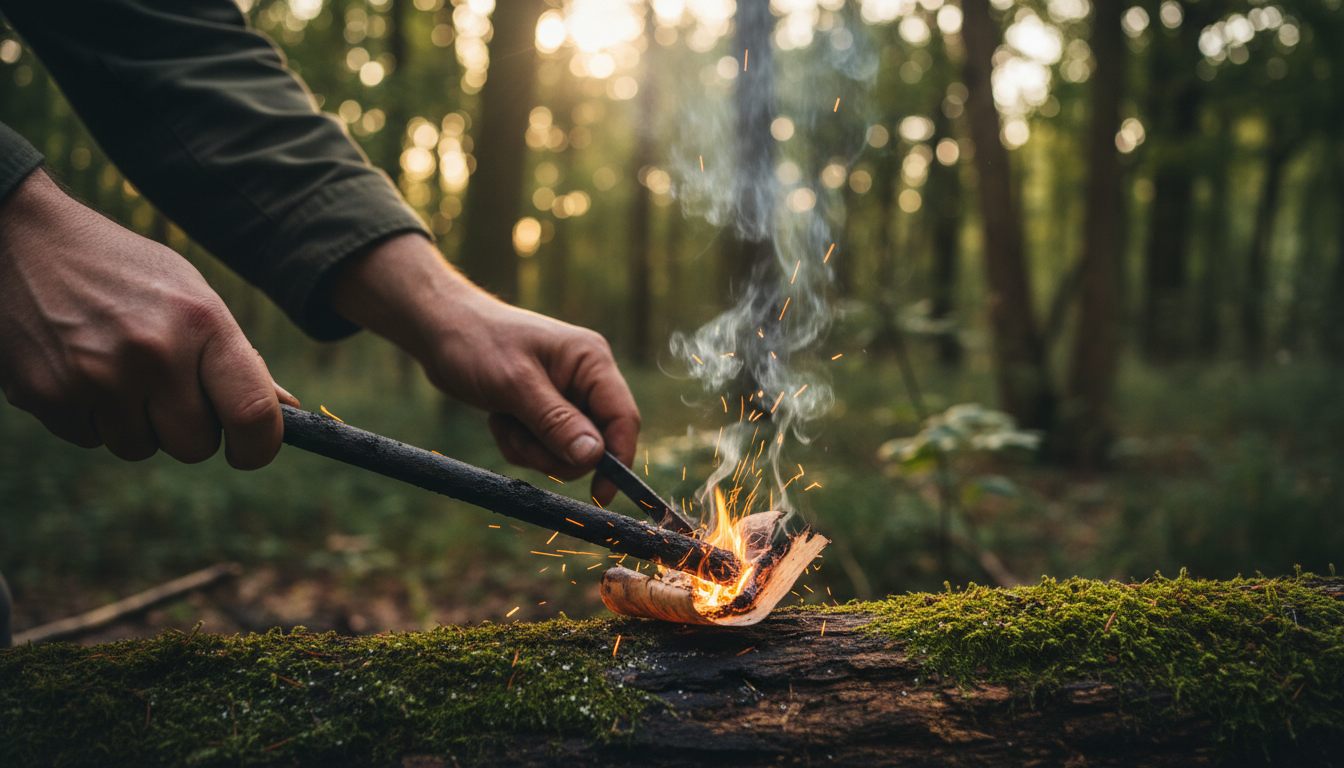
How it works: You scrape a sharp edge (often a striker that comes with it, or the spine of your bushcraft knife) down the rod, creating a shower of sparks that you direct onto your prepared tinder. It takes a bit of practice to get a good, consistent strike. You get the best results by pulling the rod backwards while keeping the striker steady against the tinder, because that sends the sparks into the nest instead of scattering them away.
Secondary Ignition Source: Waterproof Matches or a Reliable Lighter
Redundancy is key in the outdoors. What happens if you lose your ferro rod, or it gets damaged? You need a backup — plain and simple.
Waterproof Matches: These are brilliant for UK conditions. Brands like Coghlan’s or UCO make ‘stormproof’ matches that are designed to burn for ages, even in wind and light rain. Make sure you keep them in a truly waterproof container — a small plastic box with a rubber seal is ideal.
Reliable Butane Lighter: A bog-standard Bic lighter is surprisingly sturdy and reliable. They’re cheap, readily available, and work well — until they get really wet or cold. The trick is to keep it dry! A small zip-lock bag or a dedicated waterproof lighter case will do the job perfectly. We always carry a cheap Bic lighter in a zip-lock bag. Sorted. It’s about redundancy, see?
Zippo lighters are iconic, but remember they need fluid and flints — which can be a bit more of a faff. The Royal Geographical Society often stresses the importance of reliable, simple tools over complex gadgets in expeditions — a principle that definitely applies to your fire kit.
Tinder Storage: Keeping Your Fluffy Bits Dry
This is perhaps the most overlooked item, but it’s absolutely critical in the UK. You can have the best ferro rod in the world, but if your tinder is damp, you’re going to struggle.
Why it’s crucial: Even on a dry day, ground moisture or a sudden shower can turn your carefully gathered tinder into a soggy mess. A dedicated, waterproof container ensures you always have a bone-dry, easily ignitable material to catch your sparks. Knowing your tinder is dry and ready is a huge part of that.
What to use: A small dry bag (the kind kayakers use), a screw-top metal tin (like an old tobacco tin — just make sure it’s fully sealed), or even an old film canister (if you can still find one!) are all excellent options. The goal is simple: keep moisture out. You could even make your own as part of some DIY bushcraft projects.
What to put in it: While this guide focuses on the kit itself, a brief mention of natural tinder is in order. Dry grass, birch bark shavings, inner bark fibres, or even a bit of commercial cotton wool or fatwood shavings are brilliant. We’ll dive much deeper into finding and preparing UK tinder in another article — but for now, just know you need somewhere to keep it dry.
These three elements — a quality ferro rod, a reliable backup, and a waterproof tinder container — are your core. Get these right, and you’re well on your way to confident fire lighting in our British outdoors.
What NOT to Bother With (Yet!) - Avoiding Beginner Traps
It’s easy to get carried away when you’re starting out, isn’t it? The market is flooded with all sorts of gadgets and gizmos that promise to make fire lighting effortless. But honestly, many beginner fire lighting kits are cluttered with items that seem impressive but fail in practical UK bushcraft scenarios — like magnifying glasses that are useless on cloudy days.
Our advice? Save your money and focus on the essentials first. There are a few common “beginner traps” We have seen countless times that you should definitely avoid for now.
Here’s what you can happily skip for your initial UK bushcraft fire kit:
Overly Complex Fire Starters: You’ll see all sorts of multi-tool fire starters, fancy plasma lighters, or elaborate piston-style devices. While some of these can be fun to experiment with, they often have more moving parts that can break, require specific conditions to work, or are just plain fiddly when your hands are cold. A simple ferro rod and a lighter are far more reliable and straightforward. Keep it simple — especially when you’re learning.
Cheap, Unreliable Lighters: We mentioned a Bic lighter is good, but we mean a decent one. Avoid those super cheap, flimsy lighters you get in multipacks from the pound shop. They’re often temperamental, run out of fuel quickly, and fail miserably in any kind of wind or cold. Invest a couple of quid in a branded, reliable butane lighter — or better yet, opt for stormproof matches as your backup.
Magnifying Glasses/Fresnel Lenses: These are brilliant for a sunny day in the Sahara — but honestly, in the UK? You’ll be waiting a long time for consistent enough sunshine to reliably start a fire. Our often cloudy, damp climate makes solar ignition more of a novelty trick than a dependable bushcraft skill. Many beginners have tried it — and it’s mostly just a good way to get cold and frustrated. Learn to process natural tinder — it’s far more rewarding and reliable once you get the hang of it.
Excessive Amounts of “Fire Paste” or Accelerants: You’ll see tubes of fire gel, blocks of chemical fire starters, or even little packets of petroleum jelly-infused cotton wool (though a small amount of petroleum jelly can be useful for DIY tinder, don’t rely solely on it). While these can certainly get a fire going quickly, they don’t teach you the fundamental skills of finding and processing natural tinder. Experienced UK bushcrafters prioritise learning how to work with natural materials. Relying too heavily on accelerants can become a bit of a crutch, preventing you from developing crucial skills. Save these for emergency situations or when you’re really in a pinch, but don’t make them your primary method. Spend your energy learning to identify and process natural tinder instead, because that skill will serve you far longer than a tube of fire gel.
These items often add unnecessary weight and complexity to your kit — and, crucially, don’t perform reliably in our specific British conditions. Focus on mastering the basics with dependable tools, and you’ll be far better off.
Putting Your Kit to Work: Basic UK Fire Lighting Techniques
Having the right kit is only half the battle; knowing how to use it effectively — especially in the often-challenging UK conditions — is where the real skill lies. Mastering your ferro rod involves consistent practice, aiming sparks directly into prepared, fine tinder, and gently nurturing the initial flame with controlled breaths — especially crucial in damp UK conditions. Once you’re confident with fire, you can move on to the joys of campfire cooking, and our guide to the essential bushcraft cooking kit is the perfect next step.
If you want a step-by-step practice plan for building from first spark to a reliable, sustained flame in wet British weather, jump into our detailed UK firecraft skills guide. It walks you through feather sticks, ignition sequences, and wind management so the gear above actually delivers when you need it.
And remember: fire safety is outdoor safety. Before you light up, run through the simple risk checks in our health and safety checklist for UK bushcraft beginners so every session stays controlled, legal, and low-impact.
It’s a process. And like any good bushcraft skill, it takes patience and practice.
Here’s a basic rundown of how to put your kit to work:
Prepare Your Fire Site Safely:
First things first — safety. Choose a clear, level spot away from overhanging branches, dry grass, or anything else that could catch fire. Clear a circle about 3 metres in diameter down to bare earth. If you’re using a fire ring or pit, make sure it’s stable. Always have a bucket of water or a trowel handy for emergencies. This is crucial for responsible bushcraft. The Forestry Commission’s ‘Be Fire Aware’ campaign consistently reminds us that unattended or improperly extinguished fires are a leading cause of wildfires — making your careful preparation absolutely essential.Gather Your Materials (Tinder, Kindling, Fuel):
This is where the UK weather often throws a spanner in the works. Even on a seemingly dry day, the ground can be damp — and deadwood might be saturated.Tinder: This is your initial ignition material — something that catches a spark easily and holds a flame for a few seconds. Think finely scraped birch bark, dry grass, feather sticks (thin shavings from a stick), or cotton wool from your dry tinder tin. Aim for material that’s as fine as a bird’s nest.
Kindling: Slightly larger pieces of wood that will catch from the tinder and burn hot enough to ignite your main fuel. Look for pencil-lead thin twigs, then slightly thicker ones — graduating up to finger-thick pieces. The trick with damp kindling? Get it really fine (almost pencil-lead thin) and feed it slowly. Dead, standing wood is often drier than fallen wood.
Fuel Wood: Your main firewood. This will be wrist-thick branches and logs that will sustain your fire. Again, look for dead, standing wood — or process larger logs by splitting them to get to the drier inner core.
Using Your Ferro Rod:
Create a Tinder Nest: Place your finest, driest tinder (from your tin, hopefully!) into a loose, bird’s nest-like bundle.
Positioning: Hold the ferro rod firmly, with the tip just above your tinder nest. Angle your striker (or knife spine) at about 45 degrees to the rod.
The Strike: Instead of scraping away from your tinder (which can push it away), try pulling the ferro rod backwards while keeping the striker stationary and pressed firmly against the tinder. This sends a concentrated shower of sparks directly into your tinder nest. And always, always practice your ferro rod strike — you want a solid shower of sparks right onto your tinder bundle.
Nurture the Ember: Once you have a glowing ember in your tinder, gently cup it in your hands (if safe) and blow softly onto it. This feeds it oxygen, helping it to grow into a flame. Don’t blow too hard — or you’ll extinguish it!
Building the Fire:
Start Small: Once you have a flame, carefully place your smallest kindling (the pencil-lead thin stuff) over and around it, forming a small tipi or lean-to structure. Don’t smother it!
Gradual Growth: As the flame takes hold of the smaller kindling, gradually add thicker pieces. Keep feeding it gently — allowing air to circulate.
Adapting to Damp: This is where skill comes in. If materials are damp, process them finer, split wood to expose dry inner fibres, and use your ferro rod’s intense sparks to really dry out and ignite your tinder. A good fire lay (like a ‘star’ or ’log cabin’ structure) can also help by allowing more airflow.
Practice, practice, practice! The more you use your kit in different conditions, the more confident and proficient you’ll become. If you’re keen to learn more specific fire lays and advanced techniques for truly challenging weather, we’ll cover that in a future article. And if you’ve got questions — don’t hesitate to get in touch!
Getting Your Sparks Flying in the UK
So there you have it — your no-nonsense guide to getting that fire kit sorted for UK bushcraft. We’ve cut through the confusion, identified the absolute essentials, and talked about what you can happily leave behind for now. Remember, the key is reliability, practicality, and suitability for our unique British conditions. You’re now equipped with the knowledge to assemble a solid kit that won’t let you down — saving you money and frustration in the long run.
Building your essential UK fire lighting kit is straightforward when you focus on reliability and practicality over novelty — empowering you to confidently create fire in British woodlands. It’s not complicated — but getting it right makes all the difference.
Now, the real magic happens when you get out there and start practicing with your new gear. Getting that first spark into a roaring fire — even when it’s drizzling — is a skill that builds serious confidence and connection to the outdoors.
If you’re keen to make sure you haven’t missed any crucial elements for your fire kit, or just want a handy reminder when you’re out shopping, a starter checklist is invaluable. Building confidence with fire is a journey — and having a reliable kit is your first big step. For a practical guide to getting started with all your bushcraft basics (including fire), you might find our free checklist really useful. It’s packed with actionable steps to help you on your journey.
Download the Free Bushcraft Starter Checklist Here!
Related Reading
Essential UK Bushcraft Cooking Kit for Beginners Once you’ve mastered making a fire, the next step is to cook on it. This guide covers the essential kit you’ll need for delicious campfire meals.
DIY Bushcraft Gear Projects for Beginners UK: Craft Your Own Kit Why buy a fire kit pouch when you can make one? Explore simple and rewarding DIY projects to create your own essential bushcraft gear.
The Ultimate UK Bushcraft Kit List: Your Essential Gear Guide See how this fire kit fits alongside shelter, tools, and clothing for a balanced beginner setup in British conditions.
Sources & Further Reading
- GOV.UK: Provides general guidance on countryside safety and fire prevention.
- Met Office: Offers historical climate data and current weather forecasts relevant to UK outdoor conditions.
- Forestry Commission: Campaigns like ‘Be Fire Aware’ highlight wildfire prevention and responsible fire management.
- Outdoor Recreation Network: Research on the psychological benefits of outdoor skills and self-reliance.
Note: This article covers general principles and tips. For advice specific to your situation, get in touch.
Frequently Asked Questions
What’s the single most important item for a UK bushcraft fire lighting kit?
If we had to pick one, we would choose a decent ferro rod. It works when wet, lasts a long time, and gives you a dependable primary ignition source for UK conditions. Once you learn to strike it well onto properly prepared tinder, it earns its place very quickly.
Do I really need a backup ignition source in my kit?
Yes. Fire kit is one of the clearest cases for redundancy because losing one item or soaking one item is easy to do outdoors. We would always carry a ferro rod plus either stormproof matches or a reliable lighter kept dry as backup.
How much should I expect to spend on a basic, reliable UK beginner’s fire kit?
You do not need much to get started properly. A good ferro rod, a backup lighter or stormproof matches, and a dry tinder container are enough for a simple beginner kit, and you can usually put that together for a sensible amount. Spend on reliability first, not quantity.
Can I just use any old lighter, or do I need something specific for UK conditions?
A standard Bic lighter is fine as a backup if you keep it dry. If you want something more dependable in wind and poor weather, stormproof matches or a better wind-resistant lighter are worth carrying instead. The important part is knowing how your chosen backup behaves before you rely on it.
Where are the best places to buy bushcraft fire lighting gear in the UK?
We would start with reputable outdoor retailers or specialist bushcraft shops that clearly state what the item is made from and how it is meant to be used. You do not need a huge range of options; you need one solid ferro rod, one backup ignition source, and a simple dry container. Smaller independent shops can also be useful if you want practical advice before buying.