UK Bushcraft Cooking Kit: What You Actually Need to Eat Properly
Why a Dedicated Bushcraft Cooking Kit Matters (Even for Beginners)
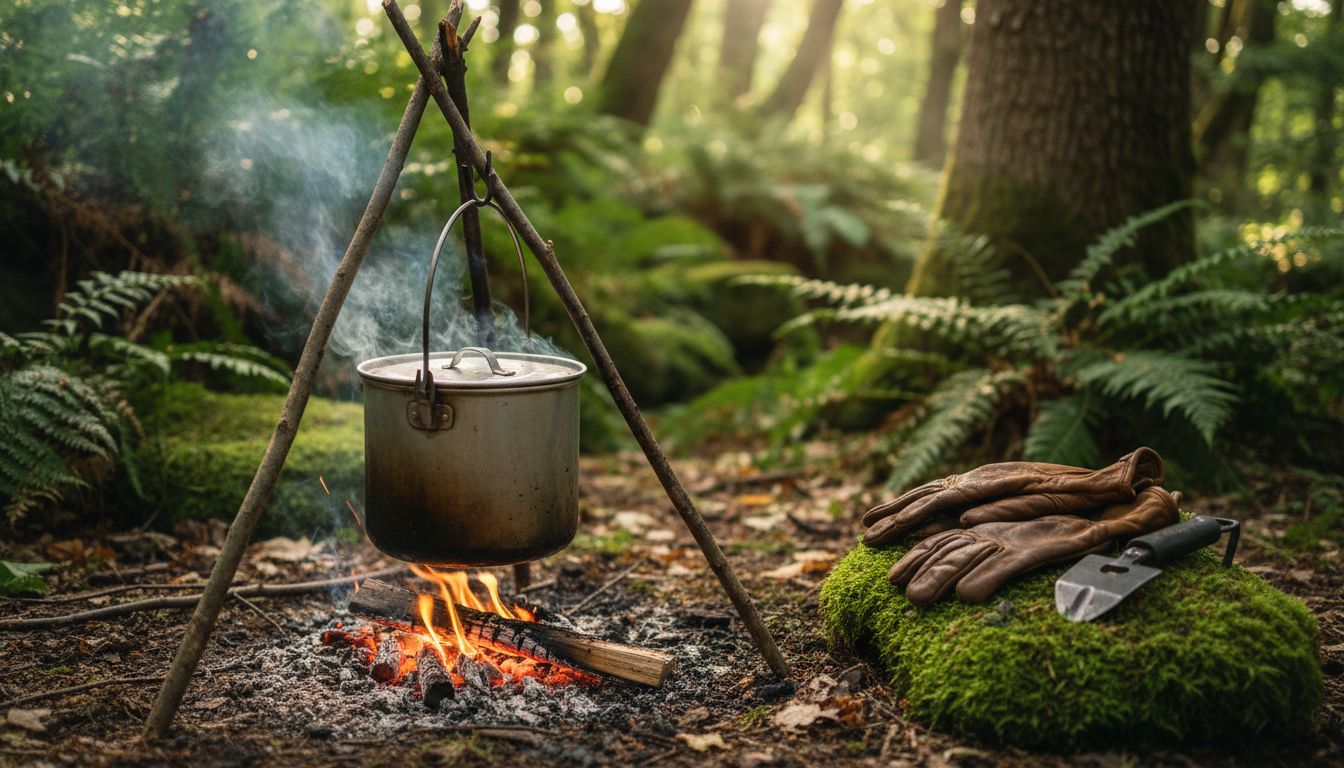
Campfire cooking gets much easier once your kit stops fighting you. A pot that hangs properly, a pan that can take direct heat, and a few dependable tools will do more for your meals than a pile of gadgets ever will.
Having a specific set of tools for bushcraft cooking isn’t about being fancy or overprepared; it’s about making your outdoor culinary adventures safer, more efficient, and ultimately, far more enjoyable. While you might be tempted to just grab a pot from your kitchen or try to improvise everything with sticks, dedicated gear is designed to handle the unique demands of open-fire cooking and the sometimes-harsh realities of the British outdoors. Proper tools are crucial for handling hot items safely, managing your fire effectively, and ensuring your food cooks evenly and tastes great. Research by the Outdoor Industry Association often highlights how specialised equipment significantly enhances user safety and enjoyment in challenging environments, reinforcing why generic kitchenware just doesn’t cut it.
Think about it: trying to flip sausages with a twig over a roaring fire is a recipe for burnt fingers and unevenly cooked food. Many beginners learn this the hard way on one of their first solo trips in the Peak District. They think they can get away with just a basic army mess tin and a couple of sticks. The sausages end up charred on one side and practically raw on the other, and they nearly drop the whole lot into the embers trying to turn them. It is a proper mess, and they end up eating a rather sad, half-cooked meal. That is when you realise a focused bushcraft cooking kit isn’t about luxury; it’s about safety, efficiency, and genuinely enjoying your food outdoors, especially when facing typical British conditions. Having the right kit simplifies the learning curve, allowing you to focus on the fun of cooking rather than struggling with inadequate tools. It also means you’re better equipped to adapt to damp wood and that famously unpredictable UK weather, which can throw a spanner in the works of even the most experienced cook. For more tips on getting started, have a look at some of our other articles.
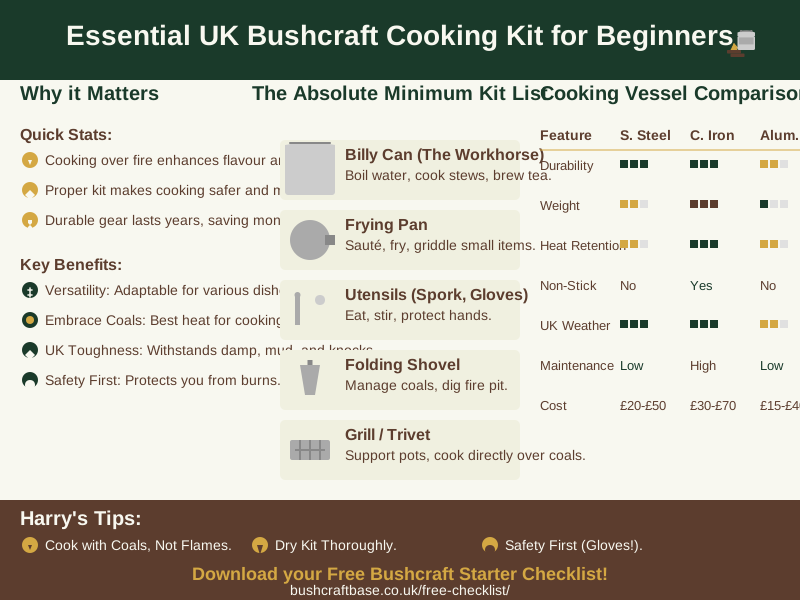
Campfire Cooking Vessel Comparison
| Feature | Stainless Steel | Cast Iron | Aluminium |
|---|---|---|---|
| Durability | Excellent, rust-resistant | Very High, needs care | Moderate, can warp |
| Weight | Medium | Heavy | Light |
| Heat Retention | Good | Excellent | Moderate |
| Non-Stick (Seasoning) | No | Yes (with seasoning) | No |
| UK Weather Suitability | High | High (if maintained) | Moderate (dents easily) |
| Maintenance | Low | High (seasoning, drying) | Low |
| Cost (Typical) | £20-£50 | £30-£70 | £15-£40 |
The “Absolute Minimum” Kit List for Campfire Cooking
When it comes to campfire cooking, especially here in the UK, the goal is versatility, durability, and packability. You want gear that can do multiple jobs, withstand the rigours of outdoor use, and won’t weigh you down. Here’s our list of the absolute essentials, designed to get you cooking delicious meals without any unnecessary faff. For UK beginners, prioritise durable stainless steel or seasoned cast iron for your primary cooking vessel – they handle damp conditions and direct heat best. If you’ve got questions about specific brands or where to buy, don’t hesitate to get in touch.
Cooking Vessel: The Mighty Billy Can (or a Good Pot)
- What it is: A billy can is essentially a lidded pot with a sturdy bail handle, often made from stainless steel or aluminium.
- Why it’s essential: This is your multi-tool. You can boil water for drinks, porridge, or rehydrating food. It’s perfect for one-pot stews, soups, or even cooking pasta. The bail handle means you can hang it directly over a fire or suspend it from a tripod. Stainless steel is brilliant for UK conditions because it’s tough, rust-resistant, and relatively easy to clean. You can find some cracking ones from brands like Kelly Kettle (their hobo stove attachment is a genius addition, by the way) or even good quality outdoor brands like Stanley.
- Our take: Honestly, if you only buy one thing, make it a good stainless steel billy can, around 1-1.5 litres. We have used ours for everything from morning porridge to evening chilli, and it has never let us down. That long handle really helps when you’re trying to lift it off a hot fire, which is why we still think it’s the most versatile first purchase.
Small Frying Pan:
- What it is: A compact frying pan, ideally cast iron or stainless steel.
- Why it’s essential: For anything you want to fry – bacon, eggs, flatbreads, even a quick stir-fry. Cast iron, once properly seasoned, offers fantastic non-stick properties and excellent heat retention, though it’s heavier and needs more care to prevent rust in our damp climate. Stainless steel is lighter and more forgiving. According to a material science overview by Cook’s Illustrated, stainless steel’s non-reactive surface is ideal for varied cooking, while cast iron excels in heat retention and even searing, making both excellent choices depending on your priorities.
- Our take: A small, sturdy frying pan (say, 20-25cm diameter) will expand your meal options hugely. We have seen many a beginner try to get by without one, attempting to cook bacon directly on hot rocks or flimsy bits of metal. Honestly, a proper small frying pan makes all the difference for a decent fry-up, saving you from burnt fingers and ruined food!
Utensils: The Basics Done Right
- Metal Cooking Spoon/Spork: A long-handled metal spoon or spork is perfect for stirring, serving, and eating. The longer handle keeps your hand away from the heat.
- Small, Sturdy Knife: You’ll already have a good bushcraft knife for general tasks, and this can absolutely double up for food prep like chopping vegetables or slicing meat. Just make sure it’s clean!
- Heat-Resistant Gloves or Pot Grabbers: This is a non-negotiable safety item. Trying to move a scorching hot pot or pan with a flimsy bit of cloth is asking for trouble. Get a proper pair of leather gloves or a dedicated pot grabber. Your hands will thank you.
- Our take: We used to use a standard fork and spoon, but after nearly burning our fingers on a hot billy can handle a few times, we invested in a long-handled spork and some decent leather gloves. A flimsy tea towel is no match for a scorching hot handle — invest in a proper pot grabber and you’ll cook with far more confidence.
Fire Management for Cooking:
- Small Folding Shovel/Trowel: This isn’t just for digging latrines! It’s invaluable for managing your fire, moving hot coals around, and banking them up for cooking.
- Metal Grill/Trivet (Optional but Highly Recommended): While you can cook directly on coals or hang pots, a small, collapsible grill or trivet gives you a stable, level surface for your pot or pan. It makes cooking so much easier and more consistent.
- Our take: For years, we cooked directly on the coals, and while it works, a small grill makes a world of difference for heat control and stability. It’s less faff, especially when you’re hungry, and gives you a more reliable cooking surface.
Cleaning Kit:
- Small Biodegradable Soap or Camp Wash: Essential for hygiene. Choose a wilderness-friendly soap that won’t harm the environment.
- Scrubber/Sponge: A small, tough scrubber (even a bit of natural fibre like jute or a handful of sand and grass) for cleaning off burnt-on food.
- Our take: Remember, Leave No Trace principles apply to your washing up too. Use minimal soap, away from water sources, and scatter the grey water.
How To: Master Your Campfire for Cooking
One of the biggest secrets to successful campfire cooking is understanding that you cook with coals, not roaring flames. This crucial distinction will transform your outdoor meals from burnt offerings to perfectly cooked delights. Mastering coal management is the secret to consistent campfire cooking; aim for a bed of glowing embers rather than a blazing inferno. Of course, to get good coals, you need a good fire, which all starts with a reliable bushcraft fire lighting kit.
Roaring flames are great for getting a fire going and for boiling water quickly, but for cooking food, they’re too erratic and intense. They’ll char the outside of your food before the inside has a chance to cook, leaving you with a burnt, raw mess – a mistake many beginners make countless times when they first start out. They try to cook sausages right over the highest flames, only to end up with black casings and cold middles. It is incredibly frustrating!
Here’s how to build a fire suitable for cooking:
- Start with a good fire: Get a decent fire going first, using a method like a log cabin or platform fire, and let it burn down. You’re aiming for a bed of hot, glowing embers, often with a few smaller, slow-burning logs still on top. Different types of wood create different quality coals; hardwoods like oak or beech burn longer and hotter, giving excellent, consistent heat. So, understanding woodland fuels is a real asset here. We’ve even written a bit more about sustainable wood sourcing if you’re keen to learn more.
- Create a cooking zone: Once you have a good bed of coals, use your folding shovel or a stick to pull some of them aside, creating a dedicated cooking area away from the main flame. This allows you to control the heat much better, giving you precision over your cooking surface.
- Managing the heat: You can adjust the heat by adding or removing coals from your cooking zone. More coals mean more heat, fewer coals mean less. You’ll get a feel for it with practice – it’s a bit like learning to cook on a gas hob, but with a bit more rustic charm. If your food is cooking too quickly, lift it higher or remove some coals. Too slowly, add more.
- Using a grill/trivet: If you’re using a grill, place it directly over your bed of coals. This provides a stable platform and allows for even heat distribution. For pots, you can either hang them over the coals or place them directly on a trivet, giving you versatility in your cooking approach.
Simple Beginner Campfire Meal Ideas (Using Your New Kit!)
Now for the fun part: connecting your shiny new kit to some genuinely achievable and tasty meals. You don’t need to be a gourmet chef to eat well outdoors; the key is simplicity and making the most of your versatile gear. Your essential kit empowers you to easily prepare hearty breakfasts like porridge or a full English fry-up, and simple one-pot stews, right over the campfire.
Here are a few ideas to get you started, showing you how your essential kit items – the billy can, frying pan, and spoon – come into their own:
Morning Porridge (Billy Can):
- How: This is as simple as it gets. Add oats and water (or powdered milk and water) to your billy can. Hang it over moderate coals or place it on your grill. Stir regularly with your long-handled spoon until it thickens.
- Ingredients: Oats, water, a pinch of salt. For extra flavour, bring along some dried fruit, nuts, or a small pot of honey.
- Our take: There’s nothing quite like a warm bowl of porridge on a chilly British morning, cooked over your own fire. It’s incredibly satisfying and fuels you for the day.
Boiled Eggs & Bacon (Billy Can & Frying Pan):
- How: Boil eggs in your billy can. While they’re cooking, get your frying pan hot over the coals, add a little oil or fat, and lay in your bacon. Cook to your desired crispiness.
- Ingredients: Eggs, bacon, a little cooking oil/fat.
- Our take: A proper breakfast fry-up cooked outdoors is a bushcraft classic for a reason. It feels like a real treat, and with your kit, it’s surprisingly easy to achieve.
Simple Stew or Chilli (Billy Can):
- How: This is best done with pre-prepared ingredients. Chop your vegetables (onions, carrots, potatoes) at home. Bring along some tinned chopped tomatoes, beans, and maybe some pre-cooked sausages or mince (if you’re not out for too long without refrigeration). Combine everything in your billy can with some water or stock, and let it simmer gently over the coals, stirring occasionally.
- Ingredients: Pre-chopped veg, tinned goods, stock cubes, seasoning.
- Our take: A hearty one-pot meal is brilliant after a day of activity. It warms you from the inside out and shows just how versatile that billy can is.
Hot Drinks (Billy Can):
- How: Fill your billy can with water and hang it directly over the flames (or place on the grill) to boil.
- Ingredients: Tea bags, instant coffee, hot chocolate sachets.
- Our take: A brew round the campfire is almost a ritual for me. That first sip of hot tea or coffee, steam rising into the cool air – pure bliss.
Flatbreads (Frying Pan):
- How: Mix flour and water (and a pinch of salt) to form a simple dough at home or in camp. Roll or flatten small portions into discs. Cook them in your hot frying pan with a little oil until golden brown and cooked through.
- Ingredients: Flour, water, salt, oil.
- Our take: Freshly cooked flatbreads are a fantastic accompaniment to stews or just eaten plain. They’re surprisingly easy and impressive!
UK Specific Considerations: Damp Wood, Wind, and What to Pack
Bushcrafting in the UK comes with its own unique set of challenges, mainly thanks to our famously fickle weather. You’ll often be dealing with damp conditions, sudden gusts of wind, and unexpected showers. Tailoring your approach and kit to these realities is crucial for success and enjoyment. In the UK, prioritise kit that withstands moisture and damp conditions, and always have a backup plan for fire-starting and cooking if the weather turns foul.
Wood Fuel: The Quest for Dryness:
- Sourcing: Finding dry kindling and fuel wood is often the biggest hurdle. Avoid taking green wood from living trees – it won’t burn well, creates a lot of smoke, and goes against Leave No Trace principles. Always seek out standing deadwood, which tends to be drier as it’s off the damp ground. Branches that are snapped off trees but still suspended can be a goldmine.
- Preparation: Even “dry” wood in the UK might have a damp surface. Split your larger pieces to expose the drier inner wood. This is where a good axe or saw comes in handy. We remember one particularly miserable trip to the Lake District where it had rained for days. Every piece of wood on the ground was sodden. It took ages, but by carefully looking for high-and-dry deadwood and splitting it down, we eventually managed a small, hot fire. Preparation truly saved the day!
Weather: Wind and Rain are Your Foes:
- Wind: Wind can fan your fire, making it burn through fuel rapidly and creating uneven heat for cooking. It can also blow ash and sparks around, which is a fire safety hazard. Try to cook in a sheltered spot, use natural windbreaks, or even build a small stone wall around your cooking fire.
- Rain: A sudden downpour can quickly extinguish an exposed fire. Always have a tarp or a natural shelter (like a dense canopy) over your cooking area. If you can, keep your fuel wood under cover. And if you’re really struggling with the elements, We have got a whole section on setting up basic shelters that might come in handy. The Met Office frequently reports on the UK’s high rainfall and wind speeds, which underscores the need for robust weather preparedness in outdoor cooking.
- Our take: Always have a backup fire-starting method, and consider a small, robust stove as a backup if you know the weather is going to be truly awful.
Kit Durability: Built for British Grit:
- Materials: This is why we recommend stainless steel and cast iron. Stainless steel is inherently rust-resistant, making it ideal for our damp climate. Cast iron, while needing more care with seasoning, is incredibly durable and holds heat beautifully. Aluminium is lighter but less robust and can warp or pit with direct, intense heat.
- Portability: Keep your cooking kit compact and organised. A simple canvas bag or a sturdy stuff sack will keep everything together and protect it. If you’re using cast iron, make sure it’s packed securely so it doesn’t rattle around and get damaged. A waterproof bag for your entire cooking kit is a shrewd move, especially if you’re hiking in!
Cleaning and Maintenance: Keeping Your Kit Ready
Looking after your bushcraft cooking kit isn’t just about keeping it shiny; it’s about ensuring its longevity, hygiene, and reliability for every trip. A well-maintained kit is a joy to use, while neglected gear can quickly become a rusty, unhygienic nightmare. Thorough drying after every use is crucial for preventing rust on your UK bushcraft cooking kit, ensuring its reliability for years to come. It’s all part of the bushcraft philosophy – looking after your tools so they look after you. You can read more about essential bushcraft tool care if you like.
Cleaning After Use:
- Hot water is your friend: While your fire is still warm, heat some water in your billy can. This hot water, combined with a small amount of biodegradable soap (used away from water sources, remember your Leave No Trace), will make cleaning much easier.
- Scrubbing: Use your scrubber or a handful of natural abrasive (like sand and grass) for cleaning off burnt-on food. For stubborn bits, you might need to simmer some water in the pot for a while to loosen them.
- Our take: Don’t leave cleaning until you get home if you can help it. Food residue can attract critters, and it’s much harder to clean once it’s dried on. Plus, it’s easier to do when the fire is still providing hot water.
Drying Thoroughly:
- Preventing rust: This is arguably the most critical step, especially for cast iron and any stainless steel items that might still have small carbon steel components (like rivets or handles). Moisture is the enemy of metal.
- Outdoors: If the weather permits, let your kit air dry fully in the sun. If not, carefully dry it with a cloth.
- Our take: Many beginners once leave a cast iron pan slightly damp after a trip to the Scottish Highlands. By the time Many beginners remembered it a week later, it had a lovely patch of bright orange rust. It was easily fixed by scrubbing and re-seasoning, but it was a completely avoidable faff! So, dry, dry, dry! Never skip thorough drying, especially with cast iron! Many beginners once leave a pan slightly damp after a rainy trip, and it was a rusty mess a week later. A quick wipe-down and air dry (or even a gentle heat over dying embers) can save you a lot of effort in the long run.
Seasoning Cast Iron Pans:
- Why: Seasoning is a layer of polymerised oil that protects the cast iron from rust and creates a natural non-stick surface.
- How: After cleaning and drying, apply a very thin layer of high smoke point oil (like flaxseed, grapeseed, or even vegetable oil) to all surfaces of your cast iron pan. Wipe off any excess, then heat it in an oven or over a very gentle fire until it smokes and the oil bakes on. Repeat this a few times. As explained by America’s Test Kitchen, proper seasoning creates a durable, non-stick surface that improves with every use.
- Our take: This might sound like a bit of work, but a well-seasoned cast iron pan is a joy to cook with and will last for generations. It’s worth the effort.
Storing the Kit:
- Once everything is clean and bone-dry, store it in a breathable bag or container. Avoid airtight containers, especially if there’s any residual moisture, as this can encourage rust or mould. Making your own custom storage bag can be a great first DIY bushcraft gear project.
Related Reading
Essential UK Bushcraft Fire Lighting Kit for Beginners You can’t cook without a fire. Make sure you have the essential tools for reliably getting a fire going, whatever the British weather throws at you.
Best Budget Bushcraft Knives UK: Top Picks Under £50 for Beginners A good knife is essential for everything from preparing tinder to prepping your vegetables for the pot. Find the best budget-friendly option for you.
Sources & Further Reading
- Outdoor Industry Association: For insights into specialised equipment enhancing outdoor safety and enjoyment.
- Cook’s Illustrated: Provides material science overviews for various cooking materials.
- America’s Test Kitchen: Offers detailed explanations on cast iron seasoning techniques.
- Met Office: For reliable UK weather patterns and rainfall data.
- GOV.UK: For general fire safety advice and outdoor fire regulations.
Note: This article provides general guidance based on current best practices. For advice specific to your situation, get in touch.
Frequently Asked Questions
Do I really need a special bushcraft cooking kit, or can I use my kitchen stuff?
You can use some kitchen gear, but it usually becomes limiting quite quickly. Bushcraft kit is built for direct heat, awkward ground, soot, and repeated packing, so it tends to be safer and easier to live with outdoors. If you do borrow from the kitchen, keep it to simple metal items that can genuinely handle fire.
What’s the best material for a campfire pot in the UK?
For most beginners in the UK, we would choose stainless steel first. It is durable, rust-resistant, and much easier to look after in damp weather than cast iron. Cast iron is excellent once you know you want it, but stainless steel is the simpler starting point.
How do I stop my food from sticking or burning?
The main fix is heat control. Cook over coals rather than flames, preheat the pan properly, and use enough fat or oil to stop food catching straight away. If the pan is crowded, cook in batches instead of forcing it.
Is it safe to cook over a campfire?
Yes, if you are doing it legally, with suitable fire control, and with the right kit to handle hot cookware safely. Keep water or soil nearby, manage the fire properly, and never leave it unattended. The cooking itself is straightforward; most of the risk comes from poor fire discipline.
What’s the single most important item in my bushcraft cooking kit?
If we had to pick one, we would choose a sturdy billy can or similar lidded pot. It covers boiling water, simple one-pot meals, and most of the basic cooking jobs a beginner actually needs. It is the bit of kit we would least want to be without.
Taking the Next Step into Campfire Cooking
The main thing is to keep the kit simple enough that you will actually use it well. A good pot, a workable pan, a few safe handling tools, and solid fire control are enough to get you started properly.
If you want a quick reference for the basics, the Free Bushcraft Starter Checklist at /free-checklist/ pulls the core cooking and general gear together in one place.