UK Shelter Building: Your First Natural & Tarp Hideaway

If your shelter leaks, traps condensation, or catches the full force of the wind, the rest of your camp gets harder fast. In UK conditions, a basic shelter needs to do three things well: keep rain off, block enough wind, and let moisture escape.
This guide breaks down the first natural and tarp shelters I would recommend to a beginner, with the site choices and setup details that matter most in British weather. The aim is not to build something elaborate. It is to give you a simple refuge you can pitch confidently and improve with practice. As part of our foundational bushcraft skills pillar, this shelter guide pairs with firecraft, knife work, and water skills so you have the full beginner toolkit.
Why Shelter Matters (Especially in the UK!)
A shelter isn’t just a luxury out in the wild; it’s your primary defence against the elements and, frankly, your best mate when the weather turns. Beyond just providing a roof over your head, a well-constructed shelter offers warmth, protection from wind and rain, and a crucial sense of psychological comfort when you’re out in the wilds of the UK.
Here in Britain, our weather is famously – or perhaps infamously – unpredictable. You can have four seasons in one day, as the old saying goes, and it’s absolutely spot on. A crisp, sunny morning can quickly give way to a blustery, driving rain by lunchtime, and a calm evening can surprise you with a sharp drop in temperature. This unpredictability means that reliable protection isn’t just nice to have; it’s absolutely essential. Without adequate shelter, you’re at real risk of hypothermia, even in seemingly mild temperatures, especially if you get wet and the wind picks up. It is easy to get caught out on Dartmoor during what was forecast to be a mild autumn day. The rain can come in sideways, and within an hour, you can be shivering uncontrollably despite wearing decent waterproofs. Scrambling to get a quick tarp shelter up can still be a close call. That scenario really hammers home the critical importance of being able to get a shelter up quickly and effectively.
A good shelter keeps you dry, which in turn helps you stay warm. It breaks the wind, which is a massive factor in heat loss, and it provides a safe, comfortable space to rest and recover. Ground insulation matters just as much, because cold earth will pull heat from you quickly even when the roof is sound. Think of your shelter as a temporary base where you can get dry, regroup, and prepare for whatever the British countryside throws at you next. If you’re keen to learn more about a broader range of outdoor skills, you might find our foundational skills guide a helpful read too.
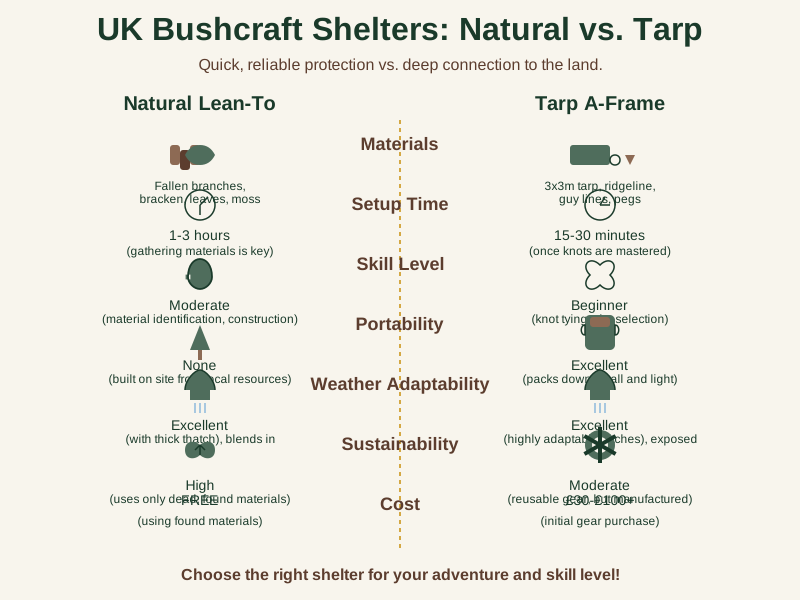
Natural vs. Tarp Shelters: A Quick Comparison
| Feature | Natural Lean-To | Tarp A-Frame |
|---|---|---|
| Materials | Fallen branches, bracken, leaves, moss | 3x3m tarp, ridgeline, guy lines, pegs |
| Setup Time | 1-3 hours (gathering materials is key) | 15-30 minutes (once knots are mastered) |
| Skill Level | Moderate (material identification, construction) | Beginner (knot tying, site selection) |
| Portability | None (built on site from local resources) | Excellent (packs down small and light) |
| Weather Adapt. | Excellent (with thick thatch), blends in | Excellent (highly adaptable pitches), exposed |
| Sustainability | High (uses only dead, found materials) | Moderate (reusable gear, but manufactured) |
| Cost | Free (using found materials) | £30-£100+ (initial gear purchase) |
Part 1: Natural Shelters – Your Woodland Resource
Natural shelters are brilliant because they teach you to work with what the land provides, fostering a deeper connection to your surroundings. The lean-to is often the best starting point for beginners – it’s simple, effective, and uses natural features to its advantage.
Finding the Right Spot (Siting Considerations for Natural Shelters)
Before you even think about gathering materials, the most crucial step is choosing your site. A good location can make or break your shelter’s effectiveness. There are four key things to consider when siting a natural shelter:
- Look for natural windbreaks: Banks, large rocks, or dense stands of trees can provide excellent protection from the prevailing wind. Pitch your shelter with its back to the wind.
- Avoid low-lying areas: These spots are magnets for cold air, which sinks, and they’re also prone to collecting water and flooding during heavy rain. You want slightly elevated, well-drained ground. The UK Met Office provides detailed local forecasts, so checking this before you head out can give you a real advantage in anticipating potential water issues.
- Consider proximity to resources: You’ll want water and firewood nearby, but ensure your fire is a safe distance from your shelter.
- Check for overhead hazards: This is absolutely non-negotiable. Scan the canopy above for ‘widowmakers’ – dead branches that could fall in high winds or heavy rain. Many beginners once nearly set up under a massive dead branch that looked stable until a gust of wind made it creak ominously. Always look up! The UK’s Health and Safety Executive (HSE) regularly publishes guidance on tree safety, reminding us that decaying branches can be incredibly dangerous.
Gathering Materials (The Crucial Bit!)
For a sturdy, effective natural shelter, you’ll need three main types of materials. This is where your knowledge of UK woodlands comes in handy.
- Main Ridgepole: This is the backbone of your lean-to. You’ll need a sturdy, relatively straight fallen branch, long enough to provide decent head clearance and width for your shelter. Look for deadwood – it’s lighter and easier to work with than green wood, and it’s much more sustainable. Always check local rules about gathering wood; generally, fallen deadwood is acceptable for temporary structures in many areas, but cutting live wood is a definite no-no unless you have explicit permission.
- Rafters: These are numerous smaller branches that will lean against your ridgepole, forming the skeleton of your roof. Again, fallen branches are ideal. You’ll need a good stack of them.
- Thatching/Insulation: This is the absolute key to keeping warm and dry in the UK. You need a thick, dense layer of natural material to shed water and trap air for insulation.
- Ferns: Bracken is incredibly plentiful across much of the UK, especially in late summer and autumn. It’s fantastic for thatch.
- Leaf litter: Deep piles of dry leaves (oak, beech, etc.) are excellent insulators for both the roof and for ground insulation inside.
- Moss: Sphagnum moss, if available, is incredibly absorbent and insulative, but use it sparingly and sustainably. The Woodland Trust advocates for sustainable foraging, reminding us that sensitive ecosystems need protection.
- Pine needles: If you’re in a conifer forest, a thick layer of pine needles can also work well.
When it comes to UK-Specific Material Focus, always prioritise safe and sustainable sourcing. That means using dead and fallen wood. Never, ever cut live trees unless it’s an emergency and you have explicit permission. For structure, good options include fallen branches from Hazel, Ash, Birch, or Pine. For insulation, bracken, large fallen leaves, and moss are your best bets. What to avoid? Thorny branches (ouch!) and rotten wood that will just snap when you try to use it. If you’re interested in learning more about identifying useful trees and plants, have a look at our introduction to UK plant and tree identification.
Construction Steps (Clear & Concise)
Building a natural lean-to is wonderfully straightforward. Here’s how we usually approach it:
- Find a suitable support: Look for two trees close enough together, a large rock face, or a sturdy fallen log to prop your ridgepole against. This saves you having to build a separate frame. It’s about working with nature, not against it!
- Prop your main ridgepole securely: Lay your main, sturdy branch across your chosen supports. Make sure it’s stable and won’t roll or slip. You might need to notch the supports slightly or use some cordage to secure it if you have any. Think of this as the spine of your shelter – it needs to be solid.
- Lean your rafters against the ridgepole: Start at a good angle – not too steep (which makes it small) and not too flat (which collects water). Overlap them slightly, creating a dense framework. This framework is what will hold your insulating layers, so aim for a good, even spread.
- Layer your insulation material thickly: This is where the magic happens for UK weather. Start from the bottom edge of your roof and work your way up, layering your bracken, leaves, or moss like roof tiles. Each layer should overlap the one below it, directing water downwards and off the shelter. Aim for at least a foot thick for really good waterproofing and insulation. The thicker, the better for keeping out the rain and holding in warmth. Don’t be shy here; this is your defence against a damp night!
“Mistakes Beginners Make” (Natural Shelters)
Most of us have made all of these at some point, so don’t feel bad if you do too!
- Not enough insulation: This is the biggest one. A thin layer of leaves won’t cut it in a proper British downpour. You need bulk. If it looks like it might leak, it probably will! The solution? Go back and gather more. Seriously, double what you think you need.
- Building on damp ground: Cold, wet ground will suck the heat right out of you, even if your roof is waterproof. Always try to find a dry, slightly elevated spot. If you can’t find dry ground, build up a thick mat of dry leaves or bracken under your sleeping area to create a barrier.
- Using flimsy or rotten wood: Your structure needs to be solid. If a branch feels spongy or snaps easily, it’s not going to hold up. Test every piece before you commit to it. Give it a good wiggle; if it feels dodgy, find another.
- Not checking for overhead dangers: Seriously, always look up. A falling branch could cause serious injury. Before you even start, do a 360-degree scan of the canopy and make sure there are no ‘widowmakers’ lurking above.
We remember one time, teaching a group of keen beginners, one chap was so eager to get his lean-to up that he skimped on the bracken. He was proud as punch until a proper drizzle set in, and he ended up huddled under a very leaky roof. We had a good laugh about it the next morning, but it taught everyone a valuable lesson: patience and thoroughness with your thatch are key!
Part 2: Tarp Shelters – Quick, Versatile Protection
While natural shelters are brilliant for honing your bushcraft skills, sometimes you need quick, reliable protection with minimal fuss. That’s where a tarp comes in.
Why Tarps?
Tarps are fantastic because they’re lightweight, incredibly versatile, and can be set up much faster than a natural shelter. They pack down small, offer immediate protection, and are a staple in our kit for any overnight trip. They’re a brilliant bridge between a full-on tent and a purely natural setup.
Choosing a Basic Tarp
For a beginner, a 3x3 metre (10x10 foot) tarp is a brilliant starting point. It’s big enough to provide good coverage for one or two people, but not so big it becomes unwieldy. Look for ripstop nylon or polyester for durability, and make sure it has plenty of strong grommets or reinforced loops around the edges for pitching options. The quality of the material and the strength of the attachment points (grommets or loops) are critical for standing up to UK winds.
Essential Knots (The Only Ones You Need)
You don’t need to be a scout master to pitch a tarp, but knowing a few key knots will make your life infinitely easier and your shelter much more secure. Focus on these three, and you’ll be sorted. Practice these knots at home before you head out! Trying to tie a Trucker’s Hitch for the first time in the dark, in the pouring rain, with cold fingers, is a recipe for frustration. Get them into your muscle memory, and you’ll be chuffed you did.
- Trucker’s Hitch: This is absolutely crucial for tensioning your ridgeline. It gives you mechanical advantage, allowing you to pull your line incredibly taut, which is vital for shedding water effectively and preventing your tarp from sagging in the wind. We use this for almost every tarp setup. A properly tensioned ridgeline can dramatically increase your tarp’s ability to withstand gales, as highlighted by expert outdoor guides like those at the Mountain Training Association.
- Clove Hitch: This is a simple, quick knot for securing a line around a pole or tree. It’s easy to adjust and untie, making it perfect for anchor points.
- Reef Knot (Square Knot): While it’s generally better to use longer lines to avoid joining them, the reef knot is useful for securely joining two lines of similar thickness if you absolutely have to. Just be sure to “dress” it properly so it doesn’t slip.
If you want a more in-depth look at how these skills progress, our UK bushcraft progression path shows where knot work fits as you level up.
Basic Tarp Setups for UK Weather
The beauty of a tarp is its adaptability. Here are a few simple setups that work a treat in the UK:
- The A-Frame: This is a classic for a reason. You run a ridgeline (a length of cordage) between two trees or sturdy poles, then drape your tarp over it like a tent. Secure the corners and sides to the ground with pegs and guy lines. It offers excellent all-round protection from wind and rain. To set up:
- Find two suitable anchor points: Trees are best, about 3-4 metres apart, depending on your tarp size.
- Tie one end of your ridgeline: Use a Clove Hitch to secure it to the first tree. Make sure it’s at a good height for head clearance inside.
- Drape and tension the tarp: Run the ridgeline to the second tree, drape your tarp over it, ensuring one of the tarp’s central loops sits on the ridgeline. Then, use a Trucker’s Hitch to tension the line through that central loop and secure it to the second tree. Get it really taut!
- Peg out the corners and sides: Peg out the four corners of the tarp, pulling them out to create a good, taut pitch. If your tarp has them, peg out the middle points along the long edges for extra stability, especially in windy conditions.
- The Lean-To Tarp: Similar to its natural cousin, this setup is fantastic if the wind and rain are coming from one predictable direction. You pitch one long edge high (using a ridgeline or poles) and peg the other long edge low to the ground. It creates an open-fronted shelter that’s great for cooking in front of, or just enjoying the view while staying dry. This is a personal favourite for a quick brew-up spot!
- The Diamond: This is a quick and easy solo shelter. You tie one corner of your tarp high to a tree or pole, then peg out the opposite corner low to the ground. The other two corners are then pegged out to create a diamond shape, offering a surprisingly spacious and protective personal hideaway. It’s surprisingly good at shedding wind and rain for its simplicity.
UK Weather Nuances: To make your tarp truly effective in our climate, remember these points:
- Pitch low to the ground: This significantly reduces windage and stops rain from blowing underneath. A gap of just a few inches can make a massive difference to comfort on a blustery night.
- Angle to shed rain: Ensure your tarp has a good slope so water runs off easily and doesn’t pool, which can stretch the material and eventually leak. Pooling water is the enemy!
- Use natural features: Don’t be afraid to use trees, banks, or large rocks to help anchor your tarp or provide additional wind protection. They’re there to help you!
- Consider ground insulation: Even with a tarp, the cold ground will steal your warmth. Use a thick layer of bracken or leaves under your sleeping mat for added insulation. This is vital for a good night’s sleep.
“Mistakes Beginners Make” (Tarp Shelters)
We have seen (and made!) these mistakes more times than we can count:
- Not tensioning the tarp properly: A saggy tarp will collect water, flap in the wind, and generally be a miserable experience. Get it taut! If it’s not drum-tight, it’s not right. The solution is usually a better Trucker’s Hitch or adjusting your anchor points.
- Pitching too high: This is a common one. Thinking more head room is better, but it just lets all the wind and rain straight in underneath. Aim for a lower profile; you’re sleeping, not having a tea party!
- Using inadequate knots: Knots that slip or come undone in the night are no fun at all. Practice your Trucker’s Hitch! A knot that fails can lead to a very cold, wet, and frustrating night.
- Not considering ground insulation: You can have the best tarp in the world, but if you’re sleeping directly on cold, damp ground, you’ll still be cold. Always, always prioritise what goes under you.
Picture one blustery night in the Peak District. You might think you’ve pitched your tarp perfectly, but if you rush the Trucker’s Hitch, it might not be quite as taut as it should be. Around 2 AM, a fierce gust of wind can come through, and the whole thing can start flapping like a flag, nearly ripping the grommets out. You then have to get out of your sleeping bag in the dark, in the pouring rain, to re-tension it properly. Lesson learned: always double-check your knots and tension!
Siting Your Shelter: Location, Location, Location
Regardless of whether you’re building a natural lean-to or pitching a tarp, the location you choose for your shelter is critical. It can profoundly impact your comfort, safety, and overall experience.
Let’s quickly recap those key siting principles that apply to any shelter: always consider the prevailing wind direction and orient your shelter to offer maximum protection. Avoid low-lying areas that collect cold air and water – look for slightly elevated, well-drained ground. Always, always check for overhead hazards like dead branches, often called ‘widowmakers,’ which could fall unexpectedly. And finally, think about proximity to resources like water and firewood, but ensure your fire is a safe distance away.
Beyond these practicalities, it’s also crucial to remember Leave No Trace principles. When you choose a spot, think about how you can minimise your impact. Don’t build on delicate vegetation, and try to use existing clearings rather than trampling new areas. Before you even start building, take a moment to check for signs of animal trails – you don’t want to wake up to a herd of deer (or worse, a grumpy badger!) trying to walk through your sleeping area. Some beginners make this mistake, setting up in what they think is a secluded spot, only to be woken by the gentle thud of a fox padding past their head. It was a charming moment, but a reminder to be more observant! Respect farmer’s fields and private land; always ensure you have permission to be there. For more on this, check out our guide on Leave No Trace principles in the UK. Always prioritise safety and minimal impact by choosing a shelter site that is dry, sheltered from prevailing winds, free from overhead hazards, and respects the natural environment.
Safety First: Your Bushcraft Shelter Checklist
Building a shelter is a brilliant skill, but safety should always be your number one priority. A bit of common sense and preparation goes a long way. Here’s a quick checklist to keep you safe:
- Fire Safety: This is absolutely critical. Never build an open fire inside a natural or tarp shelter. The risk of fire or carbon monoxide poisoning is too great. If you have a fire, maintain a safe distance from your shelter, and always clear a wide area around it down to bare earth to prevent sparks from spreading. The UK’s Fire and Rescue Services consistently advise extreme caution with open fires in wild spaces.
- Ventilation: If you’re using a small, enclosed natural shelter (which we wouldn’t recommend for beginners), or even a tarp in certain configurations, ensure there’s adequate airflow. This prevents condensation and, in extreme cases, carbon monoxide build-up if you’re using a tiny stove nearby.
- Structural Integrity: Regularly check your shelter, especially if the weather changes. Wind can loosen guy lines, and heavy rain can weigh down natural thatch. A quick inspection before you settle down for the night can prevent a collapse.
- First Aid: Always carry a basic first aid kit. Small cuts, scrapes, or blisters are common, and being able to treat them promptly makes a huge difference. St John Ambulance offers excellent advice on what to include in a basic outdoor first aid kit.
- Inform Someone: Before you head out, always let someone know where you’re going, your planned route, and when you expect to be back. This is non-negotiable for solo trips.
- Permission: Be aware of land access rules in the UK. On many Forestry England sites, temporary shelters using deadwood are often permissible if you follow Leave No Trace, but wild camping and shelter building might be restricted in National Parks or on private land without explicit permission. Always check local guidance, often available on National Park Authority websites or the GOV.UK land access pages.
We know of a very near-miss where a small fire, which someone thought was a safe distance, flared up unexpectedly due to a sudden gust of wind, sending sparks towards their tarp. Luckily, they were right there and managed to deal with it, but it is a stark reminder of how quickly things can go wrong if you’re not constantly vigilant. For a more comprehensive look at staying safe outdoors, our health & safety guide for UK bushcraft beginners is a must-read.
Related Reading
Mastering Foundational UK Bushcraft Skills: A Beginner’s Practical Guide Shows how shelter building fits alongside fire, knife, and water skills in your core toolkit.
Water Procurement & Purification in the UK Wilderness Pair a solid shelter with dependable hydration planning so every camp is safe and comfortable.
Sources & Further Reading
- The Woodland Trust: For sustainable foraging and UK woodland information.
- Mountain Training Association: For expert advice on outdoor skills and safety.
- UK Met Office: For reliable weather forecasting and understanding UK conditions.
- St John Ambulance: For essential first aid advice for outdoor activities.
Note: This article provides general guidance based on current best practices. For advice specific to your situation, get in touch.
Frequently Asked Questions
Do I need permission to build a basic shelter in UK woodlands?
I treat permission as the first question, not an afterthought. Even for a small temporary shelter, I would check the landowner rules or site guidance first, because access law and local bylaws vary a lot across the UK. If you cannot confirm that it is allowed, pick another place or stick to low-impact practice that does not involve building.
What’s the easiest shelter for a complete beginner to build?
If I were starting from scratch, I would begin with a low tarp A-frame. It is faster to pitch, easier to adjust, and gives you reliable shelter while you learn site selection and tensioning. A natural lean-to is worth learning too, but it takes longer and is less forgiving if you rush the insulation.
How thick does my natural shelter insulation need to be?
For UK rain and cold, I would treat a foot of insulation as a sensible minimum rather than an ideal target. Layer it from the ground up like roof tiles so water sheds off instead of soaking through. If it still looks thin, add more before you bed down, because this is the part beginners most often underestimate.
Can I use a tarp for more than just rain protection?
Yes, and that is one of the main reasons we keep one in our kit. A tarp can block wind, create shade, cover gear, or give you a dry working area for cooking and sorting kit. Just remember that it only solves the overhead problem, so you still need insulation underneath if the ground is cold or wet.
What’s the single most important thing to remember when choosing a shelter spot?
I would put safety ahead of convenience every time. Choose a spot that is dry, out of the prevailing wind, and clear of overhead hazards before you think about comfort or views. If the site feels questionable, move on early rather than trying to make a poor spot work.
Where to Go From Here
By this point, you should have a clear idea of what makes a shelter work in UK conditions: sensible siting, enough insulation, proper tarp tension, and a setup that matches the weather rather than fights it. Start with simple pitches, repeat them often, and pay attention to what failed when conditions changed.
Once your shelter basics feel dependable, the next improvement is usually your wider kit. If you want a simple starting point, our Free Bushcraft Starter Checklist pulls together the gear I would prioritise for early trips.