Bushcraft Knife Carving UK: The 3 Cuts That Actually Matter
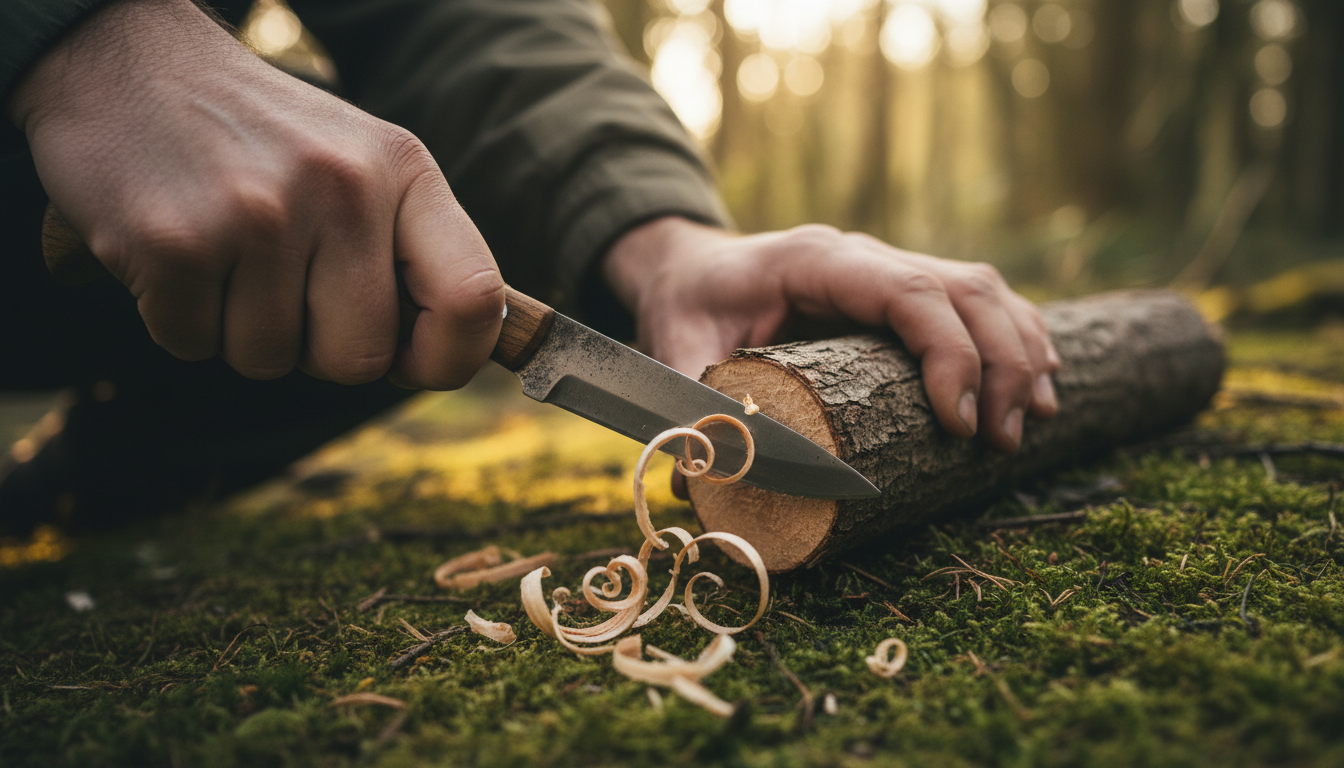
Knife carving gets useful fast in bushcraft. Once you can control a small fixed blade safely, you can make feather sticks, pegs, pot hooks, and simple camp repairs from wood you find on site.
Why Knife Carving Matters in UK Bushcraft
Knife carving in bushcraft isn’t just about making shavings; it’s about developing a deeper connection with natural materials and honing practical skills essential for self-reliance in the British outdoors. It’s easy to think of a bushcraft knife as just a tool for cutting cord or opening packets, but its potential for creation goes so much deeper. When you start carving, you’re not just manipulating wood; you’re connecting with the very materials around you, understanding their properties, and transforming them into something useful. This process builds a profound sense of self-reliance and fosters a truly rewarding craft. It’s a bit like learning a new language, but instead of words, you’re learning the language of the forest.
Think about it: out in the British countryside, whether it’s a damp Welsh hillside or a sheltered Scottish pine forest, being able to improvise and adapt is key. That’s where carving comes in. It’s a fundamental skill for creating a whole host of practical items you might need on a camp. For instance, you can carve fine feather sticks to get a fire going even in damp conditions, which really helps when everything else is wet. You can fashion sturdy tent pegs, strong pot hooks to hang your billy can over a fire, or even a simple spoon or spatula for cooking. Carving skills can also be used to make quick repairs to gear or to create useful toggles for securing a tarp. Being able to make a simple pot hook from a fallen branch is satisfying because it gives you an immediate, practical result. It’s also a skill that contributes directly to bushcraft self-reliance: meeting your needs from the environment around you.
Beyond the tangible items, carving develops a whole suite of essential bushcraft skills. You’ll improve your fine motor control, learning precision and patience with every cut. You’ll gain a deeper understanding of wood grain – how it runs, how it splits, and how to work with it rather than against it. This knowledge is invaluable for everything from splitting firewood to building shelters. It also hones your problem-solving abilities; when a piece of wood doesn’t behave as you expect, you learn to adapt your technique. In the UK context, where our woodlands often present us with damp conditions and specific tree types, adapting your carving approach becomes even more important. It’s all part of building a solid foundation in bushcraft fundamentals. And if you’re keen to learn more about our approach and philosophy, pop over to our about page.
Choosing Your First UK Bushcraft Carving Knife
For UK bushcraft beginners, a fixed-blade knife with a comfortable grip, a blade around 2-3 inches, and readily available steel (like high-carbon) offers the best balance of safety, usability, and legal compliance for carving practice. Deciding on your very first carving knife can feel a bit like navigating a minefield, especially with all the options out there and the specific legal considerations we have here in the UK. But don’t you worry, we’ll walk you through it. The goal is a knife that’s safe, effective, and won’t break the bank.
Legality
First things first, and this is crucial for anyone using a knife in the UK: legality. In England and Wales, it’s generally illegal to carry a knife with a blade over 3 inches (7.62cm) in public without a “reasonable excuse”. For bushcraft, a fixed-blade knife used for legitimate outdoor activities can fall under reasonable excuse, but it’s always about context and responsible ownership. Always transport your knife securely, preferably in a locked box in your vehicle, and only carry it when you’re genuinely heading out for bushcraft. Avoid carrying it in urban areas unnecessarily. You can always check the latest government guidance on GOV.UK for the most up-to-date information on knife law – it’s genuinely important to stay informed, as the rules can be a bit nuanced.
Now, when it comes to the knife itself, we almost always recommend a fixed-blade knife for carving beginners. Why? They’re simpler, stronger, and there’s no folding mechanism to accidentally fail or trap your fingers. For carving, you want that solid, unmoving connection between the blade and the handle. It gives you so much more control and confidence.
Blade shape and size
Next up is blade shape and size. For general carving, a blade around 2 to 3 inches (roughly 5-7.5cm) is ideal. It gives you enough edge for most tasks but keeps the knife compact and very controllable. Look for a drop point or a relatively straight spine design. These shapes give you a strong point for detail work and a flat spine you can push with your thumb for controlled cuts. Many dedicated carving knives, like the Morakniv 106 or 120, feature a Scandinavian (or “Scandi”) grind, which is brilliant for carving. It’s a single, wide bevel that’s incredibly easy to sharpen and creates a very strong edge for push cuts. Avoid anything too large or with a complicated serrated edge – they’re just not practical for fine carving.
Handle comfort
Handle comfort is another big one. You’ll be holding this knife for extended periods, and potentially with wet or cold hands. A comfortable, non-slip grip is absolutely vital. Wooden handles are lovely, but make sure they’re well-finished and offer good purchase. Textured synthetic handles can be brilliant too, as they often provide a better grip when damp. Handles made from materials like rubber or textured plastic generally offer a much more secure grip in typical damp UK weather conditions compared to some highly polished wooden handles. Your hands can get surprisingly sweaty even in the cold, and a good grip prevents slips. Avoid anything too small or too large for your hand, as it’ll quickly lead to fatigue and potentially less control.
Steel type
As for steel type, let’s keep it simple. You’ll mainly hear about carbon steel and stainless steel.
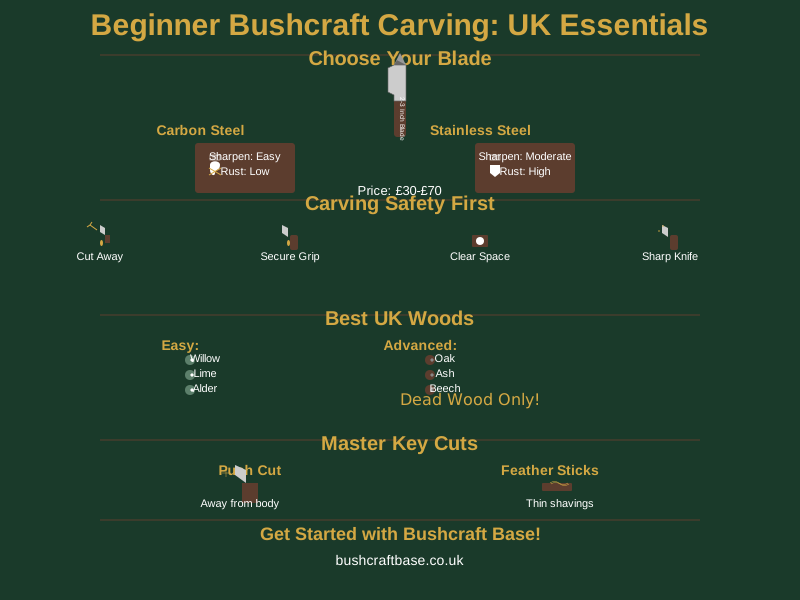
- Carbon steel (like 1095 or O1) is fantastic for carving because it’s generally easier to sharpen to a razor edge and holds that edge well. The downside? It will rust if you don’t clean and oil it regularly, especially in our damp UK climate.
- Stainless steel (like 420HC or 12C27) is much more rust-resistant, which is a bonus, but it can be a bit harder to get that super-fine edge, and it might not hold it quite as long.
For a beginner, we’d lean towards a good quality carbon steel – the ease of sharpening makes learning much less frustrating. The science behind it is pretty straightforward: carbon steel has smaller, harder carbides that form a very fine edge, while stainless steel’s chromium content (for rust resistance) can make those carbides larger and more difficult to align perfectly for a razor edge [Source: Blade Magazine].
Comparison of UK Carving Knife Steel Types
| Steel Type | Sharpening Ease | Edge Retention | Rust Resistance | Best Use for Beginners |
|---|---|---|---|---|
| Carbon Steel | Very Easy | Good | Low | Fast Learning, Fine Edges |
| Stainless Steel | Moderate | Moderate | High | Low Maintenance, Damp Conditions |
UK brands and retailers
When it comes to UK brands and retailers, you’re in luck. There are some brilliant, accessible options. We generally recommend starting with something like a Morakniv 106 (a dedicated carving knife) or a Morakniv 120 (another excellent carver). They’re brilliant value, hold an edge well, and are forgiving if you’re still learning how to sharpen. Plus, they’re readily available in the UK from most outdoor or craft suppliers like Ray Mears Bushcraft or Woodlore. The Opinel No. 8 (the traditional French folding knife) can also be a very basic, affordable starter, but as a folder, it’s not quite as sturdy for heavier carving tasks. For more gear recommendations, check out our other articles on the /blog/.
Cost
Finally, cost. You don’t need to spend a fortune. A sensible budget for your first carving knife is somewhere between £30 and £70. This will get you a really solid, reliable tool that will last you for years. Remember, it’s about getting a good, functional knife, not the most expensive one. Choosing the right bushcraft gear from the outset makes a huge difference.
Essential Knife Safety for Carving
Safe knife carving in bushcraft hinges on the fundamental principle of always cutting away from your body, maintaining a secure grip, and ensuring your workspace is clear and stable. When you’re learning to carve, safety isn’t just a recommendation; it’s absolutely really matters. A sharp knife, used carelessly, can cause a nasty injury, quickly putting an end to your woodland adventures. So, let’s go over the essential rules to keep yourself and those around you safe.
The Golden Rule of knife carving is simple: Always cut away from yourself. This might sound obvious, but it’s incredibly easy to forget when you’re focused on a tricky cut. If the knife slips, it should go into the air or the ground, not into your hand or leg. This means positioning your body, the knife, and the wood so that the blade’s path is always clear of any body parts. This isn’t just a suggestion; it’s a non-negotiable principle that will save you a lot of grief.
Your grip on both the knife and the workpiece needs to be secure. A firm, controlled grip on your knife handle prevents it from slipping. Similarly, ensure the piece of wood you’re carving is held firmly. If it’s a small piece, you might hold it in one hand while carving with the other, ensuring your holding hand is always behind the blade’s path. For larger pieces, brace them against a log or a sturdy surface.
Speaking of surfaces, your work area should be clear and stable. Find a comfortable spot, whether sitting on a log or standing at a workbench, where you have plenty of room. Make sure there are no loose items or tripping hazards around you. And always be aware of your surroundings – are there other people or animals nearby? If so, ensure they are well out of your cutting zone. A clear space means a clear mind, which leads to safer carving.
Sharpening safety is often overlooked, but a dull knife is actually more dangerous than a sharp one. A dull blade requires more force to cut, increasing the likelihood of it slipping and causing injury. Learning to sharpen your knife safely is a core skill. Whether you’re using a simple sharpening stone or a leather strop, always ensure your hands are protected and that the sharpening motion is controlled. Many beginners once see a mate nearly take a chunk out of his thumb because he was rushing a feather stick with a blunt knife. A sharp knife, used carefully, is your best friend. A blunt one is a menace.
When you’re not carving, your knife needs to be carried safely. This means always using a proper sheath that covers the blade entirely and holds the knife securely. Make sure the sheath is attached firmly to your belt or pack so it doesn’t swing around or fall out. When transporting it, especially in a vehicle, keep it out of immediate reach and out of sight.
You might hear experienced bushcrafters talk about ‘batoning’ – using a piece of wood to strike the spine of your knife to split larger pieces of wood. While it has its place for certain tasks, it’s generally not recommended for beginner carving knives or techniques. Carving knives are often designed for fine work, and batoning can damage the blade or handle, or even cause the knife to slip dangerously. Stick to carving techniques for carving, and learn safe and effective axe skills for splitting larger wood. Even with the best safety practices, accidents can happen. Always carry a small, well-stocked first-aid kit when you’re out in the woods, especially when using sharp tools. Knowing how to deal with a minor cut quickly can prevent a small mishap from becoming a big problem. If you ever have questions about safety, don’t hesitate to get in touch with us.
Finally, and this is perhaps the most important, practice mindfulness. When you’re carving, be present and focused. Don’t rush, don’t get distracted, and don’t try to carve when you’re tired, cold, or frustrated. Bushcraft safety is about being aware of yourself, your tools, and your environment at all times. It’s about respecting the tool and the task.
Mastering Basic UK Wood Carving Techniques
Creating effective feather sticks involves understanding the wood’s grain and using controlled push and pull cuts to produce thin, consistent shavings essential for catching a spark. Once you’ve got your trusty knife and understand the basics of safety, it’s time to get down to the really fun bit: learning the actual carving techniques. You don’t need a fancy workshop or years of experience to start; just a bit of patience and the right approach.
Understanding wood grain
The first thing you need to grasp is understanding wood grain. Wood isn’t uniform; it has a ‘grain’ which is essentially the direction the wood fibres run. Think of it like a bundle of straws. If you cut along the straws, it’s easy and smooth. If you try to cut across them or push against them, it’s much harder, and the wood will tear or splinter. When carving, you generally want to cut with the grain. This gives you cleaner, more controlled cuts. You can usually see the grain running along the length of the wood. Pay attention to it – it’ll make your life a lot easier! If you’re struggling to visualise it, imagine peeling a banana; you go with the natural lines, not across them.
Now for the fundamental cuts:
The Push Cut
This is your bread and butter. It’s a controlled cut where you push the blade away from your body, using your thumb on the spine of the knife for extra control and pressure.
- Hold the knife firmly, blade facing away from you.
- Place your carving thumb on the spine of the blade, close to the tip.
- Position the wood so the blade will cut away from your body.
- Apply gentle, consistent pressure with your thumb and push the blade through the wood, letting the blade glide with the grain. This cut is brilliant for removing small amounts of wood with precision. It’s your go-to for most carving tasks, giving you maximum control.
The Pull Cut
This cut involves pulling the knife edge towards you, but with extreme caution and control. It’s used for specific tasks where a push cut isn’t practical, often for shaping or creating concave areas.
- Hold the knife firmly, with the blade angled towards you.
- Brace the wood securely against a stable surface or hold it in a way that your holding hand is behind the blade’s path.
- Use your thumb or fingers on the back of the blade for control, pulling the blade towards you in short, controlled strokes. This cut is much more dangerous, so practice it very carefully and always ensure your body is out of the blade’s way. We rarely use a direct pull cut for general carving, preferring to adjust your body or the wood to make a push cut if possible.
Feather sticks
One of the most iconic and useful bushcraft carving skills is making feather sticks. These are thin, curly shavings attached to a stick, designed to catch a spark and ignite a fire, even with damp wood. They’re a brilliant practice project.
Here’s a detailed step-by-step guide to making feather sticks:
- Select Suitable Wood: Start with a piece of dry, softwood, ideally a dead, standing branch of Willow, Lime, or even a dry piece of pine. The drier and softer, the easier it will be to get those fine curls.
- Prepare the Stick: Hold the stick firmly in one hand. You want to expose a smooth, knot-free section. You might need to remove some bark first.
- Find Your Angle: Position your knife at a shallow angle (around 15-20 degrees) to the wood, with the blade almost parallel to the stick.
- Make the Cut: Using a controlled push cut (or a very gentle pull cut if you’re confident), push the blade with the grain. The key is to apply just enough pressure to shave off a thin layer, but not so much that you cut it completely off.
- Create Curls: As you push, try to keep the blade at a consistent depth and angle, allowing the wood to curl up into a fine “feather.” The thinner and more consistent the curls, the better they’ll ignite.
- Rotate and Repeat: Rotate the stick slightly and repeat the process, working your way around the stick to create a cluster of feathers.
- Keep Practising: Don’t get disheartened if your first feather sticks look a bit chunky. Keep practising on dry, soft wood – you’ll soon get the feel for the right pressure and angle. Your first feather sticks will probably look a bit rubbish, but with practice they become a reliable fire-starting tool. It takes time, but it’s incredibly rewarding, especially when you light a fire with them. This skill is truly essential for UK firecraft skills.
Try sticks
Try sticks are another excellent way to practice. These are simply pieces of wood (often a branch) where you practice different cuts, angles, and techniques without the pressure of making a finished item. You might try making various notches, rounded edges, or different types of shavings. It’s a great way to get a feel for your knife and different wood types. Don’t waste your best wood on practice! Keep a dedicated “try stick” or a pile of off-cuts handy. This lets you experiment freely without worrying about messing up a special piece you’ve earmarked for a project. It’s how most carvers figure out their techniques.
Related Reading
Mastering Foundational UK Bushcraft Skills: A Beginner’s Practical Guide Knife carving is a cornerstone of bushcraft. See how it fits into the broader picture of essential skills with our comprehensive beginner’s guide.
Safe & Effective Axe Skills for UK Bushcraft: Chopping, Splitting & Safety Once you’re comfortable with a knife, learning to use an axe safely is the next step in your wood-processing journey. This guide covers the essentials.
Basic whittling
Finally, basic whittling involves gentle shaving for shaping. This is where you remove small, thin layers of wood to refine a shape, round an edge, or create a smooth surface. It’s about patience and consistent, controlled strokes rather than deep, aggressive cuts. Remember, a sharp knife is crucial for all these techniques; a dull knife will tear the wood and make the job much harder.
Selecting the Best UK Woods for Beginner Carving
For UK beginners, woods like Willow, Lime, and Alder offer the easiest carving experience due to their softness and fine grain, making them ideal for practicing fundamental skills. Choosing the right wood is just as important as choosing the right knife, especially when you’re just starting out here in the UK. Our woodlands are full of diverse trees, and some are far more forgiving for a beginner’s blade than others. The softness, grain structure, and even the moisture content of the wood will dramatically affect how easy it is to carve.
Best bets for beginners
Let’s look at some of the best bets for beginners – ideally, dry and seasoned wood, which is always easier to work with than green wood.
- Willow (Salix spp.): This is a fantastic choice. Willow is very soft and easy to carve, with a relatively straight grain. It’s widely available, often found near water sources like rivers, streams, and ponds across the UK. It’s brilliant for spoons, simple shapes, and general practice. It is always worth keeping an eye out for fallen branches of Willow when you are out walking. They’re usually dry enough to carve straight away and are incredibly forgiving for practicing new techniques.
- Lime / Linden (Tilia spp.): If you can find it, Lime (sometimes called Basswood in other parts of the world) is absolutely superb. It’s very soft, has an incredibly fine, even grain, and holds detail beautifully. It’s often found in parks, older woodlands, and as street trees in the UK. This is a carver’s dream wood.
- Alder (Alnus spp.): Another good option, Alder is soft and workable, with a fairly fine grain. Like Willow, it often grows in damp areas and along riverbanks throughout the UK. It’s a great practice wood, similar in feel to Willow.
- Poplar (Populus spp.): Similar in characteristics to Willow, Poplar is generally soft and easy to carve, with a relatively straight grain. You’ll find various species of Poplar across the British countryside.
Woods to approach with caution (or avoid initially)
Now, let’s talk about woods to approach with caution (or avoid initially). These aren’t impossible to carve, but they’ll be much harder and more frustrating for a beginner.
- Oak (Quercus robur): Our mighty English Oak is incredibly hard, with a strong, often interlocking grain. It’s beautiful, but it’s a real challenge for beginners and can be tough on your knife edge. Save this for when you’ve got a lot more experience.
- Ash (Fraxinus excelsior): Ash is known for its strength and flexibility, but it can be quite tough to carve, especially if it’s green. The grain can be a bit unpredictable, making clean cuts difficult for a novice.
- Beech (Fagus sylvatica): Beech has a moderate hardness and a fine, even grain, so it can be workable. However, it’s significantly harder than Willow or Lime and less forgiving for those learning the ropes.
Finding wood
Finding wood is a key part of bushcraft carving. The most important rule is: never cut live trees. It’s bad for the tree, often illegal, and green wood is much harder to carve anyway. Always look for dead, standing wood or fallen branches. These are usually drier and easier to work with. Make sure you’re aware of local bylaws and landowners’ rules; not all woodlands allow you to collect wood. A good rule of thumb is to only take what you need and leave no trace. Before you head out, it’s worth checking the regulations for any specific woodland you plan to visit. Many Forestry England sites or local nature reserves have clear guidance on foraging or collecting fallen wood. A quick online search can save you a potential telling-off!
Seasoning
Finally, a quick word on seasoning. Seasoned wood is wood that has been allowed to dry out naturally over time. Dry wood is significantly easier to carve than ‘green’ (freshly cut) wood, which still contains a lot of moisture. If you find a particularly nice piece of green wood, you can take it home, remove the bark, and let it air-dry for a few weeks or months in a sheltered spot. This process makes it much more pleasant to carve and reduces the risk of it cracking later. For identifying UK tree species, resources like the Woodland Trust website or BBC Nature are brilliant. The Woodland Trust, for example, reports that there are over 60 native and naturalised tree species in the UK, offering a fantastic variety for carvers once you know what to look for!
Simple Beginner Carving Projects for UK Bushcraft
Simple bushcraft carving projects like a functional pot hook or a toggle peg allow beginners to practice essential shaping and detailing techniques using readily available UK wood. Once you’ve got a feel for your knife and the basic cuts, it’s incredibly rewarding to start making something genuinely useful. These aren’t about creating works of art (yet!); they’re about building confidence and demonstrating the practical application of your new skills. Here are a few simple projects perfect for UK bushcraft beginners. Don’t aim for perfection on your first attempt. The goal is to learn the process, understand how the wood behaves, and finish with something functional, even if it’s a bit rustic. Every project is a learning experience, not a competition!
Project 1: The Pot Hook
This is a fantastic first project because it’s highly functional and teaches you basic shaping.
- Skill focus: Basic shaping, making a functional hook, understanding wood strength.
- Wood: A medium-sized dry branch of Willow, Alder, or Poplar, roughly 1-2cm thick and about 30-40cm long. Look for one with a slight natural curve if you can, as this can help with the hook.
- Steps:
- Prepare the Branch: Use your knife to de-bark the branch if necessary, and smooth out any rough spots.
- Point One End: Carefully carve one end of the branch into a sturdy point. This will be used to stick into the ground or hang from a larger branch. Use push cuts, working evenly around the branch.
- Carve the Hook: About 10-15cm from the pointed end, begin to carve a hook shape. You want a strong, open curve that can hold the handle of a pot or billy can. Use a series of push cuts to remove wood from the inside of the curve, gradually deepening and shaping the hook. Remember to always cut away from your body.
- Refine: Once the basic hook shape is there, use smaller, more controlled cuts to smooth out the curve and ensure it’s strong enough to bear weight. A first spoon is often more of a rough scoop, but it still works. The key is to start simple, like making a pot hook. It’s a tangible result that proves you can do it.
Project 2: The Toggle/Peg
Toggles are incredibly versatile in bushcraft for securing tarps, closing bags, or as simple buttons.
- Skill focus: Rounding, refining shape, and carefully carving or drilling holes.
- Wood: A small, dry branch, about 1-1.5cm thick and 5-10cm long. Willow or Lime are ideal.
- Steps:
- Cut to Length: Cut your chosen branch to the desired length for your toggle (e.g., 5-7cm).
- Round the Ends: Use gentle whittling cuts to round off both ends of the stick.
- Shape the Body: You can leave it cylindrical or gently taper the middle section to give it a more refined shape. The goal is a smooth, comfortable item.
- Carve/Drill Holes: This is the trickiest bit. You’ll need two holes, usually near the ends, for cordage. If you don’t have a drill, you can carefully carve small, shallow depressions on opposite sides and then use a small, sharp knife tip (or a ferro rod striker if it has a sharp point) to twist and bore through the wood. Be incredibly careful here, always supporting the wood and cutting away from your hands. This project teaches precision and the importance of a smooth finish.
Project 3: The Basic Spoon Blank
Don’t worry, we’re not aiming for a finished, polished spoon here, just the initial rough shaping.
- Skill focus: Rough shaping, understanding concave carving, and material removal.
- Wood: A slightly larger piece of Lime, Willow, or Alder, roughly 3-4cm thick and 15-20cm long. You might need to split a larger log to get a suitable piece.
- Steps:
- Outline the Shape: Use a pencil to draw a rough spoon outline (bowl and handle) onto one side of your wood.
- Rough Cut the Profile: Using strong push cuts, carefully remove wood from around your outline, working to get the basic profile of the spoon. Don’t go too deep yet; you’re just defining the outer shape.
- Begin the Bowl: Now, focus on the bowl area. Using your knife, start to carefully remove wood from the centre of where the bowl will be. You’ll be making shallow, controlled cuts, gradually hollowing out a concave shape. This is where a slightly curved blade or a dedicated hook knife (for later) would be useful, but you can start with your straight blade.
- Continue Shaping: Keep removing wood, slowly refining the handle and the bowl. The goal for a beginner is just to get the basic form and a discernible hollow for the bowl. Don’t worry about perfect smoothness or deep hollowing at this stage. This project helps you think in three dimensions and understand how to remove larger amounts of material. These simple projects are a brilliant way to solidify your skills and give you something tangible to show for your efforts, encouraging you to keep going with your bushcraft projects.
Maintaining Your Bushcraft Knife
Regular cleaning, safe sharpening using a strop or simple stones, and occasional oiling are key to maintaining a bushcraft knife’s performance and longevity in UK conditions. Your bushcraft knife is an investment, a reliable companion in the woods, and just like any good tool, it needs a bit of looking after. Proper maintenance isn’t just about keeping it shiny; it’s about ensuring it performs safely and effectively every time you use it.
First up, cleaning. After every use, especially if you’ve been cutting anything sappy, resinous, or food-related, give your knife a good clean. Simply wipe the blade down with a damp cloth to remove any debris, then dry it thoroughly. This is particularly important for carbon steel blades, as they will rust if left wet. A quick wipe with a clean cloth or even a bit of tissue is usually enough. For wooden handles, just wipe them clean and dry. A bit of warm, soapy water can work wonders if it’s really grimy, but always rinse and dry immediately.
Next, and perhaps most crucial, is sharpening. A sharp knife is a safe knife, remember? A dull blade requires more force, increasing the risk of slips and injury. You don’t need a complex, expensive sharpening system to start.
- Stropping: For maintaining an already sharp edge, a leather strop with some polishing compound is brilliant. You simply pull the blade away from the cutting edge (never into it) across the leather, alternating sides. A quick strop on a belt loop can keep an edge going in the field.
- Sharpening Stones: For bringing back a duller edge, a basic sharpening stone (a ‘whetstone’) is all you need. Start with a coarser grit to establish the edge, then move to a finer grit to refine it. The key is to maintain a consistent angle, usually around 20-25 degrees for a bushcraft knife, as you push or pull the blade across the stone. It takes practice, but a simple stone and steady technique are enough to learn well.
Finally, oiling. This is mainly for carbon steel blades and wooden handles.
- Carbon Steel Blades: To prevent rust, after cleaning and drying, apply a very thin coat of oil to the blade. Food-safe mineral oil is a good choice if you use your knife for food prep. Linseed oil (boiled linseed oil, not raw) is also excellent for protecting both the blade and wooden handles. Even a tiny dab of olive oil works in a pinch, though it can go rancid over a long time. The goal is a thin barrier against moisture.
- Wooden Handles: Wooden handles can dry out and crack over time. A periodic application of linseed oil will nourish the wood, prevent it from drying, and enhance its grip. Just wipe it on, let it soak for a bit, then wipe off any excess. This keeps the wood supple and comfortable in your hand.
By incorporating these simple maintenance steps into your routine, your bushcraft knife will serve you faithfully for years to come, always ready for your next carving adventure.
Sources & Further Reading
- GOV.UK: For the most up-to-date official guidance on UK knife law and responsible ownership.
- Blade Magazine: An industry authority on knife steel properties and metallurgy.
- UC Berkeley Environmental Health & Safety: Research on blade sharpness and safety, highlighting the dangers of dull tools.
- The Bushcraft Journal: Provides context on bushcraft principles like self-reliance in outdoor living.
- Woodland Trust: An excellent resource for identifying native UK tree species and understanding their properties.
Note: This article covers general principles and tips. For advice specific to your situation, get in touch.
Frequently Asked Questions
Is it legal to carry a fixed-blade knife for bushcraft in the UK?
If you are carrying a fixed-blade knife for bushcraft, make sure the reason is obvious and legitimate: travelling to site, using it there, then packing it away again. In the UK that usually comes down to having a reasonable excuse and behaving responsibly throughout. I would still check the current GOV.UK guidance before relying on old assumptions, because knife law is not something to treat casually.
What’s the difference between whittling and bushcraft carving?
I think of whittling as broad recreational carving, while bushcraft carving is usually tied to a camp task. If you carve a peg, pot hook, spatula, or feather stick, you are making something with an immediate outdoor use. The knife skills overlap, but the goal in bushcraft is function first.
How do I know if the wood I find is dry enough to carve?
Start with dead standing wood or fallen branches that feel light for their size and show no obvious rot. If a small twig snaps cleanly, that is usually a good sign; if it bends, feels spongy, or leaves the blade wet, move on. For practice, choose the driest and straightest piece you can rather than trying to force a poor bit of wood to work.
My knife keeps getting stuck or making rough cuts. What am I doing wrong?
Usually it comes down to three causes: a dull edge, cutting against the grain, or wood that is too green or knotty for the task. I would check the edge first, then rotate the workpiece and test a cut from the opposite direction. If the knife still drags or tears, switch to softer, drier wood instead of fighting the material.
How can I make my carving projects last longer in the UK weather?
If you want a carving to last outdoors, let it dry properly first and then seal it. Boiled linseed oil, beeswax, or a wax-and-oil blend all work well for simple bushcraft projects. The finish will not make the item indestructible, but it will slow down moisture ingress and help prevent cracking.
Taking the Next Step
At this stage, the priority is simple: use a sensible knife, keep your cuts controlled, and practice on forgiving wood. If you can make clean feather sticks, pegs, and rough camp tools safely, you are already building the right foundation.
If you want a short checklist for your first outings, our Free Bushcraft Starter Checklist pulls together the core kit and safety basics in one place.