Upside Down Fire Lay for Wet Conditions UK
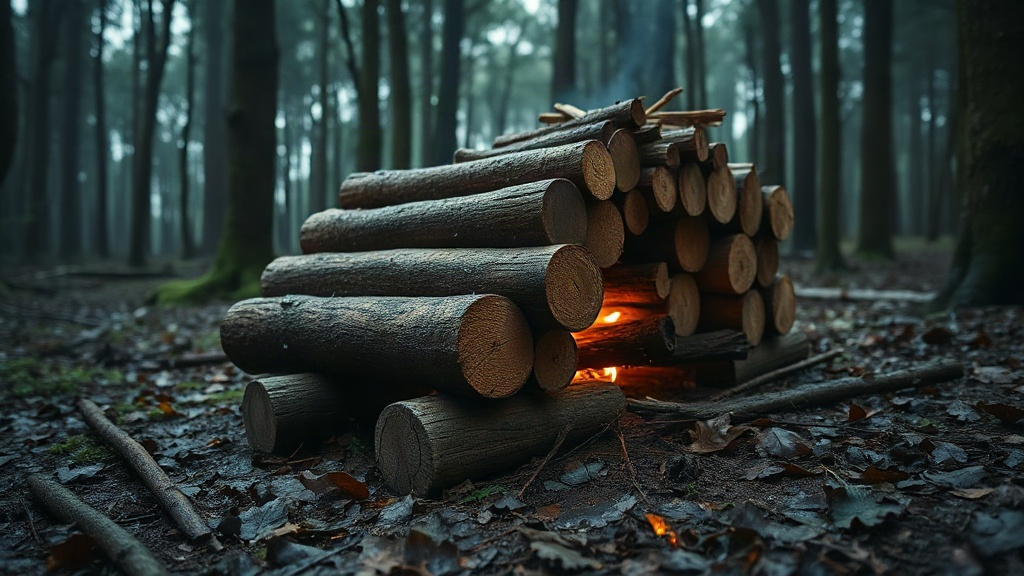
The upside-down fire lay reverses the conventional approach: instead of placing the largest fuel at the bottom with heat travelling upward through progressively wetter wood, it positions the biggest logs at the base and builds downward-burning combustion from a dry ignition point at the top.
It’s not a magic trick. It won’t revive genuinely rotten wood or substitute for dry tinder. But when everything around you is damp—the kindling, the logs, the air itself—this is the lay that keeps a fire going without constant attention. Here’s how it works and when it’s the right choice.
Why traditional methods fail with wet fuel
A standard fire lay burns from the bottom up: you light tinder, the tinder heats kindling, the kindling heats small sticks, and the sticks eventually ignite the logs. That chain works fine when your fuel is dry. When it’s damp, the process breaks down at the first link.
Wet wood doesn’t just resist burning; it absorbs heat. Every joule your flame produces goes into boiling off water before the wood itself can ignite. The result is a fire that smoulders, smokes heavily, and never really takes hold. A lighter flame doesn’t last long enough to overcome that, and even a ferro rod—which throws sparks hot enough to light damp tinder—struggles if the tinder itself is too wet.
There’s a learning curve with ferro rods that many don’t anticipate. The angle and speed of the strike matter far more than the force behind it. Get the striker angle wrong and the sparks scatter instead of shower. This is why practising at home in dry conditions before relying on one in the field makes sense. A wet woodland in the rain is a difficult classroom if you haven’t built a few fires and learned what a good spark shower looks and sounds like.
The other variable is wind. In a sheltered spot, a lighter might hold a flame long enough to get something started. Add wind and rain together and the flame never stabilises—it gets blown out or cooled down faster than it can build. This is the combination that defeats most beginners, and it’s the combination the upside-down lay is built to handle.
How the upside-down principle works
Most fire lays work by heating fuel from below. The upside-down lay works the opposite way: it burns from the top down.
📺 Watch: The ‘Upside-down Fire’ - Survival Campfire Build
Imagine a pyramid of wood—the largest logs at the base, medium logs above those, kindling at the top, and your tinder and feather stick at the very peak. You light the top. The dry tinder and kindling create an intense initial flame that drives heat downward into the layers below. As the top layer burns, it drops hot embers onto the next layer of wood, which has been pre-dried by the radiant heat falling onto it. That layer then ignites, drops more embers, and the process continues downwards.
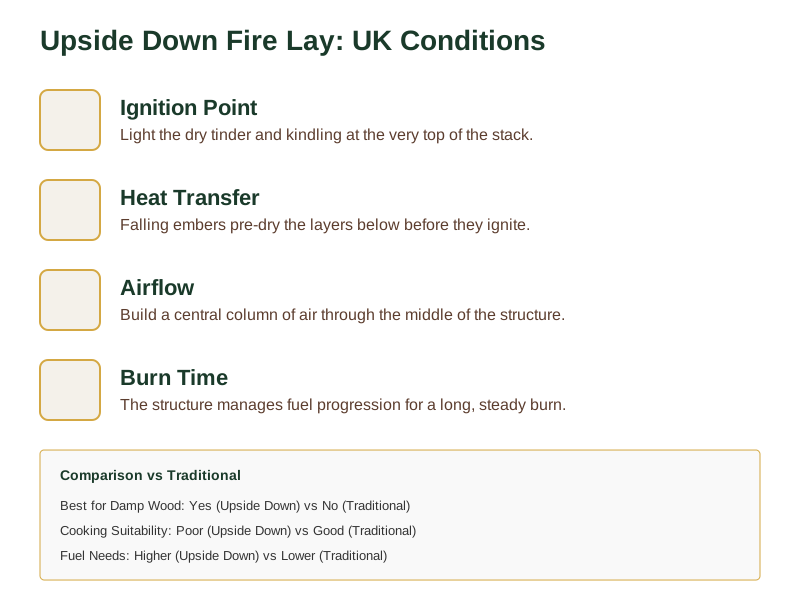
The mechanism is simple and it works because heat rises; the fire is always heating fuel that hasn’t caught yet, driving moisture out of it before it needs to ignite. A properly constructed upside-down lay can burn for extended periods without intervention, because the structure itself manages the fuel progression. You aren’t adding wood every ten minutes; the fire is working through what you’ve already stacked.
This is why it handles damp wood better than a traditional lay. A log at the base of an upside-down fire isn’t being asked to ignite directly; it’s being pre-heated by embers falling from above, which dries its surface moisture before the heat needs to penetrate further. That surface dryness is often enough to let the log eventually catch, even if the inner wood is still green.
It isn’t a guaranteed fix for any damp wood, but it tilts the odds in your favour in a way a teepee or cabin lay simply doesn’t.
Constructing the fire lay
Here’s what you’re working towards: a stable, self-feeding structure with the largest material at the base, progressively smaller fuel going up, and your tinder and feather stick at the very top. The key detail that most descriptions miss is airflow—you need a central column of air running through the middle of the stack for the fire to breathe.
Start by sorting your fuel into three piles. Your tinder and feather stick go in one. Your kindling—split sticks, thin branches—goes in another. Your fuel logs, from thumb-thickness up to wrist-thickness, go in the third. Sort them first: you won’t have time to find the right stick once the fire is partially built.
Place your largest, driest logs at the base, laying them across the ground parallel to each other with a gap between them for airflow. Add a second layer of medium logs at right angles to the first, again leaving gaps. You’re building a log-cabin grid that forms a stable platform and allows air to move through the base.
Now add smaller fuel on top—thinner sticks and kindling—in the same cross-directional layering. This isn’t a teepee; it’s a stack. Work up until you’re placing kindling that’s roughly pencil-thickness. The whole structure should feel solid; you shouldn’t be able to push it over with a firm hand.
Finally, add your driest tinder and feather stick on top in a loose pile. Make sure the feather stick shavings are pointing upward so they catch the sparks directly. Leave a small gap in the very centre of the top so you can see down into the structure; this is where the initial flame needs to reach.
Light from the top. Strike your ferro rod and shower the sparks directly onto the feather stick and tinder. The flame needs to establish at the peak and burn downward, so resist the urge to light from below or from the side.
The critical point: the tinder and kindling at the top must be genuinely dry. Feather stick, birch bark, dry cattail fluff—whatever you have. The rest of the structure can be damp on the surface; the falling embers will deal with that. But the ignition point needs to be dry or the whole thing fails at the start.
Before you head out, make sure your kit is ready. Download the free Bushcraft Starter Checklist —it covers fire-lighting kit, tinder preparation, and the checks worth doing before any trip.
Limitations and when to choose differently
This lay isn’t a universal replacement for every fire. It has specific weaknesses.
It requires more fuel to build than a traditional lay. You need a decent quantity of kindling to get the top layer established, and you need larger logs to form the base. If you’ve only collected enough fuel for a small fire, use a different lay—a Dakota fire hole, for instance, is better suited to conserving fuel for a small, hot fire.
It’s not suitable for cooking. The upside-down lay doesn’t produce a stable bed of coals in the way a traditional fire does, and the flame moves downward through the structure rather than presenting a consistent cooking surface. If you need to cook, build a separate fire or use a tripod setup.
It doesn’t fix genuinely wet fuel. The mechanism works because falling embers pre-dry the next layer. If your logs are waterlogged—pine that’s been sitting in a puddle, or wood that’s visibly rotted—there’s not enough dry surface to catch and hold heat. The fire will struggle. A good upside-down lay handles surface moisture; it doesn’t resurrect saturated fuel.
The mistake that shows up most in forum discussions is building the lay on wet ground without any platform. The base logs sit in direct contact with damp earth, which cools the whole structure from below and prevents the upward airflow the fire needs. Put your base logs on a platform—a fallen trunk, a row of stones, even a pile of dry sticks—so air can circulate underneath.
Common questions answered
Is the upside-down lay suitable for cooking?
No—this lay is designed for heat output and long burn time, not for the steady flame and coal bed that cooking requires. A traditional teepee or log cabin fire gives you a more manageable flame for cooking. Consider maintaining a separate small fire for food preparation while using the upside-down lay primarily for warmth.
What burn time can I expect?
With decent-sized base logs, an upside-down fire can sustain itself for hours without intervention. Larger logs and a fuller structure extend that further. The fire manages its own fuel progression, so once it’s established you can leave it to work—which is exactly the point of using this lay when you need your attention elsewhere.
Can I use greenwood for the base logs?
Partly. Greenwood with surface moisture will work—the falling embers dry the surface before the log needs to ignite. Greenwood that’s genuinely waterlogged won’t. A useful indicator: if a log feels unusually heavy for its size or shows visible moisture when split, it’s probably too wet. Dry split kindling on top remains essential regardless of what the base logs are like.
Comparing fire lay approaches
| Feature | Upside-Down Lay | Traditional Lay |
|---|---|---|
| Ignition Point | Top (tinder/kindling) | Bottom (tinder/kindling) |
| Fuel Progression | Burns downwards | Burns upwards |
| Best For | Damp wood & long burn | Dry wood & cooking |
| Fuel Requirement | Higher (needs base logs) | Lower (conserves fuel) |
| Airflow Needs | Central column required | Standard open air |
| Cooking Suitability | Poor | Good |
Building with intention
The upside-down fire lay rewards careful construction rather than rushed assembly. Unlike quicker methods that prioritise speed, this approach asks you to build slowly and methodically, with each layer placed deliberately to create a self-sustaining combustion sequence.
What makes it effective is the precise stacking order: large base logs first, then medium fuel, then kindling, with your driest tinder at the very top. The sequence matters because each layer supports the one above while being prepared by the one below. There are no shortcuts—if you rush the build or mix up the layers, the downward-burning mechanism fails.
Use this checklist as your build-sequence card, working through each step in order without skipping ahead:
- Sort all fuel into three distinct piles before starting
- Create a stable base platform with adequate airflow
- Stack layers in descending size order
- Ensure top-layer tinder is completely dry
- Light from the very peak, not the sides
This methodical approach pays off when conditions are against you. While other fire lays demand constant attention, a properly built upside-down fire manages itself once lit, freeing you to focus on other camp tasks.
If you’re heading out and want a clear reference for what to have ready before you even strike a spark, Download the Free Bushcraft Starter Checklist —it covers fire-lighting kit, tinder preparation and the checks that make the difference between a fire that lights and one that doesn’t.
Related Guides
For broader context on fire lay selection, see our UK Firecraft: Choosing and Building Fire Lays for UK Woodland .
Reference materials
Note: General guidance only, verify details with a qualified professional or official source.