Star Fire Lay for Slow Burning Overnight UK
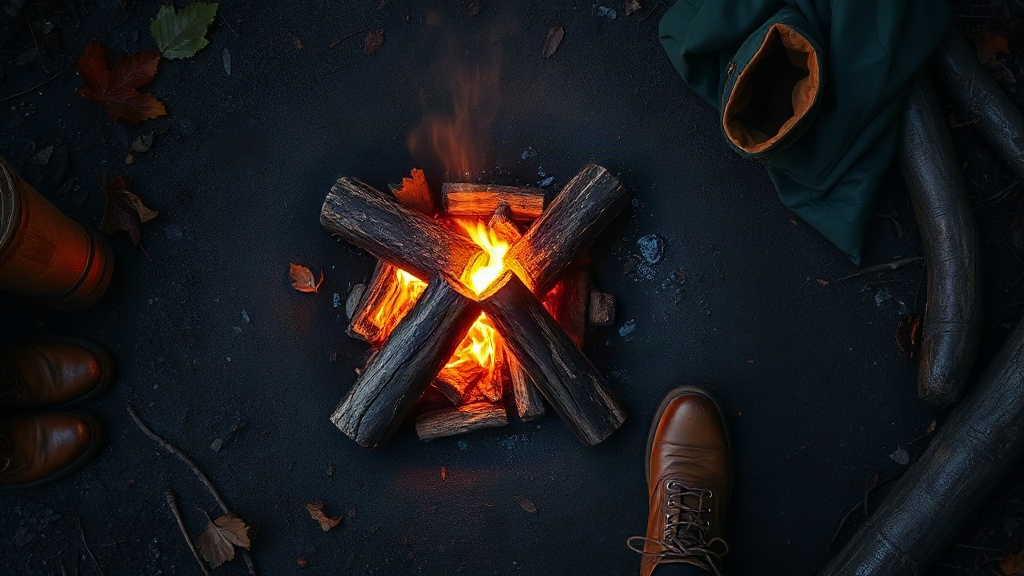
The star lay throttles the air supply to the fire, turning a quick blaze into a slow, lasting burn.
Most fire failures in British woodland aren’t about the wood—they’re about airflow. A standard log pile burns from the top down, and every time you add a log, you disturb the structure and choke the flame. The star lay works the opposite way: the fire burns at the centre, and the logs are arranged like spokes on a wheel with their tips pointing inward.
As the fire heats the wood, the logs slowly burn back from the tip toward the base. You push them inward to feed the fire without moving or relighting anything. One person with a stick can keep a well-built star lay running for hours. That self-feeding quality is why it is a lay worth learning.
The geometry also concentrates heat. With logs stacked close together, you get a hot, focused flame that’s genuinely useful for cooking—something a wide, flat fire never quite manages. Because the logs point inward rather than outward, stray sparks stay contained. That matters more than people think when you’re sitting next to bracken, birch, or heather in dry conditions.
UK woodland gives you plenty to work with. Birch, oak, and ash all burn well in this lay. If you have managed to get your hands on some dry kindling—birch bark, dry grass, dead standing twigs—you can build a base that lifts the fire clear of damp ground.
Building the Star: How the Fire Feeds Itself
Building one isn’t complicated, but the order matters.
📺 Watch: Firemaking Fridays; Star Fire Lay
Clear the ground first. You need a flat, open spot—a fire pit or ring is ideal, but even a scraped patch of bare earth works. The ground needs to be dry enough that moisture won’t kill the initial flame, and you want nothing overhead. A clear safety zone around the fire is commonly advised.
Build the kindling platform. This is the step beginners skip, and it’s the reason most fires fail on damp British ground. Lay a small platform of bone-dry material—birch bark shavings, dry grass, fine dead twigs—directly on your cleared ground. This lifts the flame off the cold, wet surface and gives it something to catch. Without it, you are fighting the ground from the first spark.
Place the first log horizontally. This is your foundation. Lay it flat and stable; the whole structure rests on this.
Stack the remaining logs to form the star. Place the next log vertically against the first, the next horizontally, and continue until you have a wheel shape with the kindling platform at the hub. The tips of all the logs should point inward, meeting roughly above the centre of the platform. Keep them close together; the fire needs to climb from the kindling up onto the wood, and gaps make that harder.
Light the kindling. Torch the platform at the centre. The flame will climb the tips of the inward-pointing logs and establish itself at the heart of the star.
Feed the fire. As the tips burn back, push the logs inward with a stick or gloved hand. Each log burns from tip to base, so pushing it in feeds the centre without disturbing the flame. Add a fresh log tip-first when the current ones are well alight; push it in alongside the others and let the fire take it.
If you are building this as part of a first trip, check your fire lighting kit before you go. A ferro rod, a tinder tin, and a good lighter give you redundancy, and redundancy matters when you are trying to get a fire going in fading light on unfamiliar ground.
Avoiding Common Mistakes
The star lay is simple, but it isn’t forgiving of shortcuts.
Damp logs will kill it. This failure mode comes up in every beginner’s account. A star lay built on green or damp wood will smoulder, smoke, and go out—no matter how good your kindling platform is. The fire needs dry fuel to burn clean and hot. If you aren’t sure, err on the side of thinner, drier pieces. Thicker logs are for later, once the fire is well established.
Don’t overload. The fire needs to breathe. Adding too many logs at once smothers the flame. Feed it one log at a time, and only when the previous ones are burning steadily.
Keep a safety zone. Have a bucket of water and a shovel to hand. You should be able to extinguish the fire completely before you leave.
Know the legal position. You can only light a fire where you have the landowner’s permission—and that means permission, not tolerance. Check with the landowner or site manager before you go. During prolonged dry weather, seasonal fire bans can apply to heathland, moorland, and some woodland sites, and these are enforced. The underlying principle that dry fuel matters applies outdoors just as it does at home. If you are unsure whether a site allows fires, don’t guess. Ask.
When the Star Lay Fits and When It Doesn’t
The star lay is the right choice in a specific set of conditions.
Use it when you are planning a camp that runs through the evening and into the night, you have the landowner’s permission, you have access to dry or partly dry firewood, and you want a fire that will run for hours without constant attention. For cooking over an open flame, the concentrated heat at the centre of the lay makes it practical to keep a pot or pan steady over the coals.
Don’t use it when the ground is waterlogged or frozen solid, when you are in a high-risk fire area during a drought, when fires are prohibited—such as in a nature reserve or a protected site—or when you need a quick fire and don’t have time to build it properly. Rushing the kindling platform is how beginners end up with a fire that won’t stay lit.
The honest answer is that this lay rewards preparation. If you have dry kindling, dry-ish logs, and a clear evening, it is a very reliable overnight fire you can build in UK woodland. If any of those three things is missing, consider a different approach or a different evening.
Questions Answered
Can I use the star lay in the rain?
Light rain won’t stop a well-built star lay, but heavy rain will. The kindling platform needs to stay dry long enough to catch and sustain a flame. If rain is forecast, bring a tinder tin, keep your kindling dry in a jacket pocket, and have a tarp ready to shield the fire during the initial lighting. Once the fire is established and the logs are burning steadily, a light drizzle is manageable.
How long does a star lay burn?
A well-built star lay with dry logs can last for hours depending on fuel size and dryness. The self-feeding mechanism means you aren’t restarting from scratch every time you add fuel—you just push the burning logs inward and add a fresh one. In practice, a fire built at dusk can see you through to midnight or beyond with minimal tending.
Is the star lay safe for cooking?
Yes—the concentrated heat at the centre makes it one of the better fire lays for cooking. You can steady a pot or pan over the coals, or use the logs as a makeshift grill by laying a green stick across the top. As with any open fire, keep flammable items away from the edges, keep a water source close, and don’t walk away from a cooking fire.
Construction Steps
| Step | Action | Key Detail |
|---|---|---|
| 1 | Clear the ground | Flat, open spot with clear safety zone |
| 2 | Build kindling platform | Lifts flame off damp ground |
| 3 | Place first log | Horizontal foundation |
| 4 | Stack logs in star | Tips point inward, close together |
| 5 | Light kindling | Torch the platform at the centre |
| 6 | Feed the fire | Push logs inward as they burn back |
Next Steps
The star lay doesn’t require expensive kit—just dry wood, a clear space, and the discipline to build it properly. The failure points are predictable: damp fuel, poor airflow, and skipping the kindling platform. All three are avoidable.
If you are planning your first overnight camp and want a straightforward way to check whether your kit is ready, the free Bushcraft Starter Checklist covers the essentials. It is a ten-minute audit that tells you what you are missing before you are standing in a dark clearing working it out the hard way.
The star lay’s slow burn makes it the one lay worth rehearsing before an overnight trip. Run through the pre-dark setup sequence while there is still light: clear the ground, build the platform, and arrange the logs. That practice turns theory into a fire that keeps going.
Related Guides
For more on choosing the right fire lay, see our UK Firecraft: Choosing and Building Fire Lays for UK Woodland .
Sources & Further Reading
Note: General guidance only, verify details with a qualified professional or official source.