Platform Fire Lay on Snow or Wet Leaves UK
As an Amazon Associate we earn from qualifying purchases. Some links on this page are affiliate links, which means we may earn a small commission if you make a purchase.
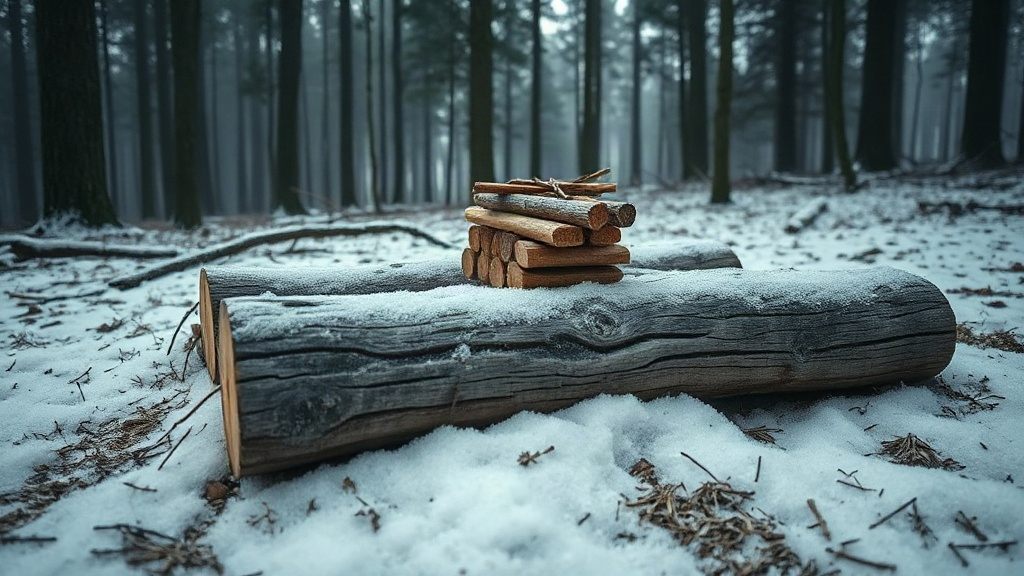
A platform fire lay is essentially a raft that floats the fire above the ground. On snow or wet leaves, the real enemy isn’t the air temperature—it’s the cold, saturated ground beneath your feet.
You’ve gathered your dry tinder, stripped back your best kindling, struck the ferro rod and watched a decent spark land on the material. Then the fire starts to smoke, the snow or wet leaves beneath it begin to weep, and within a minute the flame dies. That’s the point where most beginners give up and assume their kit failed.
The kit is usually fine. The problem is the surface underneath. Snow and wet leaves aren’t just inconvenient ground cover—they actively work against a fire in ways that aren’t obvious until you’ve watched one fail. Compression is the answer. Here’s why it matters and exactly how to do it.
The physics of failure
Loose snow and a carpet of damp leaves look like a flat, workable surface. They aren’t. They behave like insulation and a sponge in roughly equal measure.
Snow is a poor conductor of heat, but a loose pile of it has air trapped between the crystals. When a fire sits on top, that air pocket acts as a barrier—the heat from the flame goes sideways into the snow rather than building upward through the kindling. More practically, the weight of the fire causes the loose snow to compact unevenly, and the fire drops into its own meltwater.
Wet leaves are worse. They’re already saturated, and when heat hits them they release that moisture as steam—a process bushcraft instructors call the sweating effect. That steam chills the tinder from below while the fire above is still trying to establish. On top of that, a layer of wet leaves is essentially a compressible mat. Add the weight of a growing fire lay and it settles, bringing the flame into direct contact with damp material.
The common mistake is treating the surface as a neutral platform. It isn’t. It’s either actively drawing heat away or holding moisture directly against the flame. The fix isn’t a different tinder or a hotter spark. It’s changing what the fire sits on.
Creating a solid foundation
This step separates a fire that lasts from one that dies quickly. The surface needs to be compressed into a solid, level slab thick enough to insulate the fire from the cold and moisture below.
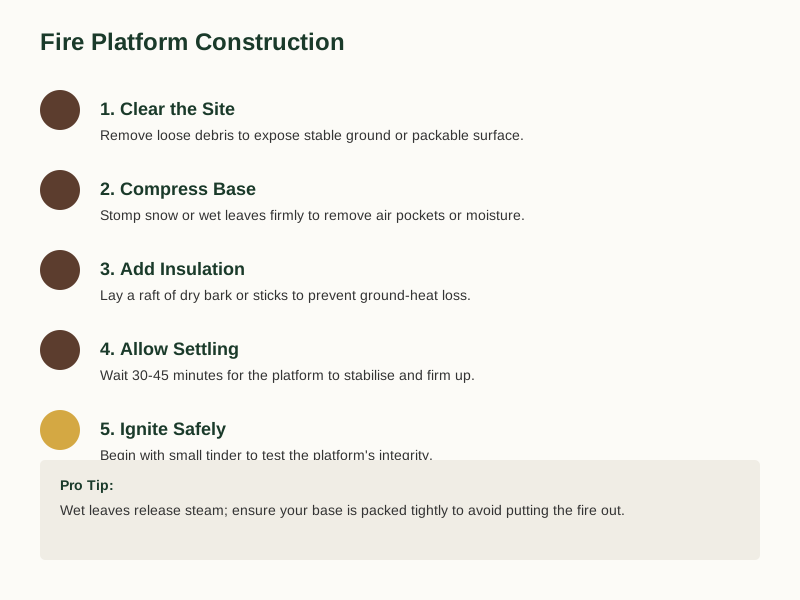
Start by clearing the immediate area. Pick up any loose sticks, twigs or debris from a circle—this gives you room to work without the platform sliding sideways. If you can see bare earth in the centre, clear down to it. If the ground is frozen or waterlogged, clear what’s there and focus your effort on the platform itself.
For snow, the technique is straightforward: stomp it down with your boots or press it firm with a log. Work from the outside of the circle inward, compressing the snow as you go. You’re looking to eliminate the air gaps entirely; the snow should feel solid underfoot before you build anything on it. A compressed snow platform will typically support a fire long enough to establish a good blaze before it begins to melt through from the heat above. If conditions are particularly cold, go thicker. Remember, you cannot light a fire directly on snow without building a platform first. Loose snow collapses under the weight of the fire, drops the flame into meltwater, and extinguishes it. Even packed snow conducts cold from below and will eventually sweat through. Build a compressed platform of solid, firm depth before you strike a single spark.
For wet leaves, the approach is similar but the material behaves differently. Pack the leaves down firmly with your feet into a dense mat, working them until air is expelled and the layer holds its shape under pressure. Then add a top layer of dry bark, birch bark if you have it, or a small raft of split dry sticks. This creates a dry surface for the fire to sit on and also lifts the flame slightly off the saturated layer below. The dry bark step is crucial—without it, even a well-packed leaf mat will eventually sweat through. If you don’t have dry bark, use a stick raft—a small structure of dry split sticks laid flat and layered, which creates a dry working surface without needing bark. The principle is the same: lift the flame off the saturated material.
The platform must be level. A slight tilt means the fire sits lower on one side, concentrating heat on one spot, and you’ll get uneven melting or saturation. Take a moment to check it with your eye before you start building the fire lay.
This step is not optional. It is the entire foundation. If the platform fails, the fire fails—no matter how good your tinder or how practised your ferro rod technique.
Fire lay arrangements for challenging ground
Once you have a solid, compressed base, the platform problem is solved. Now you need to solve the fire lay problem: arranging fuel so that airflow keeps the flame alive and the fire builds properly.
On snow, a pyramid lay or log cabin arrangement works well because both lift the flame off the base and create a self-feeding structure. The pyramid—three or four larger pieces as a base, progressively smaller sticks stacked on top—is simple to build and naturally directs heat upward. The log cabin, where you lay two parallel fuel pieces and stack cross-pieces between them, creates more surface area and burns longer. Either works. The principle is the same: build upward from the platform, not flat against it.
On wet leaves, a reflector fire lay earns its keep. By propping longer sticks at an angle against a larger log or a windbreak, you direct heat toward you rather than upward into empty air, and you keep the flame itself slightly elevated off the saturated surface. The geometry of a reflector naturally creates distance between flame and damp surface.
Avoid using long, thin rounds on a wet platform. They roll. Use pieces thick enough that they won’t shift when you’re adding fuel or adjusting the lay. If it’s windy, place your reflector upwind—it shields the flame and bounces heat back toward you.
If you’re working with a ferro rod, practice striking down onto your tinder rather than up—the sparks fall into the material rather than scattering. It’s a small adjustment that makes a noticeable difference in damp conditions.
Essential wet-weather fire kit
A good fire-lighting kit matters more in wet conditions than almost anywhere else. Your ferro rod needs to be reliable, your tinder dry, and your backup options ready.
📺 Watch: Cold Wet Weather Fire: Build a Raised Platform Fire
The Light My Fire FireSteel Army, Rusty Orange (paid link) is a sensible default—strong consistent sparks and a long track record in outdoor and military kits. The Army version is the one I would pick over the thinner Scout model—bigger diameter, easier to grip, and more fuel per strike. The one caveat is that it requires practice: the rod works well but isn’t instant, and tinder quality matters as much as the spark itself. If you’re trying to light semi-moist material, the rod will struggle regardless of brand. Always use the included striker rather than scraping the rod against a knife spine, which damages the blade.
Ferro rods are more reliable over time—one rod lasts for hundreds of fires—but they require dry tinder and some practice to use well. Stormproof matches are easier to use in the moment and excel in wind and rain, but they’re a consumable. The honest answer is carry both: the ferro rod for consistent use, the matches for when conditions are genuinely grim and your fingers are cold.
See Light My Fire FireSteel Army, Rusty Orange on Amazon → (paid link)
Stormproof matches—Lifesystems makes a widely-stocked version—are worth carrying as a backup in genuinely bad conditions. They light in wind and rain, burn for around 20 seconds, and give you enough flame to get tinder going when a ferro rod requires too much fine motor control with numb fingers. They’re small and light. The trade-off is that they’re expensive for what they are and the verified UK review base is thin, so the reputation rests on the performance spec rather than a deep pool of long-term owner feedback. But the spec is solid: they’re reliable when everything else is failing.
A Waterproof Match Case, Metal Airtight (paid link) is the unglamorous item that actually earns its place. The matches are only as useful as their protection from moisture, and a plastic tub or sealed tin keeps them dry in a rucksack in ways that a jacket pocket won’t.
See Waterproof Match Case, Metal Airtight on Amazon → (paid link)
A small bellows like the Spitfire Pocket Bellows (paid link) can help direct air into damp tinder without disturbing the fire’s structure.
Buy Spitfire Pocket Bellows on Amazon → (paid link)
For more detail on the full fire-lighting kit—what’s worth carrying, what isn’t, and what the budget options look like—there’s a dedicated guide on the site: fire lighting kit .
Site shutdown and restoration
A fire that burns well also needs to be shut down properly. A buried fire that looks dead can reignite and cause real damage.
The method is simple. Pour water over the embers—enough that they’re thoroughly soaked—then stir the material with a stick until no heat is felt when you press your hand near it. This breaks up the ash and exposes any remaining hot spots. Leave it for a while, then check the area again before walking away. If you’re on a site where others might not see it, scatter the cold ash and cover the platform material so the ground looks undisturbed.
If you’ve built a platform on snow, dismantle it and scatter the material. Compressed snow melts slowly and can look artificial to anyone passing. Wet leaf platforms break up easily and blend back in without much effort.
Always check local fire restrictions before you light anything. The rules vary by landowner and by season—a dry spring weekend in the countryside is precisely when fire bans can be in place. Never leave a hot fire unattended; it is how small fires turn into wildfires.
Platform comparison
| Feature | Snow | Wet Leaves |
|---|---|---|
| Primary Issue | Air pockets insulate heat | Saturated material releases steam |
| Compression Method | Stomp with boots or log | Pack firmly with feet |
| Recommended Top Layer | None (solid snow is fine) | Dry bark or stick raft |
| Insulation Duration | Sufficient for blaze establishment | Variable (depends on pack density) |
Next steps for practice
The platform is the one component beginners almost never practise at home. Before your first winter outing, run through this backyard drill: find a patch of damp ground, compress a small platform, and build a miniature fire lay on top. The checklist below covers the essentials—worth having in your rucksack pocket rather than trying to remember everything from memory on a wet hillside.
For a quick reference of the key steps, there’s a free checklist that covers the essentials: Download the Free Bushcraft Starter Checklist .
Related guidance
For more on fire lay selection, see our UK Firecraft: Choosing and Building Fire Lays for UK Woodland .
References
As an Amazon Associate we earn from qualifying purchases. The products linked above are ones we think are worth a look.
Note: General guidance only, verify details with a qualified professional or official source.