UK Bushcraft Skills: What to Learn First (And What Can Wait)
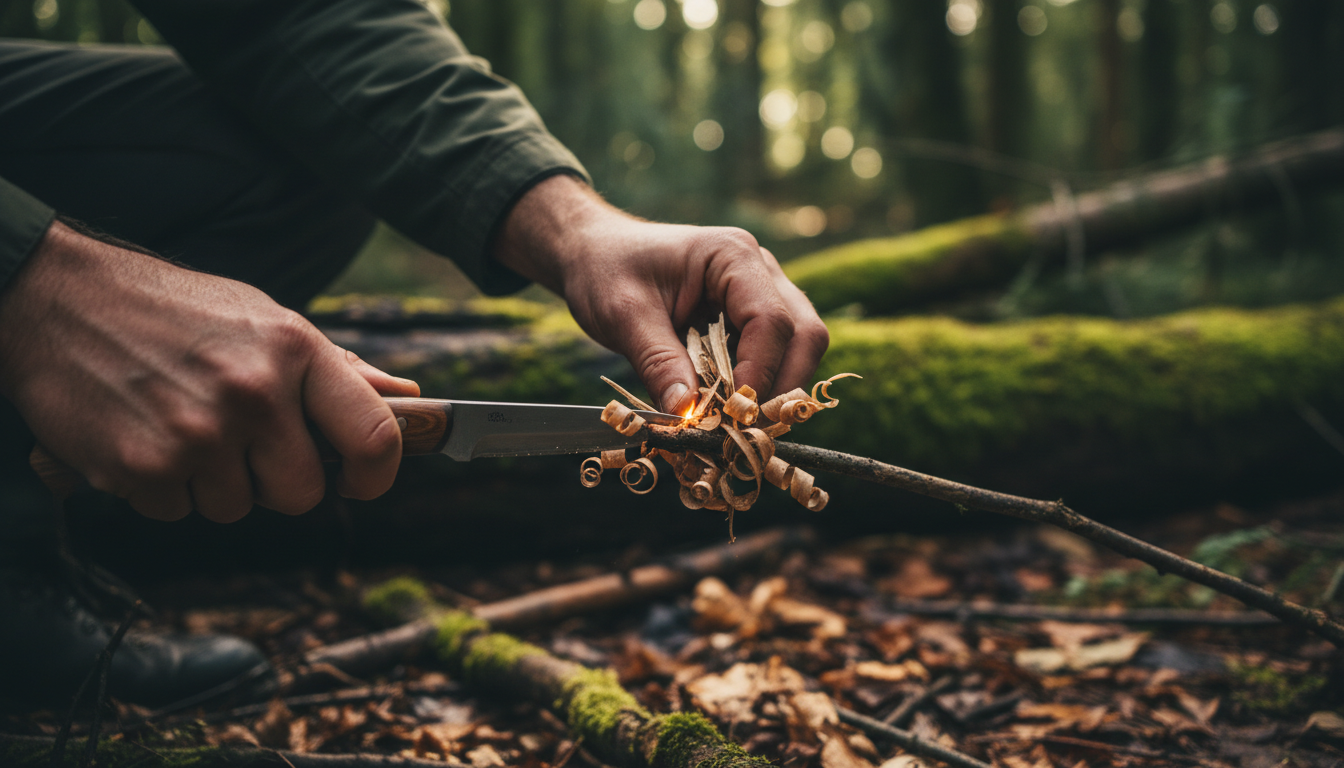
Bushcraft feels complicated at the start because every skill seems to depend on three others. In practice, you only need a few foundations to begin with: fire, knife work, shelter, navigation, water, and the safety habits that hold all of them together.
When you first start poking around the British woodlands, trying to figure out how to light a fire in the pouring rain or build a shelter that doesn’t immediately collapse, it is normal to feel a bit lost. Many beginners feel utterly defeated during a particularly soggy weekend, trying to get a tiny spark to catch on some damp kindling. But here’s the thing: bushcraft isn’t about surviving the apocalypse; it’s about connecting with nature and building confidence through practical skills, even in the damp British outdoors. This guide is your no-nonsense, UK-specific roadmap to the fundamentals that matter first. You can learn a bit more about our approach and what Bushcraft Base is all about over on the about page if you’re curious!
What Exactly Is Bushcraft, Anyway?
Bushcraft, at its heart, is the art of using natural resources and practical skills to live comfortably and safely outdoors, fostering a deeper connection with the natural world. It’s about understanding your environment, working with it, and being able to provide for your basic needs using traditional skills and minimal modern equipment.
Now, you might hear “bushcraft” and immediately think “survival,” but let me tell you, while there’s certainly an overlap, they’re not quite the same. Survival often implies an unexpected, urgent situation where you’re just trying to make it through. Bushcraft, on the other hand, is about thriving, learning, and enjoying the outdoors. It’s about building a competent relationship with nature, not just grimly enduring it. Think of it this way: a survivalist might focus on the quickest way to get rescued, whereas a bushcrafter would be more interested in how to make a comfortable camp, cook a meal, and enjoy the experience using what the land provides, even if they’re only out for a weekend. In the UK, bushcraft is less about ‘survival’ and more about ’thriving’ outdoors, using skills to enhance your experience and connection with nature. It’s about the journey of learning and the satisfaction of self-reliance, not just an emergency.
It is helpful to think of it like this: survival is reacting to an unplanned crisis and trying to get out, while bushcraft is learning in advance how to stay comfortably outdoors.
Here in the UK, with our varied landscapes – from ancient woodlands to wild moors and rugged coastlines – bushcraft takes on its own unique flavour. It’s about adapting to our specific climate, our native flora and fauna, and, crucially, our legal and ethical considerations for land access. We’re not talking about felling trees willy-nilly; we’re talking about respectful interaction, understanding seasonality, and leaving no trace. It encompasses core pillars like fire lighting, shelter building, water procurement, foraging for food, using tools effectively, navigating by natural signs and maps, and, perhaps most importantly, developing a mindful respect for the natural environment around us. It’s a journey of continuous learning, and a brilliant way to deepen your appreciation for our incredible British countryside. You’ll often find that understanding the Countryside Code (which we’ll touch on later) is as important as knowing how to tie a knot. It’s all about being a responsible, knowledgeable visitor to our shared natural spaces.
Bushcraft vs. Survival: Key Differences for UK Outdoors
| Aspect | Bushcraft Approach | Survival Approach |
|---|---|---|
| Primary Goal | Thriving, connection, enjoyment, self-reliance | Emergency, temporary endurance, getting rescued |
| Duration | Planned outings, long-term skill development | Unplanned, short-term until help arrives |
| Mindset | Proactive learning, comfortable living outdoors | Reactive problem-solving, immediate danger mitigation |
| Equipment Focus | Versatile, durable tools, natural resource use | Minimalist, emergency-specific, often improvised |
| UK Context | Respectful interaction, Countryside Code, permission | Adapt to immediate threats, prioritise safety |

Your Essential UK Bushcraft Skills Toolkit
For any beginner wanting to dip their toes into the world of bushcraft, it can feel like there’s an overwhelming amount to learn. But look, you don’t need to become a master overnight. The trick is to focus on a few foundational skills first – the “must-knows” that will build your confidence and give you a solid base to grow from. These are the cornerstones that will enable you to feel safe, warm, and capable in the British outdoors. Mastering fire, knife work, and shelter are the cornerstones of UK bushcraft, providing safety, warmth, and the confidence to explore further.
Let me give you a quick rundown of the areas we’ll be diving into in this guide:
- Fire Lighting: This is often seen as the heart of bushcraft, and for good reason. A fire provides warmth, allows you to cook, boils water for purification, and offers a huge psychological boost. Getting a fire going reliably, especially in our often-damp climate, is a true worth its weight in gold.
- Knife Skills: Your knife is arguably your most important tool in the woods. From preparing kindling to making tent pegs or even simple carving, a sharp, well-handled knife is indispensable. But safety is absolutely absolutely key here – it’s not about being reckless, it’s about being precise and respectful of your tool.
- Shelter Building: Protection from the elements is non-negotiable, especially with our notoriously changeable British weather. Learning to construct a basic shelter, whether from natural materials or a tarp, is a fundamental skill for staying dry, warm, and comfortable.
- Basic Navigation: Knowing where you are, where you’re going, and how to get back is crucial for any woodland adventure. While phones are handy, understanding how to use a map and compass, or even just natural signs, gives you true self-reliance.
- Water Procurement & Purification: We can’t survive long without water, and knowing how to find, collect, and purify water in the UK wilderness is an essential life skill.
- Foraging (with heavy safety caveats): Understanding what edible and medicinal plants nature offers is a fascinating aspect of bushcraft. Our introduction to UK plant and tree identification is a great place to start. However, this is one area where caution is key. You absolutely must be 100% certain of your identification – if in doubt, leave it out! This skill takes years to develop safely.
These skills aren’t just isolated techniques; they work together. A good fire helps dry out materials for your shelter, a sharp knife helps prepare your fire-making materials, and knowing where you are lets you safely explore for the right resources. Our advice is to pick one or two to really focus on first, build that competence, and then gradually expand your repertoire. Mastering fire lighting on a damp Scottish morning feels like a real personal victory – it is not just about the warmth; it is about the confidence it instills. It makes all the difference when you know you can rely on yourself.
Skill 1: Fire Lighting – Taming the British Damp
Fire lighting is arguably the most iconic and rewarding of all bushcraft skills, offering warmth, light, a means to cook, and a huge morale boost. Reliable fire lighting in the UK hinges on meticulous preparation of dry tinder and kindling, even when the weather seems determined to thwart you. Our notoriously damp climate means you can’t just expect to pick up dry sticks and get a blaze going. You need a bit of cunning, a bit of patience, and a lot of preparation.
The biggest challenge in the UK is finding and preparing dry materials. You’ll often be looking for “inner bark” from dead standing trees, which remains dry even when the outside is sodden. Birch bark is a fantastic natural fire starter that peels off in papery layers and burns even when slightly damp (it contains oils that help it ignite). Fatwood, or resinous pine heartwood, is another absolute gem if you can find it in pine forests – it’s packed with flammable resin and throws off a great spark. And then there’s the art of feather sticking: carefully shaving thin curls from a piece of dry wood, creating a feathery surface that catches a spark easily. Many beginners get this wrong for ages before figuring it out, often ending up with wood shavings rather than actual feathers! The trick is a sharp knife and a light touch, letting the blade do the work.
Here’s our step-by-step guide to getting a fire going, even when it’s a bit drizzly:
- Site Preparation: This is crucial for safety and legality. First, check if fires are even permitted where you are. If so, choose a spot away from overhanging branches, dry grass, or anything flammable. Clear a circle of bare earth at least a metre in diameter. If you’re using an existing fire pit, brilliant – use it. Otherwise, consider a small, contained pit (and always leave no trace). Always check local regulations, particularly from sources like Forestry England, Natural Resources Wales, or Forestry and Land Scotland, regarding fire restrictions, especially during dry periods.
- Tinder Bundle: Gather a good handful of the finest, driest material you can find. This is what will catch your initial spark or flame. Think birch bark shavings, fine feather sticks, dried grass (if genuinely dry!), inner bark fibres, or even cotton wool with a bit of Vaseline (a reliable modern trick). You need much more than you think – enough to fill a bird’s nest.
- Kindling: Next, gather progressively larger pieces of dry wood. Start with pencil-lead thin twigs, then pencil-thick, then thumb-thick. This is your transitional fuel. Again, you need a good pile of it. Dead, snapped-off branches that are still attached to a tree are often your best bet for dry kindling in wet weather.
- Catching the Spark/Flame:
- Ferro Rod: A reliable choice. Scrape off some fine shavings from your ferro rod onto your tinder, then strike it firmly to create a shower of sparks. Aim for the heart of your tinder bundle.
- Waterproof Matches/Lighter: Simple and effective. Protect them from the wind, light your tinder, and be ready to nurture that tiny flame.
- Nurturing the Flame: Once your tinder catches, gently blow on it to provide oxygen. Don’t blast it! Slowly add your thinnest kindling, building it up into a small tepee or log cabin shape. The flame needs to “climb” the kindling.
- Building to Logs: Once your kindling is burning well, start adding larger pieces of wood. Again, don’t smother it. Gradually increase the size of the wood until you have a self-sustaining fire. Keep feeding it steadily.
Common Beginner Mistakes:
- Not enough tinder/kindling: This is the absolute classic. You always need more than you think!
- Using damp wood: Even slightly damp wood will smoke and struggle to burn.
- Building too big too soon: A small, hot fire is easier to manage than a sprawling, inefficient one.
- Choosing a bad spot: Ignoring safety or legal considerations can lead to serious problems.
One reliable helper for damp UK fire-lighting is a small amount of cotton wool with Vaseline. It is not traditional, but it gives you enough burn time to get natural tinder and kindling going while you are still learning.
On a particularly drizzly Welsh hillside, with prepared tinder a bit damp and options running low, a small, dry birch branch that snapped off a tree but is still hanging can save the day. Carefully peeling off the thinnest, papery layers of birch bark — barely an inch long each — takes patience, but eventually you can build a tiny, fluffy pile. With a ferro rod and persistence, that tiny shaving can catch. It feels like winning the lottery. The truth is that meticulous preparation and perseverance are your best friends when it comes to fire lighting in the UK. If you’re keen to really get stuck in, you can find a more in-depth guide to UK firecraft skills here.
Skill 2: Knife Skills – Your Best Friend in the Woods
Your bushcraft knife is probably the most versatile and important tool you’ll carry into the woods. A fixed-blade, full-tang knife is the most versatile and reliable tool for UK bushcraft beginners, but safe handling is non-negotiable. It’s not just for chopping; it’s for carving, preparing tinder, making feather sticks, processing food, and so much more. But with great utility comes great responsibility – knife safety is vital. Learning the hard way about keeping your thumb clear when making feather sticks is a common early mistake. A small nick is a quick reminder of the importance of focus.
Safety First: The Golden Rules
- Always cut away from your body: This seems obvious, but when you’re tired or distracted, it’s easy to forget.
- Maintain a safe working distance: Keep your fingers, knees, and anything you don’t want to cut well clear of the blade’s path.
- Control your cuts: Don’t just hack away. Use controlled, deliberate movements.
- Sharp is safe: A sharp knife requires less force, meaning less chance of slippage. A dull knife is a dangerous knife.
- Sheath it when not in use: Never leave a naked blade lying around. Always put it back in its sheath immediately after use.
- Know your cutting zone: Imagine a sphere around your body – that’s your safe working area. No one else should be in it when you’re using your knife.
Choosing Your First Knife
When you’re starting out, don’t get bogged down in expensive, fancy blades. What you need is something reliable, durable, and comfortable. Look for:
- Fixed Blade: No moving parts to break or fail. This means it’s inherently stronger and less likely to let you down when you really need it.
- Full Tang: This is crucial. It means the blade metal extends all the way through the handle, making it incredibly strong and virtually unbreakable even under stress like batoning. You wouldn’t want a flimsy handle snapping off in the middle of a task, would you?
- Blade Length: Around 4-5 inches (10-12.5 cm) is a good all-rounder – big enough for most tasks, but not so big it’s unwieldy or intimidating. For UK law, remember that carrying a knife with a blade over 3 inches in a public place without good reason is illegal, so always be mindful of where and when you’re carrying your bushcraft knife.
- Comfortable Handle: You’ll be using this for a while, so make sure it fits your hand well. A good grip means better control and less fatigue.
- Carbon Steel: Often easier to sharpen and holds an edge well, though it requires more maintenance (oiling) to prevent rust than stainless steel. Stainless steel is more forgiving if you’re a bit forgetful about maintenance, but carbon steel generally gets a keener edge.
Brands like Mora (Swedish, but widely available and excellent value in the UK) are fantastic for beginners. You can find a more detailed guide on beginner knife carving skills here. Your knife is your primary tool, but as you progress, you’ll also want to learn safe and effective axe skills for processing larger wood.
Basic Cuts: Getting Started
Once you’ve got your knife and you’re thinking safety, it’s time to learn some fundamental cuts. Practice these slowly and deliberately.
- The Push Cut: This is your primary carving stroke. Hold the wood firmly, place the blade on the material, and push with controlled force using your thumb on the spine of the blade for precision, or by pushing the material into the blade. Great for making feather sticks or shaping wood.
- The Pull Cut (Draw Stroke): Using the full length of the blade, draw the knife towards you (again, away from your body!). This is good for slicing and removing larger amounts of material.
- Batoning: This is where you use a piece of wood (a “baton”) to strike the spine of your knife, driving the blade through larger pieces of wood. It’s useful for splitting logs for kindling, especially if you don’t have an axe or saw. WARNING: This puts a lot of stress on your knife. Only do this with a full-tang fixed blade, and always wear gloves. Never baton through knots, and always aim to strike the baton, not your hand!
- Carving (e.g., for feather sticks or tent pegs):
- Feather Sticks: Hold the wood (often a dry stick) and make shallow, overlapping cuts, peeling back thin, continuous curls of wood without detaching them. These curls provide a large surface area for ignition.
- Tent Pegs: Select a straight branch about thumb-thick. Use push cuts to sharpen one end to a point. Then, about 6-8 inches up, carve a notch or “hook” that a guy line can sit in securely.
Maintenance: Keep it Sharp, Keep it Clean
After every use, clean your knife. Wipe the blade clean of sap, dirt, or food residue. If it’s carbon steel, a light coating of oil (food-grade if you use it for food prep) will prevent rust. Sharpening is a skill in itself, but for beginners, a simple ceramic sharpening rod or a small sharpening stone is a good start. Just a few strokes at the correct angle can bring back a decent edge. A sharp knife truly makes all the difference – it’s safer and far more enjoyable to use.
We always recommend carrying a small sharpening stone, even on short trips. A few quick passes at the correct angle can bring a dull edge back to life and make a big difference to both safety and efficiency.
Skill 3: Shelter Building – Staying Dry and Comfortable
When you’re out in the British countryside, a good shelter isn’t just a luxury; it’s a necessity, especially with our wonderfully unpredictable weather. The purpose of a shelter is simple: to protect you from wind, rain, and cold, keeping you dry and comfortable. Effective UK bushcraft shelters prioritise dryness and insulation, often using a simple lean-to design augmented with abundant natural materials like bracken and leaves. There’s nothing quite like the feeling of being snug and dry in a shelter you’ve built yourself while the rain drums down outside. Many beginners remember one particular night in the Lake District, caught in an unexpected downpour. A quickly thrown-together lean-to from earlier in the day, mostly for practice, can become a surprisingly cosy refuge, proving just how vital even a simple structure can be.
UK Considerations: Choose Your Site Wisely
- Avoid Water Run-off: Don’t build in a hollow or at the bottom of a slope where water will naturally collect. Look for slightly elevated ground. A small ditch (a “trench”) around your shelter can also help divert water if you’re building a more permanent-feeling structure, but always consider the “leave no trace” principle.
- Beware of Deadfall: Always look up! Make sure there are no “widowmakers” – dead branches or entire trees – that could fall on your shelter. This is a non-negotiable safety rule that’s often overlooked in the excitement of building.
- Wind Direction: Position your shelter to block the prevailing wind, using natural features like thickets or large boulders. In the UK, our winds often come from the west or southwest, so orienting your open-sided shelter (like a lean-to) with its back to that direction is usually a good bet.
- Available Materials: Our woodlands are abundant with suitable materials. Look for sturdy fallen branches for your frame, and plenty of leaves, bracken, moss, or even pine needles for insulation and waterproofing. Be mindful of not stripping an area bare; gather sparingly and widely.
Simple Designs for Beginners
You don’t need to be an architect to build a decent shelter. Two simple designs are excellent starting points:
The Lean-to: This is probably the easiest natural shelter to construct.
- Construction: Find two sturdy trees (or use stakes) about 2-3 metres apart. Lay a strong, straight branch (your “ridgepole”) between them, about waist-to-chest height.
- Rafters: Lean smaller branches (rafters) from the ridgepole down to the ground at an angle of about 45 degrees. Pack these tightly together.
- Roofing: This is where the magic happens for waterproofing and insulation. Start at the bottom and work your way up, layering thick bundles of bracken, leaves, or pine needles over the rafters like shingles. Each layer should overlap the one below it, shedding water off. Aim for a thick layer – at least 6-12 inches (15-30 cm) of compacted material.
- Sides: You can build up side walls with more branches and insulation to create a more enclosed space, especially against the wind.
- Bedding: Inside, create a thick bed of dry leaves or bracken. This insulates you from the cold ground – it’s often more important than the roof for staying warm!
The A-Frame: A more enclosed option, providing better protection from multiple directions.
- Construction: Similar to a lean-to, but you’ll need two ridgepoles forming an “A” shape, or one ridgepole supported by two uprights, with rafters leaning down on both sides, meeting at the ground.
- Roofing/Insulation: Again, layer natural materials thickly on both sides. This creates a fully enclosed sleeping space, which can be very cosy.
Materials: What to Look For
- Frame: Sturdy fallen branches, often found under conifers or deciduous trees. Hazel and ash branches are particularly strong and straight if you can find them.
- Insulation/Waterproofing: Bracken (abundant in many UK areas, especially in late summer/autumn when it’s dry and brown), large deciduous leaves (oak, beech – gather in autumn), pine needles, moss (can be used as a top layer for extra waterproofing, but can be heavy when wet). For a truly waterproof layer, a simple tarp is hard to beat, especially for beginners.
Common Mistakes:
- Building too close to hazards: Always check for deadfall!
- Not insulating enough: The ground sucks away your warmth. A thick bed is crucial. A good rule of thumb is at least 6-12 inches (15-30 cm) of compacted dry material between you and the ground.
- Poor waterproofing: Gaps in your roofing layers will let water in. Layer, layer, layer!
- Poor ventilation: In a completely sealed shelter, condensation can build up, making everything damp. A small opening for airflow is often a good idea, even if it’s just a small gap at the top.
- Forgetting Leave No Trace: When you leave, dismantle your shelter and spread the materials around so they can naturally decompose. Don’t leave a permanent structure.
Do not underestimate the cold from the ground. A thick, dry bed of leaves or bracken is often more important for warmth than the roof itself, so pile it high and compress it properly.
Building a shelter is incredibly rewarding. It teaches you to observe your environment, problem-solve, and appreciate the simple comfort of being protected from the elements. For more detailed instructions, check out our guide on basic UK shelter building techniques.
Skill 4: Basic Navigation – Finding Your Way
Knowing where you are and how to get where you’re going is fundamental to safe and enjoyable bushcraft. Basic navigation skills are crucial for avoiding getting lost, enhancing your exploration, and giving you the confidence to venture further into our beautiful British landscapes. While technology is useful, fundamental map and compass skills are crucial for reliable navigation in UK woodlands, where visibility can be limited. Don’t get me wrong, a phone with GPS is brilliant as a backup, but batteries die, signals drop, and screens crack. Relying solely on it is a recipe for trouble. On Dartmoor, when thick fog rolls in unexpectedly and your phone is almost dead, having taken a simple compass bearing to a known track earlier can save a lot of faff and worry.
Natural Navigation: Reading the Landscape
Before we dive into maps and compasses, it’s worth understanding some natural navigation cues. These are less precise but can give you a general sense of direction:
- The Sun: In the Northern Hemisphere, the sun rises in the east and sets in the west. At midday (around 1 PM in summer due to BST), it will be due south. This gives you a good general east-west line. This is a very basic but often overlooked indicator.
- Moss: While often cited as growing on the north side of trees, this is highly unreliable in the UK due to our prevailing westerly winds and varied microclimates. Don’t trust it! It’s a common myth that can easily lead you astray.
- Prevailing Winds: In the UK, our prevailing winds are generally from the southwest. This can sometimes shape trees or snowdrifts, giving you a very general directional clue, but again, it’s not foolproof. It’s more of a subtle hint than a reliable guide.
- Water Flow: Rivers and streams generally flow downhill. If you know the general topography of an area, following a watercourse can sometimes lead you to a known feature or habitation. Just be aware that following a river can be incredibly slow and difficult terrain.
Map & Compass Basics: Your Reliable Duo
This is where true navigational competence comes in. You need a good quality, waterproof map of the area (Ordnance Survey maps are the gold standard in the UK) and a baseplate compass.
Identifying Key Map Features:
- Contour Lines: These show elevation. Lines close together mean steep ground; lines far apart mean gentle slopes. Understanding these is vital for predicting how hard a walk will be or finding good viewpoints.
- Symbols: Learn the common OS map symbols for footpaths, bridleways, buildings, water features, forests, and other landmarks. They’re like a secret language that opens up the map to you.
- Scale: Understand the map’s scale (e.g., 1:25,000 means 1cm on the map is 250m on the ground). This helps you judge distances and plan timings accurately.
Orienting the Map: This is the first, most important step.
- Place your map flat.
- Place your compass on the map.
- Rotate the map and compass together until the red (north) end of the compass needle aligns with the north lines (grid lines) on your map.
- Now your map is oriented to the real world – north on the map is north in reality. All the features on the map should correspond to what you see around you.
Taking a Bearing (Simple Explanation):
- From Map to Ground: If you want to walk to a feature you see on the map, place the edge of your compass from your current position to your destination on the map. Rotate the compass housing until the orienting lines (the parallel lines inside the compass housing) are aligned with the map’s north lines. Read the bearing from the index line. Now, hold the compass flat, turn your body until the red end of the needle is inside the orienting arrow, and the direction of travel arrow points to your destination.
- From Ground to Map: If you see a feature in the distance and want to locate it on your map, point the direction of travel arrow at the feature. Rotate the compass housing until the red end of the needle is inside the orienting arrow. Read the bearing. Then, on your map, place the compass edge on your current position, rotate the entire compass until the orienting lines align with the map’s north lines, and draw a line along the compass edge – your feature should be on that line.
UK Specifics:
- Visibility Issues: Dense woodland, fog, or heavy rain can drastically reduce visibility. This is where accurate map and compass skills are vital, as you can’t rely on visual landmarks.
- Reliance on Trails and Landmarks: In many UK woodlands, well-defined trails and distinct landmarks (streams, stone walls, large trees) are your best friends. Use them to confirm your position on the map.
- Keep Your Map Dry: A waterproof map case is essential in the UK. Paper maps ruined in a sudden downpour are a common lesson, so a waterproof case is essential.
Do not stop at learning map and compass indoors. Start in a familiar park or local woodland, orient your map, identify landmarks, and take bearings to known points. Low-stakes practice is what makes the skill dependable later.
Our advice is to start with short, familiar walks in local woods. Practice orienting your map, identifying landmarks, and taking simple bearings. Never rely solely on your phone’s GPS; it’s a fantastic tool, but it’s not a replacement for knowing how to read a map and compass. A key part of navigation is also reading the landscape through tracking and sign.
Safety & Legality: The Non-Negotiables
Bushcraft is about connecting with nature, but it’s equally about doing so responsibly, safely, and legally. Responsible UK bushcraft is built on a foundation of respecting the Countryside Code, understanding land access rights, and prioritising personal and fire safety. Ignoring these can not only put you in danger but also damage the environment and give bushcraft a bad name.
The Countryside Code: Your Guiding Principles
This is your bible for responsible outdoor behaviour in England and Wales (Scotland has its own access code, which is generally more permissive). The key principles relevant to bushcraft are:
- Respect Everyone: Be considerate to other visitors and local communities.
- Protect the Environment: Leave no trace. Take all your litter home, and don’t damage plants or trees.
- Enjoy the Outdoors: Plan ahead and be prepared.
You can find the full Countryside Code on the GOV.UK website – it’s well worth a read: GOV.UK - The Countryside Code. It’s not just a set of rules; it’s a mindset for being a good steward of our shared outdoor spaces.
Permission: Know Before You Go
This is a big one. In England and Wales, most land is privately owned. You generally have a right to roam on designated ‘access land’ (often moorland or mountains), but for woodlands and other areas, you’ll almost always need landowner permission for activities beyond simply walking on public rights of way. This is especially true for:
- Fires: Open fires are often prohibited or require explicit permission. A carelessly discarded cigarette butt near a fire site can have devastating consequences – We have seen the aftermath of moorland fires, and it’s heartbreaking. Always be vigilant.
- Overnight Stays/Camping: Wild camping is generally only permitted with landowner permission, except in parts of Scotland and some Dartmoor areas.
- Cutting/Gathering Materials: You cannot cut branches from living trees or gather large amounts of natural materials without permission. Stick to deadfall and small quantities.
Always check local authority websites, such as those for National Parks or Forestry England, Natural Resources Wales, or Forestry and Land Scotland, for specific bylaws and restrictions in the areas you plan to visit. The Ramblers Association also offers excellent guidance on access rights. Many people aren’t familiar with the Countryside Code, which is why it’s important for us bushcrafters to set a good example and spread awareness.
Fire Safety: Beyond the Spark
- Site Selection: As mentioned, clear a wide area, away from flammable materials.
- Water Nearby: Always have a bucket of water or sand close by to extinguish your fire quickly if needed.
- Never Leave Unattended: A fire should never be left alone, even for a moment.
- Extinguish Thoroughly: Before you leave, ensure the fire is completely out. Douse it with water, stir the ashes, and check for any remaining embers with the back of your hand. If it’s warm, it’s not out.
Knife Safety: Reiterate the importance of safe handling, as discussed in the knife skills section. A momentary lapse in concentration can lead to a serious injury.
First Aid: Be Prepared
Carrying a basic first-aid kit and knowing how to use it is non-negotiable. Even a small cut or blister can become a big problem if not treated properly. Your kit should include:
- Plasters
- Antiseptic wipes
- Sterile dressings
- Medical tape
- Painkillers
- Blister treatment
- Gloves
Knowing basic first aid (e.g., how to treat cuts, sprains, and hypothermia) is just as important as having the kit itself. You can find more information on what to include in a bushcraft first-aid kit here: Bushcraft First Aid.
Tell Someone: This is a simple but vital rule. Always let someone know where you’re going, your planned route, and when you expect to be back. If something goes wrong, this information can be life-saving. A sensible approach is to send a simple WhatsApp message to a trusted friend or family member, including a map screenshot and your expected return time. It takes seconds and could make all the difference.
Before you head out, do a quick mental “what if” check. What if you get a cut, lose the route, or get soaked unexpectedly? That habit helps you pack better and respond more calmly if something does go wrong.
Related Reading
Beginner Knife Carving Skills for UK Bushcraft: Tools & Techniques Your knife is your most important tool. Dive deeper into the fundamental carving cuts that will unlock a world of creativity and practical skills.
Basic UK Shelter Building Techniques for Beginners: Natural & Tarp Shelters Staying dry and warm is paramount. This guide provides step-by-step instructions for constructing simple, effective shelters from natural materials or a tarp.
Your First Bushcraft Kit: What You Actually Need
When you’re just starting out, it’s easy to get overwhelmed by the sheer amount of bushcraft gear out there. Shiny new axes, custom-made knives, fancy tarps… it can quickly add up and leave you feeling like you need to spend a fortune. But trust me, you don’t. A first rucksack is often far too big and heavy, packed with things you never use. The lesson is to pack lighter and smarter. A beginner’s UK bushcraft kit should prioritise essential, versatile items like a fixed-blade knife, reliable fire starter, and basic navigation tools, rather than expensive specialised equipment.
The key is to focus on versatility and quality over quantity. You want gear that serves multiple purposes and is robust enough to handle the British outdoors.
Here’s a breakdown of what we consider essential for a beginner’s UK bushcraft kit:
- Fixed-Blade Knife: As discussed earlier, a good quality fixed-blade, full-tang knife (like a Mora Companion) is your most important tool. It’s versatile, reliable, and relatively inexpensive for its quality. You’ll use it constantly, so a decent one is worth the investment.
- Fire Starter: A ferro rod and striker are incredibly reliable, waterproof, and last for ages. Back it up with waterproof matches (in a waterproof container) or a reliable lighter. Having multiple ways to make fire is always a good idea – We have seen too many trips ruined by a single wet lighter.
- Small Saw or Folding Saw: While a knife is great, a small folding saw (like a Bahco Laplander) makes processing larger firewood much quicker and safer than batoning with a knife. It’s a real workhorse for UK wood sizes, especially for cutting dead branches for shelters or fires.
- Metal Water Bottle / Pot: A single-walled stainless steel water bottle can be used to boil water over a fire (without its lid, of course!), acting as both a water carrier and a cooking pot. This multi-use item saves space and weight.
- Basic First-Aid Kit: Absolutely essential, as discussed in the safety section. Don’t leave home without it!
- Headtorch: Even if you plan to be back before dark, a headtorch is a crucial safety item for navigating unexpected delays or just finding your way around camp in the evening. Don’t forget spare batteries! Trust me, trying to find your way in pitch black with just a phone light is no fun.
- Map & Compass: A good quality Ordnance Survey map of your area (laminated or in a waterproof case) and a reliable baseplate compass. Learn how to use them before you go! This is your primary navigation, your phone is secondary.
- Waterproof Jacket & Trousers: The UK weather is notorious. A decent set of waterproofs will keep you comfortable and prevent hypothermia. Look for something breathable. This is non-negotiable for comfort and safety.
- Sturdy Boots: Comfortable, waterproof, and supportive boots are vital for spending time on uneven, potentially muddy terrain. Blisters and wet feet can quickly ruin a good day out.
- Small Rucksack: Don’t go for a massive expedition pack. A 25-40 litre rucksack is usually plenty for a day trip or even an overnight stay once you learn to pack efficiently. According to outdoor retailer Cotswold Outdoor, a 25-35L pack is ideal for day hikes. This means you won’t be tempted to overpack.
- Tarp: A simple tarp (3x3 metres is a good size) offers versatile shelter. It’s lightweight, waterproof, and can be set up in many configurations to protect against rain or sun. It’s a brilliant backup shelter or primary roof for a lean-to.
What to Avoid (Initially):
- Overly Specialised Gear: Fancy axes, expensive custom knives, or complex trapping kits aren’t necessary for beginners. Master the basics first.
- Heavy Equipment: You’ll soon regret carrying unnecessary weight. Every gram counts!
- Anything You Don’t Know How to Use: Don’t buy a piece of kit just because it looks cool. If you don’t know its purpose or how to use it safely, leave it at home (or learn how to use it first!).
Budget-Friendly Tips:
You don’t need to break the bank. Places like Go Outdoors, Cotswold Outdoor, and even army surplus stores can be great for finding good value, reliable gear. Keep an eye out for sales, and don’t be afraid to buy second-hand for some items (like rucksacks or clothing) as long as they’re in good condition. Remember, quality over quantity will serve you far better in the long run.
When building your kit, think in terms of multi-use. A metal bottle that can boil water or a bandana that can serve as a bandage, pot holder, or signal aid earns its place more easily than single-purpose extras.
How to Get Started: Your First Steps
Right, you’ve got the theory, you’ve got a basic kit list – now what? The biggest hurdle for many beginners is just getting out there and taking that first practical step. Here’s how we’d suggest you approach your initial forays into UK bushcraft:
1. Plan Your First Outing (Small & Local)
Don’t aim for a week in the Highlands straight away! Pick a local park, a small woodland, or even your garden if that’s all you have access to. The goal is to practice a single skill, like fire lighting or knot tying, in a low-pressure environment. Check local bylaws for fire restrictions and landowner permissions. Keep it short, maybe just a couple of hours.
2. Focus on One Skill at a Time
Trying to master everything at once is a recipe for frustration. Choose one skill from this guide – maybe getting a small fire going, or practicing your knife cuts on some dead wood. Give it your full attention. Celebrate the small victories, like that first spark catching or a feather stick finally curling just right. That feeling of accomplishment is what keeps you going!
3. Learn from Others (Courses & Groups)
While this guide is a great start, there’s no substitute for hands-on learning from experienced instructors. Look for local bushcraft courses or groups in the UK. They can teach you safe practices, local knowledge, and help you avoid common beginner mistakes. It’s a brilliant way to accelerate your learning and meet like-minded people. Learning from others is invaluable over the years.
4. Review and Adapt Your Kit
After your first few outings, take some time to review your kit. What did you use? What didn’t you touch? What did you wish you had? This iterative process is how you refine your gear to suit your personal style and the specific conditions of the UK outdoors. You’ll quickly learn what’s truly essential for you.
Frequently Asked Questions
Do I need a licence to practice bushcraft in the UK?
Generally, no, you don’t need a specific bushcraft licence in the UK. However, and this is a big however, you absolutely must respect the Countryside Code, landowner permission rules, and local bylaws. This is especially important for things like lighting fires, wild camping, or gathering materials. Always check local regulations for the specific area you’re in, as rules can vary – What is okay in one county might be strictly prohibited in another, so always do your homework.
Is bushcraft dangerous for beginners?
It can be, yes, if you rush it or treat the tools casually. The safest way in is to start with the basics, keep the sessions small, and take fire, knives, and navigation seriously from the start. Telling someone where you are going remains one of the simplest and most useful habits you can build.
Where can I practice bushcraft in the UK?
You will often have legal scope for low-impact practice on public access land, rights of way, or designated camping areas, but the specific activity still matters. Always check local access rules and landowner permissions before you head out. Small, familiar places are often the best starting points anyway.
What’s the biggest mistake UK beginners make?
Usually it is trying to do too much too soon while underestimating how much damp weather changes everything. People buy too much gear, skip the basics, or neglect the legal and safety side. Patience and repetition solve far more than extra kit.
How often should I practice these skills?
As often as you can sustain without turning it into a chore. Short, regular sessions build confidence faster than occasional big trips. Even knot practice at home or a quick session on feather sticks in the garden adds up.
Taking the Next Step into the Wild
The useful next step is not to chase complexity, but to make the basics reliable. If you can light a fire in poor conditions, handle your knife safely, pitch a simple shelter, and stay oriented, you already have a strong foundation.
If you want a practical prompt for your first outings, download the Free Bushcraft Starter Checklist. And if you have any questions or just fancy a chat about bushcraft, don’t hesitate to Get in Touch – We’d love to hear from you.
Want to track your progress? Download the free Bushcraft Skills Tracker — tick off each skill as you learn it.